Capturing the perfect photo often requires more than just aiming and clicking. Sometimes, you need a little extra time to get into position or adjust the frame. That’s where the camera timer feature on your iPad comes in handy.
Whether you’re taking a group photo, a selfie, or experimenting with different compositions, knowing how to activate the camera timer can significantly improve your photography experience.
The camera timer allows you to set a delay before the photo is taken, giving you enough time to compose your shot and join the group if you’re in it. It eliminates the need for rushed poses or the hassle of finding someone else to take the picture for you.
Read: How To Enable ‘Siri’ Instead Of ‘Hey Siri’ On iPad
Activate Camera Timer On iPad
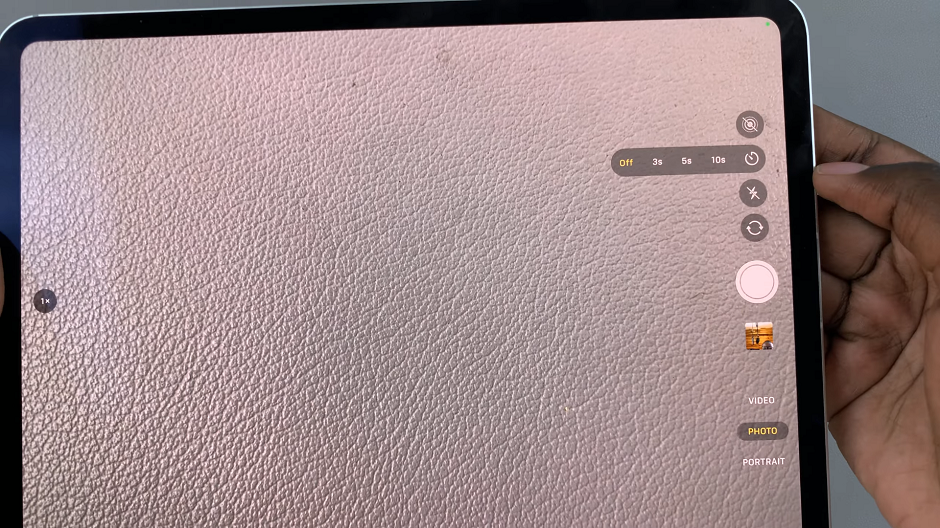
Start by launching the Camera app on your iPad. You can find it easily on your home screen
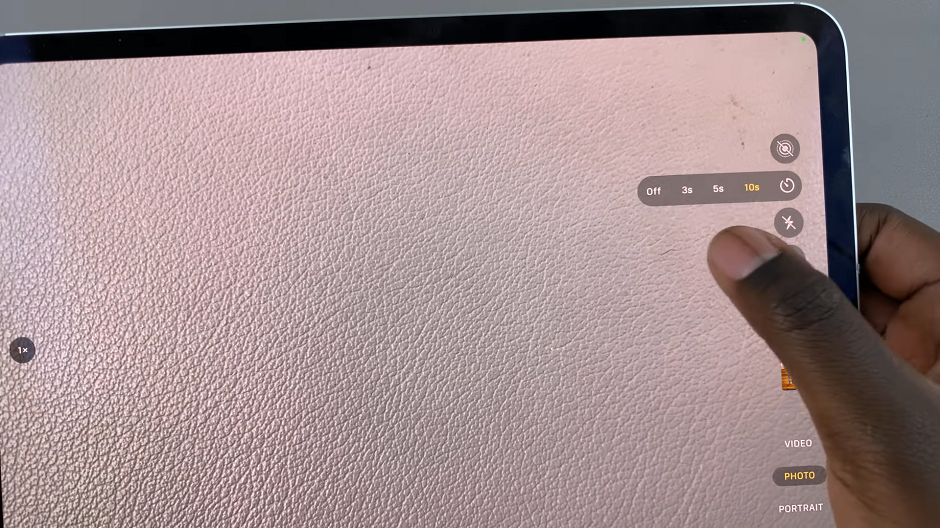
Look for the timer icon usually located near the shutter button. Tap on it to reveal the timer options. The timer duration determines the delay between pressing the capture button and the photo being taken. By default, the option is set to Off.
Select the delay that suits your needs. You’ll typically have options such as 3 seconds, 5 seconds and 10 seconds. A shorter delay like 3 seconds works well for quick selfies, while a longer delay such as 10 seconds allows you more time to set up group shots.
After setting the timer, compose your shot as usual. Make sure everyone is in position and that the framing looks good. Find a stable surface or attach your iPhone to a tripod to ensure a steady shot. Make sure the camera is facing towards the desired subject or scene.
Align your shot by adjusting the position and angle of your iPhone. You can use the grid lines on the camera screen to help with composition.
Once you’re ready, tap the shutter button. The timer will start counting down, and the photo will be captured after the selected delay. Use this time to position yourself perfectly within the frame.
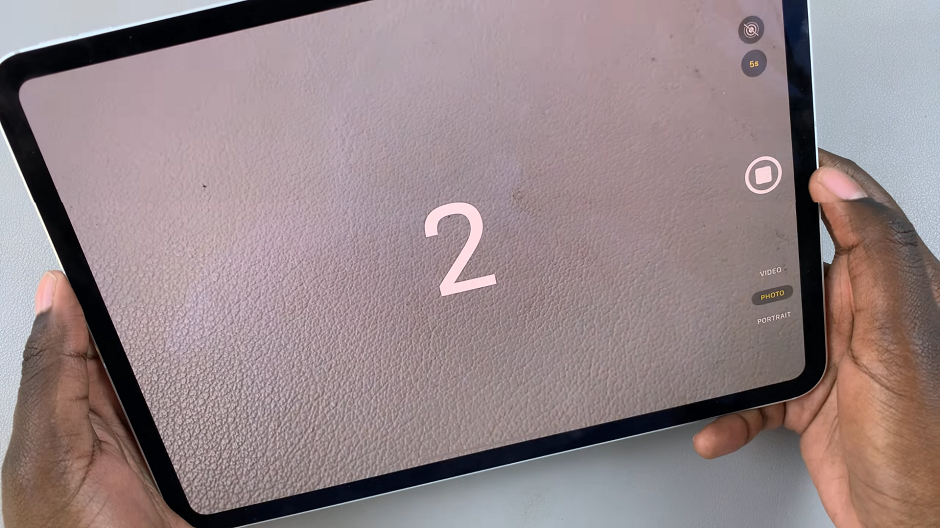
When the timer reaches zero, your iPhone will automatically take the photo, capturing the perfect moment with you included. You can always change the duration or turn the timer duration off should you choose to do that.
To stop the timer, before the timer elapses, you can always tap on the Shutter button once again.
Tips for Using the Camera Timer Effectively
Stable Surface or Tripod: To ensure a steady shot, place your iPad on a stable surface or use a tripod. This helps prevent camera shake, especially in low-light conditions.
Adjust Camera Settings: Depending on your environment, you may need to adjust exposure or focus settings manually to get the best results.
Experiment with Burst Mode: If you’re unsure about timing, consider using Burst mode alongside the timer. This captures multiple shots in quick succession, ensuring you have several options to choose from.
Review and Retake: After taking the photo, review it on your iPad. If needed, you can retake the shot until you’re satisfied with the result.
Learning how to activate the camera timer on your iPad can greatly enhance your photography skills and make capturing moments more enjoyable. Whether you’re a casual photographer or a seasoned pro, mastering this feature opens up new possibilities for creativity and precision in your photos. Take advantage of the timer next time you’re out shooting and discover how it can transform your photography experience.
Now that you know how to activate the camera timer, grab your iPad and start capturing those perfect moments with ease!