HEIC (High-Efficiency Image Format) is a modern image format used by iPhones to capture high-quality photos while reducing file size. However, compatibility issues may arise when sharing HEIC images with devices or platforms that don’t support this format.
Fortunately, converting HEIC to JPEG, a widely supported format, is a simple process that can be done directly on your iPhone.
In this article, we’ll guide you through the steps to convert HEIC to JPEG using the built-in tools on your iPhone.
Also watch: How To Create Desktop Shortcuts On Mac/MacBook
How To Convert HEIC To JPEG On iPhone
Firstly, open the “Photos” app on your iPhone. Next, locate and select the HEIC image you want to convert to JPEG.
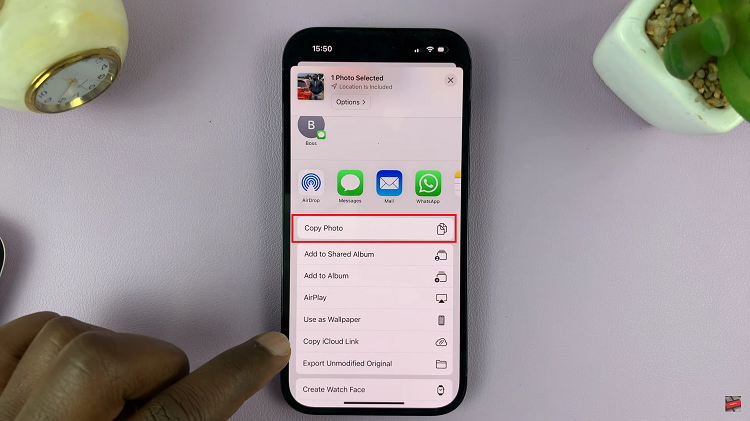
Then, tap on the “Share” button located at the bottom-left corner of the screen. From the share options that appear, tap on “Copy Photo.”

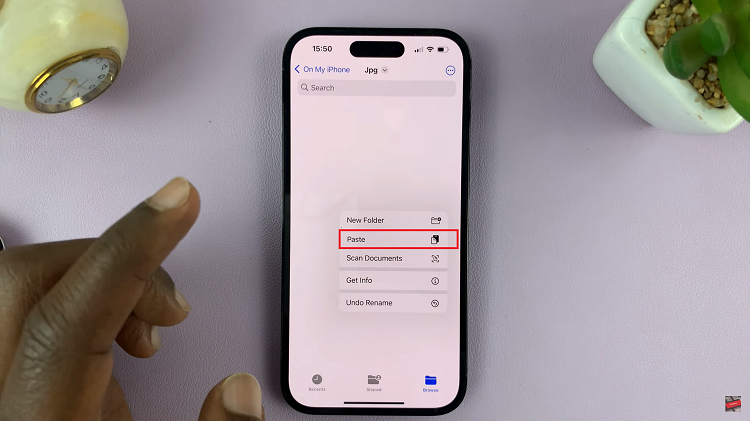
From here, go to the “Files” app on your iPhone. Once in the Files app, choose the location where you want to paste the photo. After selecting the location, simply long press on an empty space on the screen, then tap on “Paste” from the menu that appears.

Once the image is pasted to the desired location, it will be saved in JPEG format. And that’s how to convert the HEIC image to JPEG. So, next time you come across a HEIC image that needs conversion, confidently follow these steps and enjoy seamless compatibility with JPEG format.

