Windows 11, the latest operating system by Microsoft, has garnered much attention for its sleek design and improved functionality. However, like any new software release, it’s not uncommon to encounter a few hiccups and issues during usage.
One particular problem that some Windows 11 users have reported is the mysterious disappearance of the sleep option in the power settings. If you’re facing this frustrating situation, don’t worry.
In this article, you’ll learn how to fix the sleep option missing on Windows 11.
Watch: How To Change Mouse Pointer Speed In Windows 11
How To Fix Sleep Option Missing On Windows 11
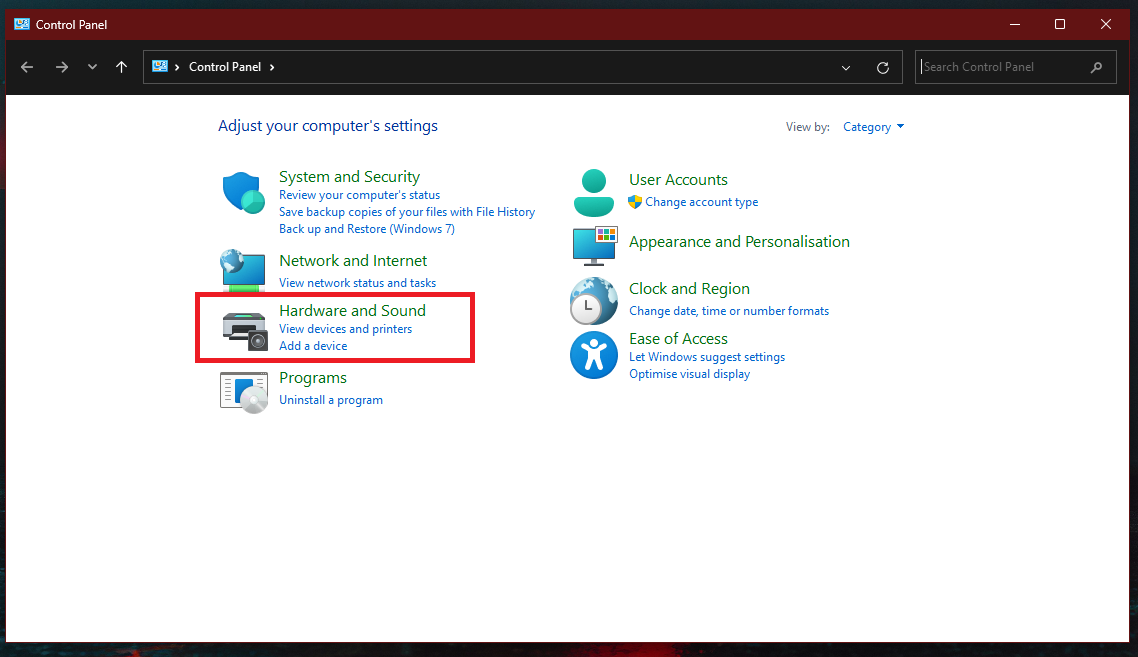
First and foremost, access the Control Panel by clicking on the Start button and typing “Control Panel” in the search bar. Once the Control Panel opens, navigate to the “Hardware and Sound” section.

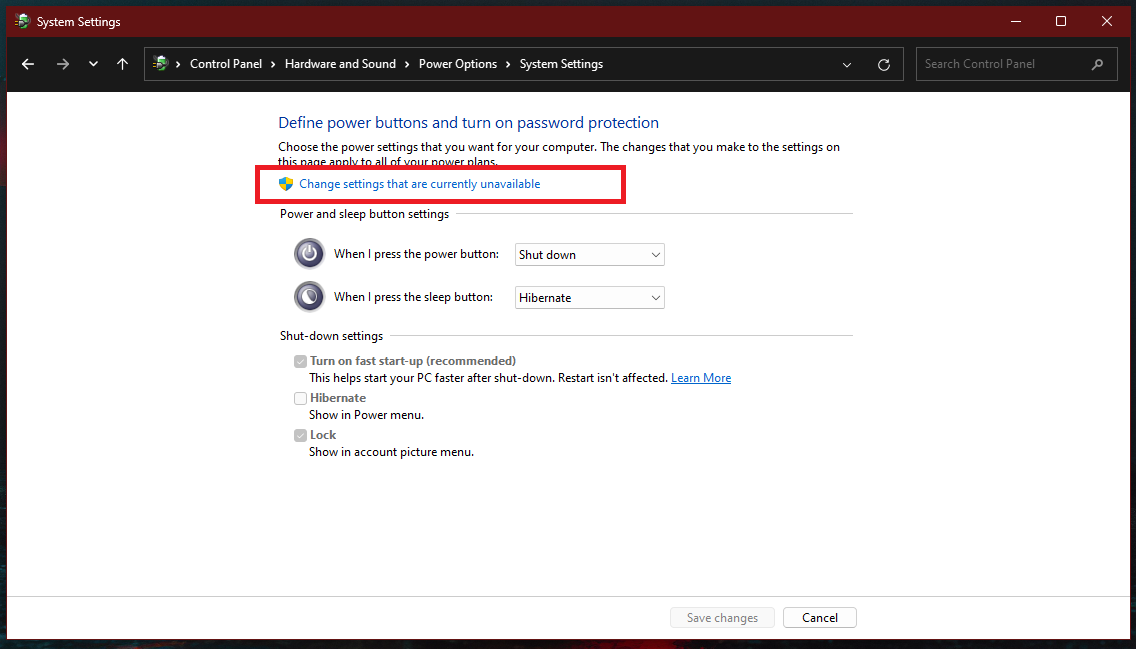
From here, click on “Power Options” then select “Choose what the power buttons do.” At this point, click on “Change settings that are currently unavailable” and when prompted, grant access.

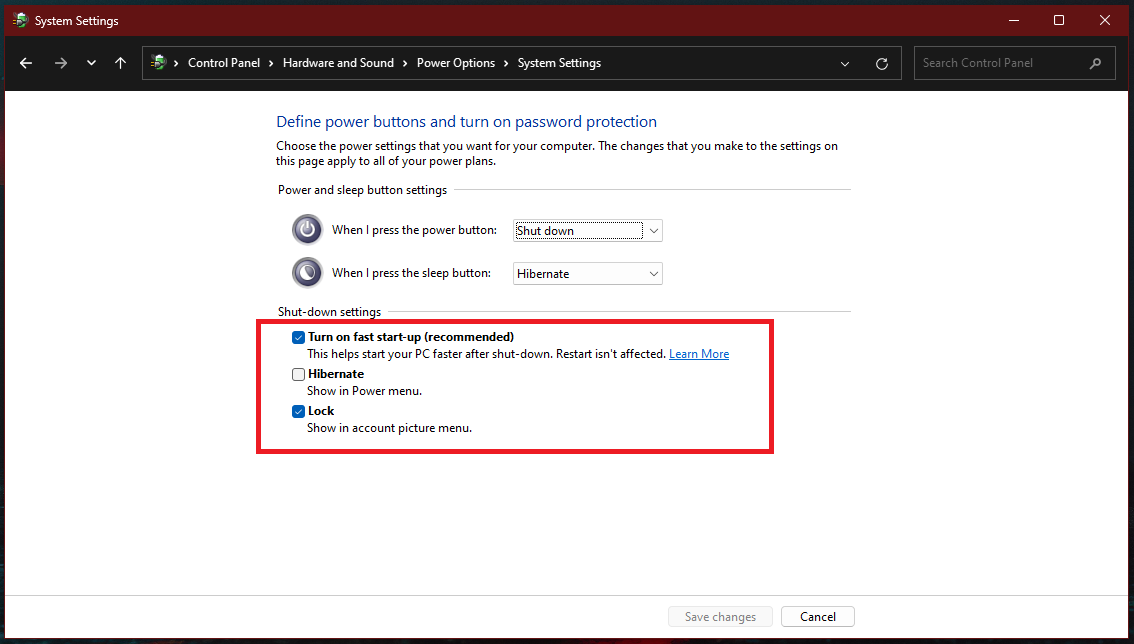
Now, check the box next to “Sleep” or “Hibernate” on some computers. Once you do this, click on “Save Changes” to confirm the settings.

Close all open windows, including the Control Panel, and restart your computer. After the restart, check the power options again through the Control Panel and see if the sleep option has reappeared.
Now you can easily put the computer to sleep mode whenever you desire.

