Scanning PDF documents has become an essential task in today’s digital age, as it allows us to easily store and share important paperwork on our smartphones.
If you’re an iPhone user, you’ll be pleased to know that the Notes app on your iPhone comes equipped with a built-in scanning feature that lets you capture and save documents as PDFs with remarkable ease.
In this article, we’ll walk you through the step-by-step process on how to scan a PDF document on your iPhone, so you can easily digitize and save important paperwork with just a few taps.
Also Read: How To See IP Address On iPhone
How To Scan PDF Document On iPhone
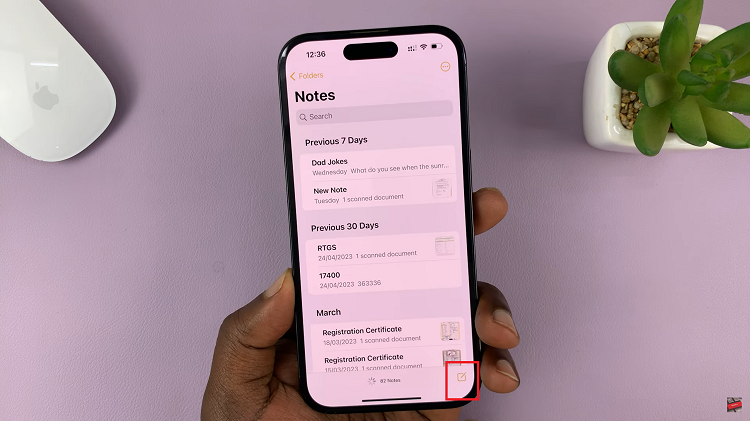
To begin, tap on the Notes app located on the home screen of your iPhone. To create a new note, tap on the “+” button at the bottom center of your screen.

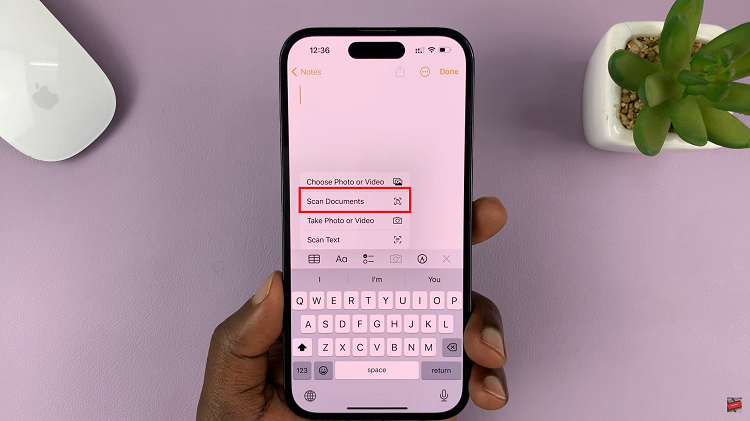
Within the newly created note, tap on the camera icon located above the keyboard. A menu will pop up, displaying several options. From the menu, select the “Scan Documents” option.

Now, carefully position your iPhone’s camera over the document you wish to scan. The app will automatically detect the document and capture the scan. Should your document have several pages. Just scan the next document. When your done, tap on “Save” at the bottom right of the screen.
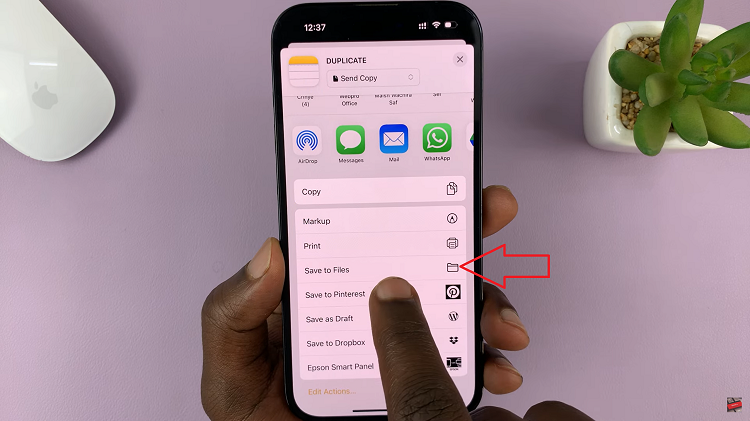
If you wish to save the scanned document to your iPhone, tap on the Share icon located at the top right corner. Scroll through the menu that appears and tap “Save to Files.”

Select where you want your new file to go, and then tap “Save.” The scanned document will now appear in your Files. To open it, simply go to Files and locate where you saved the document.
Watch: How To Edit & Export Vertical Videos In iMovie On iPhone

