Whether it’s a dazzling travel vlog, a snappy dance routine, or a heartwarming family moment, vertical videos offer an engaging and immersive viewing experience on mobile devices.
iMovie allows you to effortlessly create, customize and add creative touches like transitions and effects to your vertical videos
In this guide, we will walk you through the step-by-step process on how to edit and export vertical videos in iMovie on your iPhone.
Also Read: How To Scan PDF Document On iPhone
How To Edit & Export Vertical Videos In iMovie On iPhone
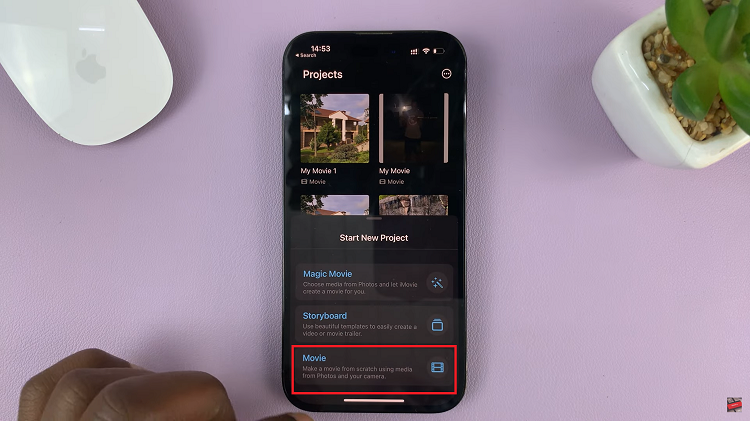
To get started, open iMovie on your iPhone, tap on “Create Project“. From the options presented, select “Movie” to start a new project.

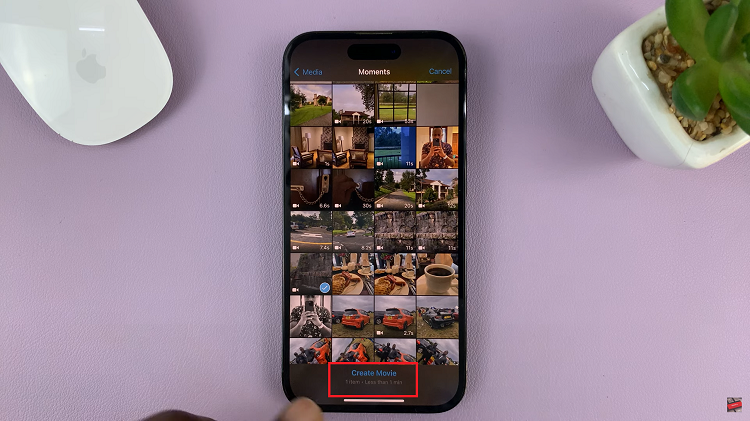
Browse through your videos and select one or multiple vertical videos then tap on “Create Movie” located at the bottom of the screen.

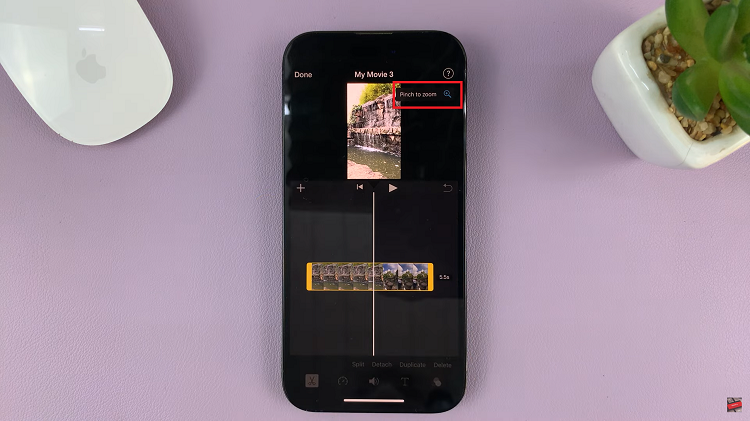
To ensure that your vertical video(s) displays correctly, tap on the video in the timeline. Look for the zoom icon, which resembles a magnifying glass. By pinching the video with your fingers, you can zoom in or out to adjust it.

Now that your vertical video is in place, it’s time to get creative. iMovie offers various editing tools, such as trimming, cutting, adding text, filters, and adding transitions between videos.
Once you’re satisfied with the edits, tap on the “Done” button. Now, look for the share icon and tap on it to access the export options.
Select the desired export quality based on your preferences and iMovie will process your video. Once it’s completed, it will be saved to your camera roll.
Watch: How To Edit Out (Remove) Unwanted Part Of A Video Clip On iPhone
