The mouse pointer is an essential element of the user interface in any operating system, as it helps us navigate and interact with our computers effectively. In Windows 11, Microsoft has introduced a new and sleek interface, but that doesn’t mean you have to stick with the default mouse pointer size.
Whether you prefer a larger pointer for improved visibility or a smaller one for a minimalist look, Windows 11 allows you to customize it according to your preferences.
In this article, we’ll walk you through the steps to change the mouse pointer size in Windows 11.
Watch: How To Turn OFF WhatsApp Notifications On Apple Watch
How To Change Mouse Pointer Size In Windows 11
To begin, you’ll need to access the Mouse Settings in Windows 11. Click on the “Start” icon on the taskbar and search for “Settings.”
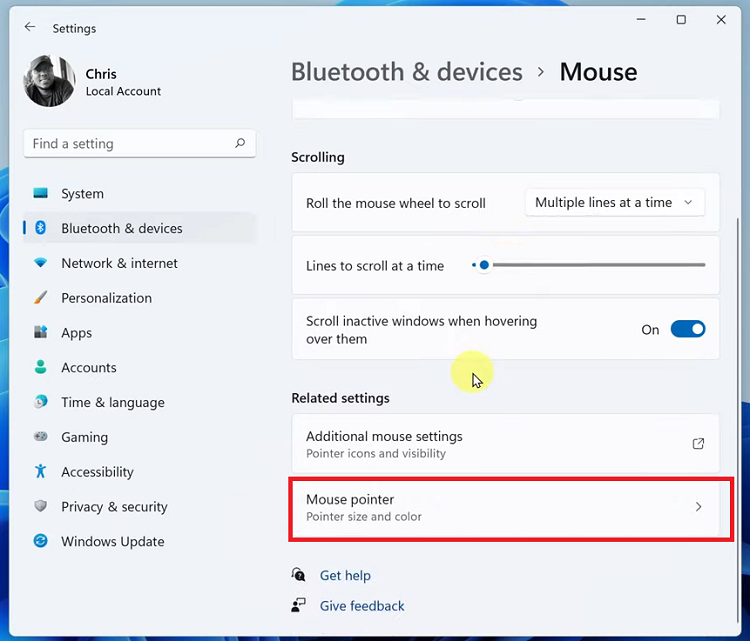
Next, click on “Bluetooth & Devices” on the left side menu on the settings page. From here, scroll down and select “Mouse” then find the “Mouse Pointer” option.

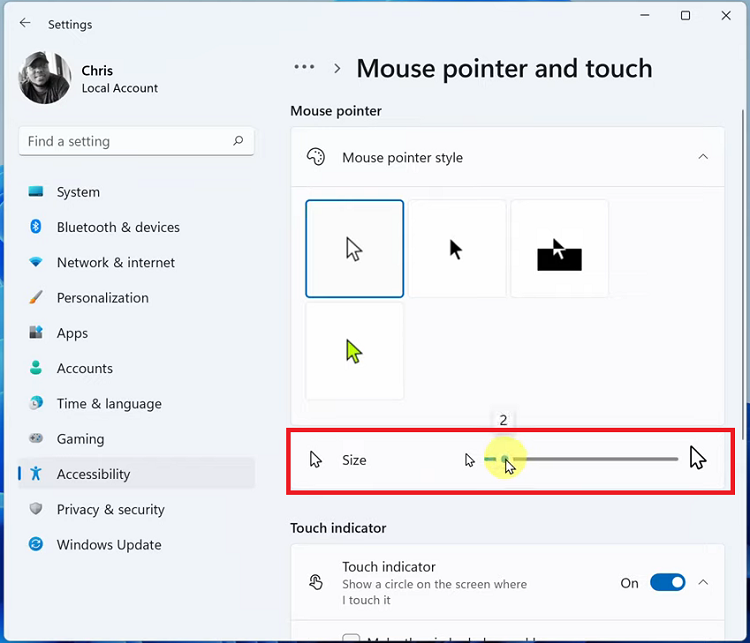
At this point, click on the option and you’ll see a couple of mouse settings. Scroll down until you find the “Size” slider. Now, use the size slider to either increase or reduce the size of your mouse pointer.

And that’s it. You’ve successfully adjusted the mouse pointer size on your Windows 11. Let us know in the comment section below if you have any questions or suggestions. If you found the article helpful, consider sharing it with someone who needs it.

