With the rise of automation features on iPhones, it’s now easier than ever to streamline various tasks and routines.
Disabling automation can be useful. For instance, if you set up a specific automation to run during a particular time, you might want to disable it after that time frame has passed. Also, if an automation is causing unexpected behavior or draining your battery, disabling it can help resolve those issues.
In this article, we’ll guide you through the step-by-step process on how to disable Automation on your iPhone.
Also Read: How To Send Photos & Videos In iMessage
How To Disable Automation On iPhone
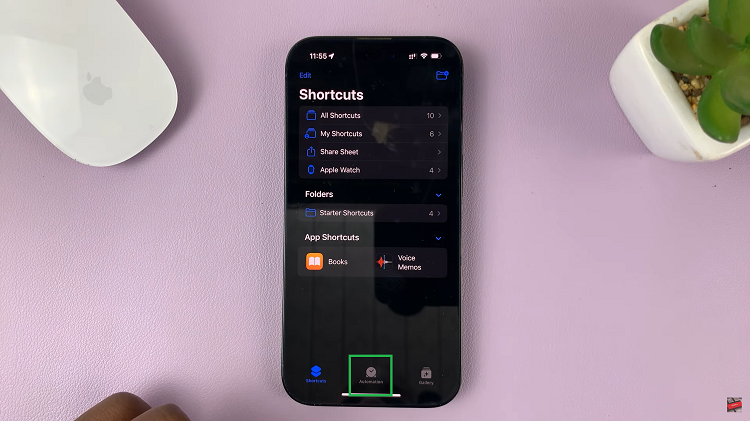
First, locate and open the “Shortcuts” app on your iPhone. Once inside the Shortcuts app, look at the bottom of the screen and tap on the “Automation” tab.

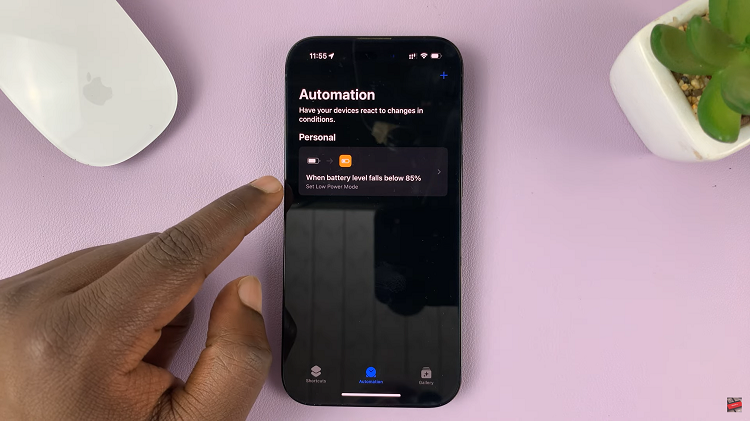
In the Automation tab, you’ll see a list of existing automations that you have set up.

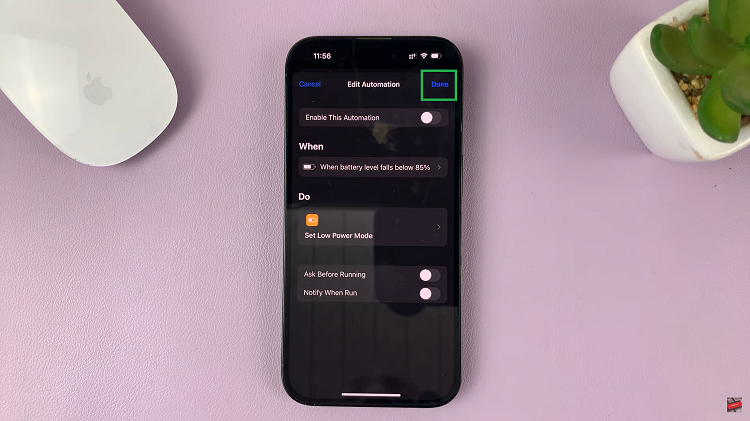
Scroll through the list and select the specific automation you want to disable. This will reveal the Automation details. In the top-right, you’ll notice a toggle switch.
To disable the automation, simply tap on it. You’ll see the color change from green to gray, indicating that the automation is now disabled. To save your changes, tap on “Done” in the top right corner.

If you have multiple automations that you want to disable, don’t worry just repeat the step above. It’s essential to remember that disabling automation does not delete them permanently. You can always re-enable them later if you decide to use them again or modify them to suit your needs.
Watch: How To Use ‘Listen To Page’ In Safari Browser On iPhone

