Roblox is a popular online gaming platform that allows users to create, play, and share games with a vast community of players. To ensure a smooth and enjoyable gaming experience, it’s essential to keep your Roblox client up to date.
By default, Roblox is set to update automatically. This ensures that you’re always on the latest version without any manual intervention. However, if you haven’t played Roblox in a while or have disabled automatic updates, you might need to check for updates manually.
In this article, we’ll guide you through the process of updating Roblox on your Windows PC.
Watch: How To See Your YouTube Subscriptions List
To Update Roblox On Windows PC
From Website
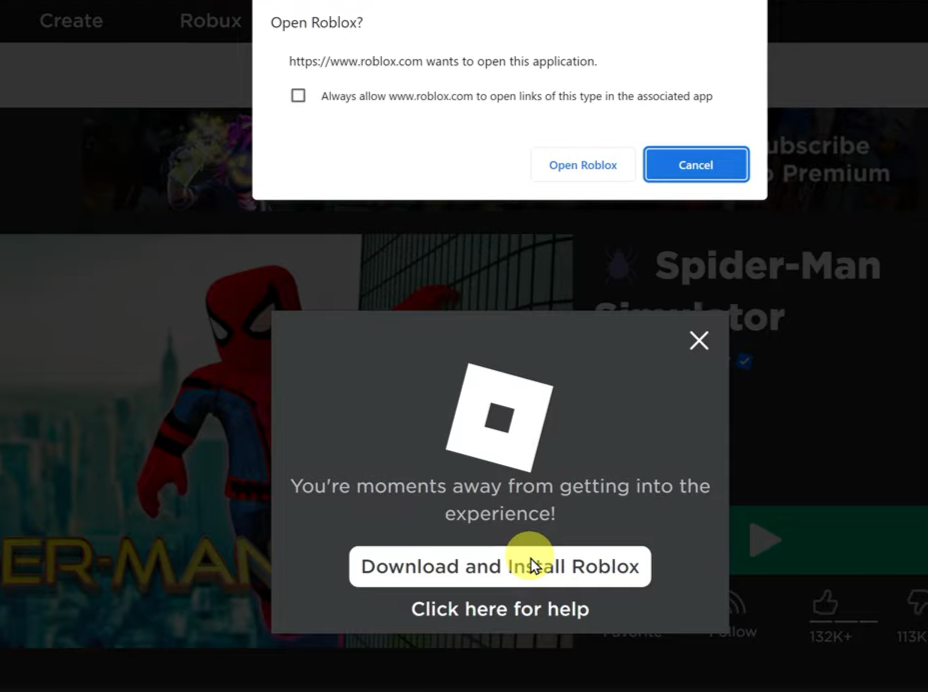
First, open your browser and go to the Roblox website. From here, log into your account and find the game you’d like to launch. You’ll get a notification to “Download & Install Roblox.” Once you click on this option, it will redirect you to the application and the upgrade will commence.

From Microsoft Store
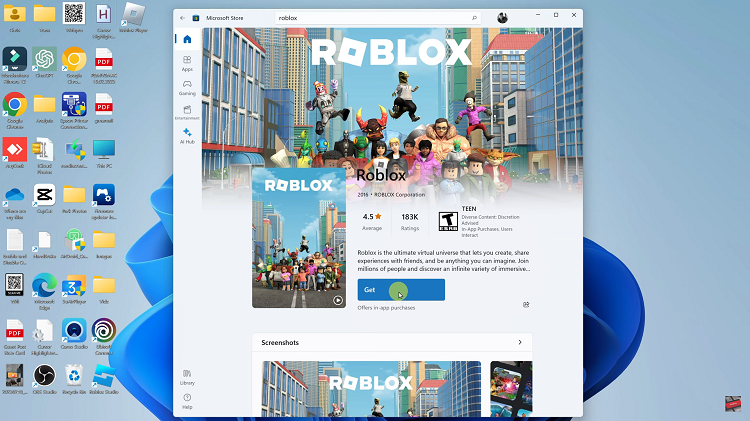
Firstly, open the Microsoft Store on your computer. You can find the Microsoft Store on the taskbar or you can simply press the Start button and search for Microsoft Store. Next, use the search bar to search for Roblox.
At this point, click on the official application. Now, if there’s an update, you’ll see the “Update” button. Click on it to update your Roblox application to the latest version.

And that’s how to update Roblox on your Windows PC. Let us know in the comment section below if you have any questions or suggestions. Feel free to share the article with someone who needs it.

