In an era defined by digital interconnectivity, the convergence of diverse tech ecosystems has become a prevalent theme.
For individuals invested in both the Windows and Apple, the prospect of harmonizing these seemingly different technology, can be intriguing yet daunting. However, the installation of iCloud on your Windows 11 PC doesn’t need to be an enigma shrouded in complexity.
In this article, we’ll take you through the step-by-step process on how to install iCloud on your Windows 11 PC. Before diving into the installation process, ensure that your Windows 11 PC is securely connected to the internet.
Also Read: How To Remove Audio From Video Clip In CapCut
How To Install iCloud On Windows 11 PC
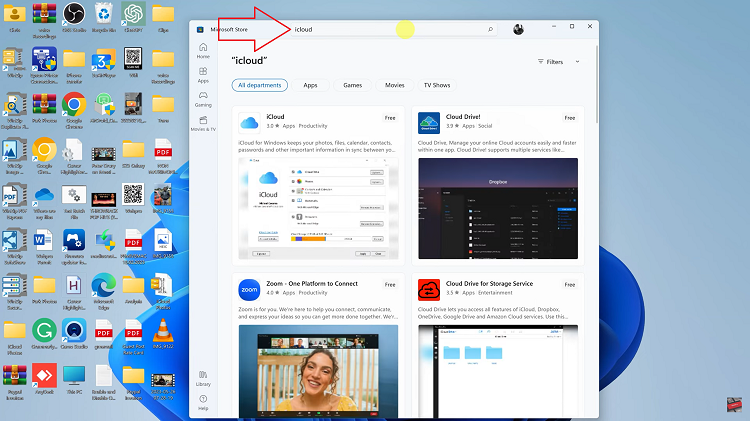
First, open the “Microsoft Store” that is displayed on your Windows 11 taskbar. Within the Microsoft Store, you’ll spot a search bar at the top right corner. Use this to locate “iCloud” and then press the Enter key.

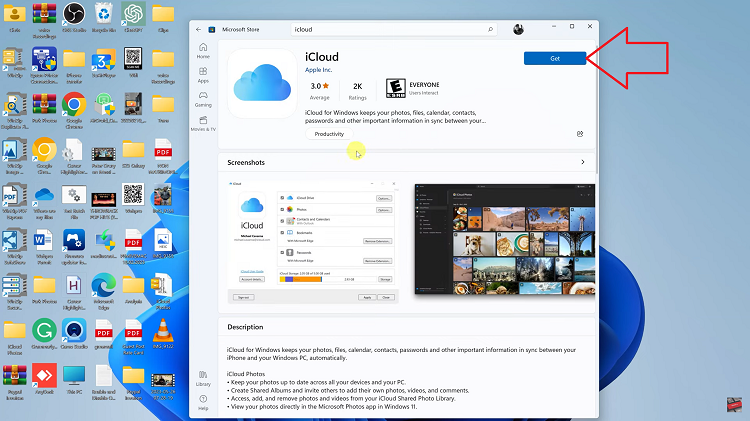
Among the search results, look for and select the official iCloud app. On the iCloud app page, your next move is to hit the “Get” button. You may need to wait a few moments for the installation process to complete.

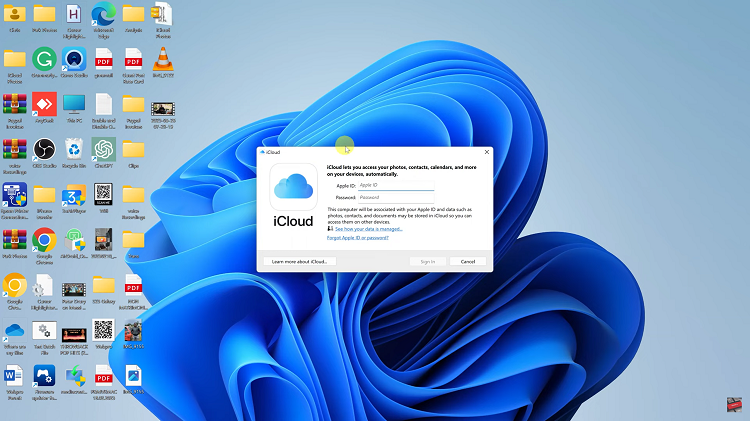
With the installation wrapped up, tap on the “Launch” button. To proceed, sign in with your Apple ID and password. If you don’t possess an Apple ID, you can create one directly from the iCloud app interface.

Now follow any on screen instruction. You can select the iCloud features you wish to enable on your Windows 11 PC. This could encompass options like iCloud Drive, Photos, Mail, Contacts, Calendar, and more.
Finally, click on the “Apply” button. This action saves your selected settings and starts the synchronization of your iCloud content with your Windows 11 PC.

