Streamlining your digital workspace can greatly enhance your efficiency and make everyday tasks a breeze. One such task involves adding the ‘Movies’ folder to the Finder sidebar on your iMac or MacBook.
By incorporating this folder into your Finder sidebar, you can seamlessly access your collection of movies without navigating through multiple directories.
In this article, we’ll take you through the step-by-step process on how to add the Movies folder to Finder on your iMac / MacBook that is running macOS Ventura.
Also Read: How To Download and Install CapCut On iMac / MacBook
How To Add ‘Movies’ Folder To Finder On iMac / MacBook
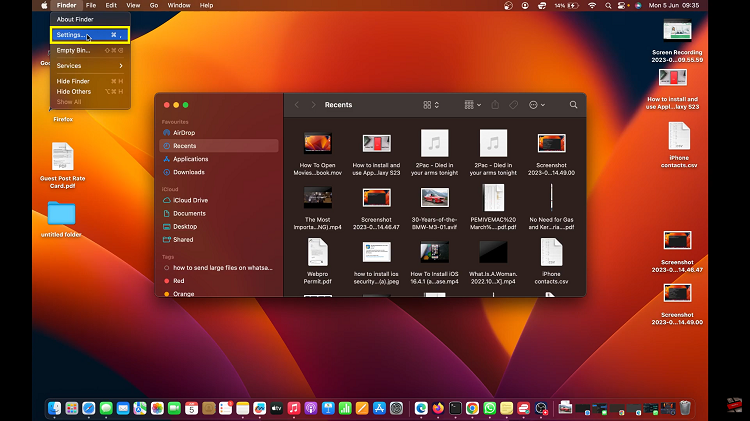
Begin by clicking on the Finder icon situated in your Dock. Once the Finder window is open, navigate to the top of your screen and click on “Finder” in the menu bar. A drop-down menu will appear. On this menu, you should select “Settings.”
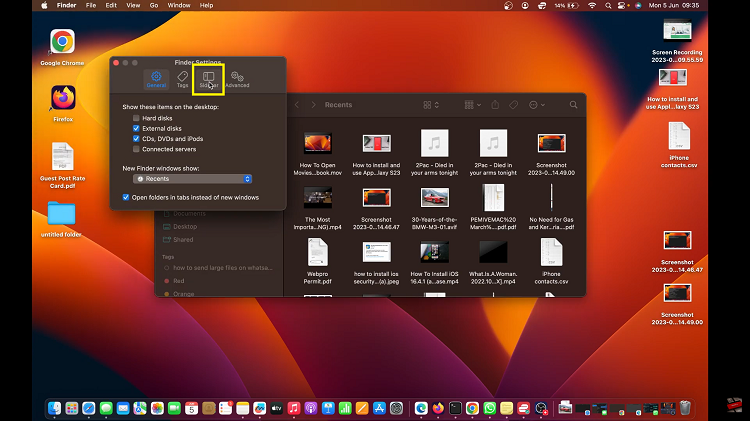
Upon selecting Settings, a Finder Settings window will pop up. In this window, locate and click on the “Sidebar” tab. Here, you’ll find an array of options to personalize the items visible in your Finder sidebar.
To integrate the ‘Movies‘ folder into your Finder sidebar, simply tick the checkbox next to “Movies.” The folder will be added instantly.
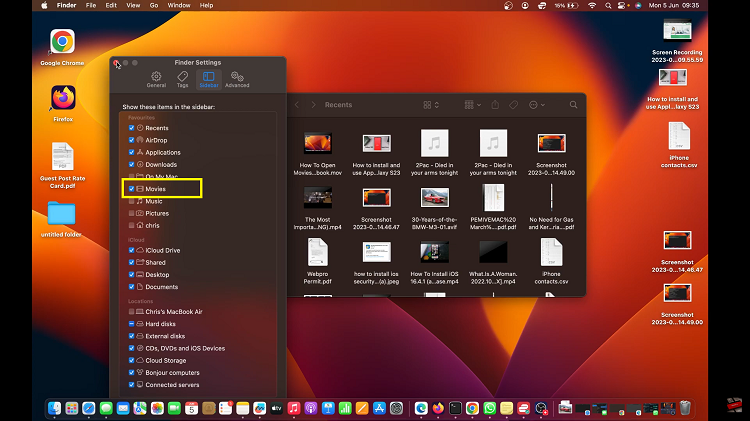
So anytime you’re within a Finder window, on the left panel. Look for the ‘Movies‘ folder under the “Favorites” section. Click on it and you can see the Movies that are on your device.
