In today’s digital age, recording your iPhone screen has become an essential tool for many purposes, from creating tutorials to sharing your gaming achievements.
With the release of the iPhone 15, Apple has made screen recording easier and more accessible than ever. Whether you want to capture a memorable moment in a game, create a tutorial, or troubleshoot an issue, screen recording can be incredibly useful.
In this article, we’ll be giving you a comprehensive guide on how to record the screen on your iPhone 115 and iPhone 15 Pro.
Also Read: How To Force Restart iPhone 15 & iPhone 15 Pro
How To Record Screen On iPhone 15 & iPhone 15 Pro
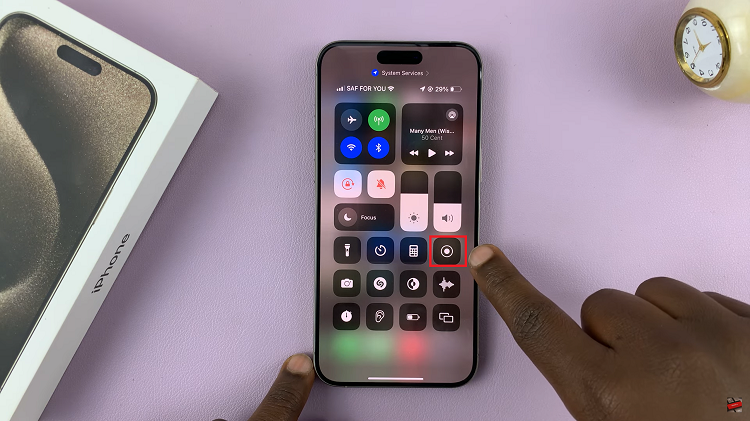
To begin screen recording on your iPhone 15, swipe down from the top right corner of the screen to access Control Centre. Look for the icon specifically designed for Screen Recording. It’s represented as a dot with a circle around it.

Tap on the Screen Recording icon to start the recording process. Once you do this, your iPhone 15 will begin capturing everything displayed on your screen.
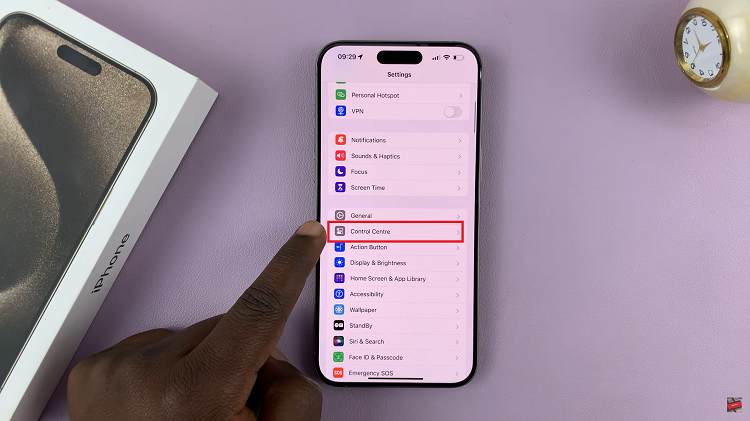
If you can’t locate the Screen Recording icon in the Control Centre, don’t worry. Apple provides an alternative method to add it. Go to your iPhone’s home screen and open the Settings app. It’s the one with the gear-shaped icon. Scroll down and tap on “Control Centre.”

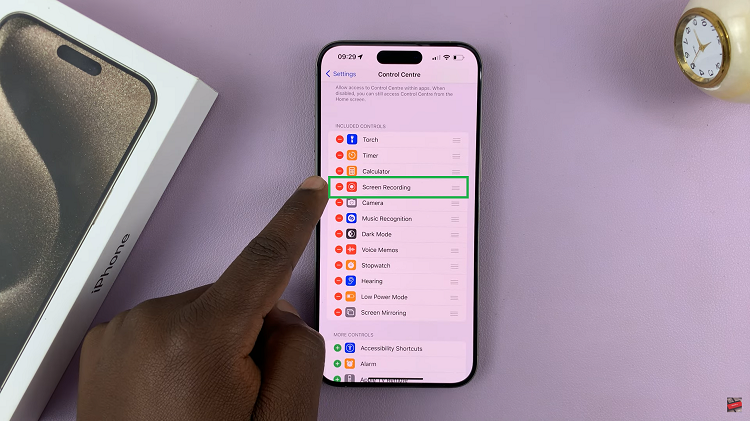
Within the Control Centre settings, you’ll see two sections: “Included Controls” and “More Controls.” These sections allow you to customize the Control Centre. Look for the “Screen Recording” option under “More Controls.” It should be represented by a plus button (+). Tap on the plus button next to “Screen Recording” to add it to the “Included Controls” section.

Now that you’ve added Screen Recording to your Control Centre, you can easily start screen recording by swiping down from the top right corner of your iPhone 15’s screen and tapping the Screen Recording icon.

