To fully unlock the potential of your Roku TV, you’ll need to connect it to a Wi-Fi network. This allows you to stream your favorite shows, movies, and music seamlessly.
With the increasing reliance on streaming services, ensuring a seamless and robust connection is essential for enjoying your favorite shows, movies, and music.
In this guide, we’ll navigate through the straightforward process of how to connect Roku TV to WiFi, empowering you to effortlessly access a plethora of streaming content from the comfort of your living room.
Watch: How To Transfer Files Using Nearby Share From Android To Windows
To Connect Roku TV To WiFi
First, turn on your Roku TV and ensure you are on the home screen. If you’re not already there, press the home button on your Roku remote to navigate to the main screen. Next, scroll up or down using the arrow buttons on your remote to highlight “Settings.” Press the OK button to enter the Settings menu.
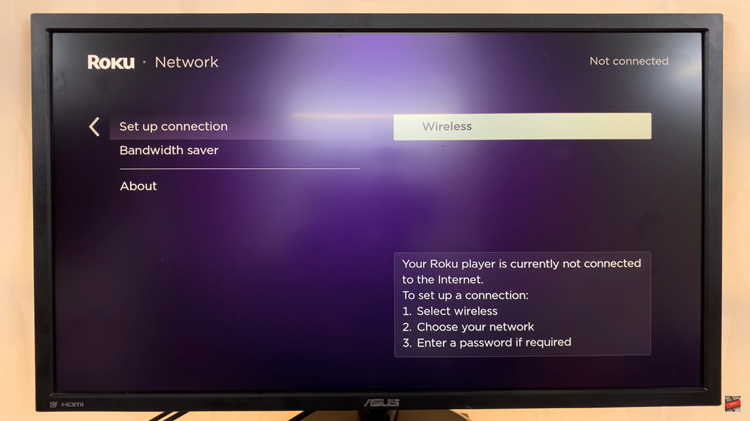
In the Settings menu, use the arrow buttons to navigate to “Network” and press OK. Scroll down to “Set Up Connection” and select it. At this point, choose “Wireless” from the list of options.

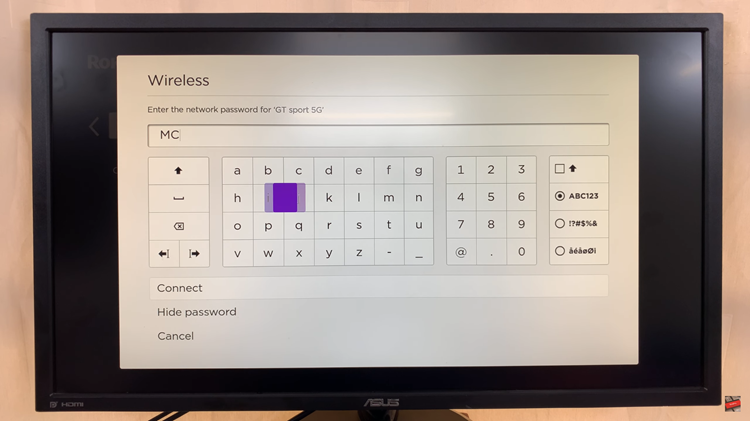
At this point, Roku TV will start scanning for available WiFi networks. Choose the WiFi network you’d like to connect to then type in the WiFi password when prompted. After entering the password, select “Connect” to initiate the connection process. Your Roku TV will attempt to connect to the selected Wi-Fi network.

Once the connection is successful, your Roku TV will display a confirmation message, and you will be returned to the Network menu.
By following these simple steps, you can ensure a seamless connection, allowing you to explore and enjoy the vast array of entertainment options available on the Roku platform.

