Uninstalling software is a common task for users looking to streamline their computing experience, and if you find yourself seeking ways to reclaim storage space or explore alternative file compression tools, removing WinZip from your Windows 11 system is a straightforward process.
Whether you’re transitioning to a different application or simply want to free up resources, this guide will walk you through the active steps to effectively uninstall WinZip.
By the end of this tutorial, you’ll have a clear understanding of how to navigate Windows 11 settings and control panels to bid farewell to WinZip and welcome a more tailored computing environment.
Watch: How To Uninstall Apps On Roku TV
To Uninstall WinZip On Windows 11
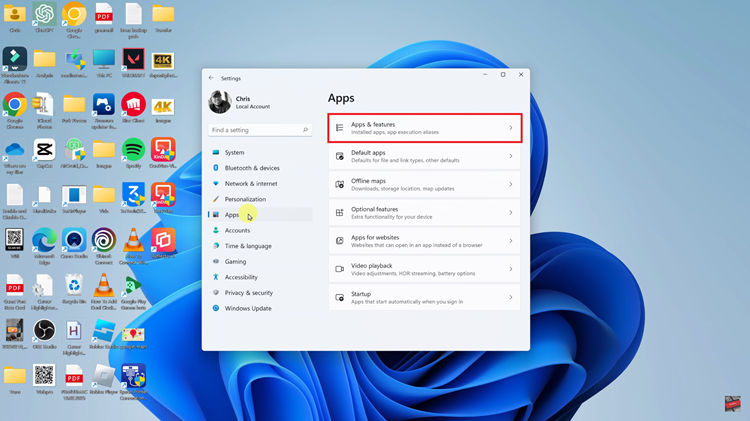
Begin by navigating to the “Settings” on your Windows 11 system. You can do this by clicking on the Start menu and selecting the gear-shaped icon. Next, in the Settings menu, click on “Apps” then click on “Apps & Features.” This will take you to the section where you can manage and uninstall installed applications.

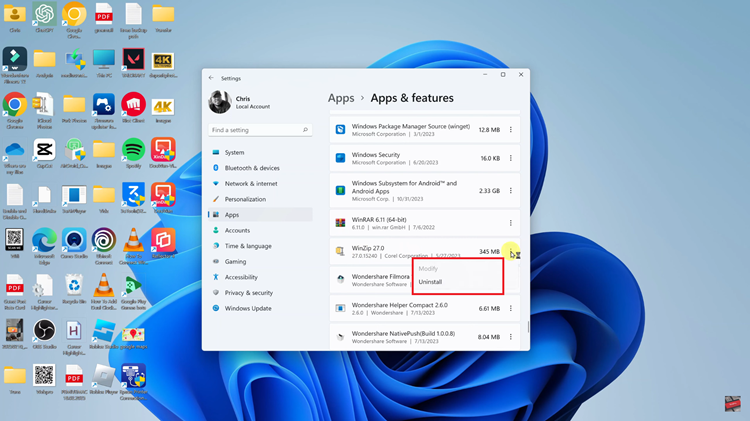
At this point, scroll through the list of installed apps until you find WinZip. Alternatively, you can use the search bar within the Apps section to quickly locate WinZip. Once you’ve found WinZip, click on the three dots to reveal additional options.
Look for the “Uninstall” option and click on it to initiate the uninstallation process. Windows 11 will likely prompt you to confirm the uninstallation. Confirm your decision by clicking “Uninstall” in the confirmation dialog box. After the uninstallation is complete, restart your computer if prompted.

By following these steps, you should be able to successfully uninstall WinZip from your Windows 11 system. Let us know in the comment section below if you have any questions or suggestions.
Read: How To Move From ‘No Command’ Screen On Google Pixel 8

