Enhancing your Roku TV viewing experience often involves optimizing the screen resolution to match your preferences and the capabilities of your television. Whether you’ve recently upgraded your TV or want to troubleshoot picture quality issues, changing the screen resolution is a straightforward process that empowers you to tailor the visual output.
Roku TVs come equipped with user-friendly interfaces, and navigating through the settings to modify the screen resolution can be accomplished effortlessly using either the Roku remote.
In this guide, we’ll walk you through the step-by-step process of how to change the screen resolution on your Roku TV.
Watch: How To Screen Mirror Android To Roku TV
To Change Screen Resolution On Roku TV
Firstly, turn on your Roku TV and ensure you are on the home screen. If you’re not already there, press the home button on your Roku remote to navigate to the main screen. Next, scroll up or down using the arrow buttons on your remote to highlight “Settings.” Press the OK button to enter the Settings menu.
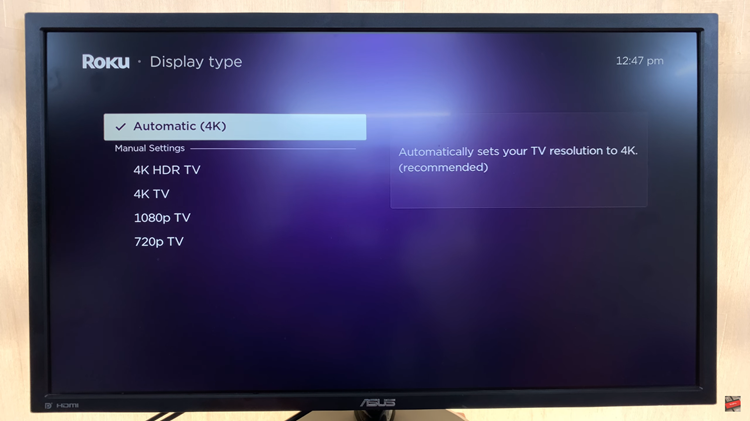
In the Settings menu, use the arrow buttons to navigate to “Display Type” and press OK. At this point, you’ll see a list of options regarding the screen resolution or display type. Now, to adjust the screen resolution, choose the preferred option.

After selecting the desired resolution, Roku will ask you to confirm the change. Choose “OK” to apply the new resolution. Afterward, restart your Roku TV to ensure the changes take effect. You can do this by navigating to “System” in the Settings menu and selecting “System restart.”
By following these steps, you can easily change the screen resolution on your Roku TV, allowing you to customize your viewing experience based on your preferences and the capabilities of your TV.

