The Google Pixel 8 and Pixel 8 Pro are known for their impressive camera capabilities, making them popular choices for capturing high-quality photos. However, there may be times when you want to transfer images from a flash drive directly to your Pixel device.
Whether it’s for backup purposes or easy access on the go, this guide will walk you through the step-by-step process.
Before you begin, you’ll need a few things:
Google Pixel 8 or Pixel 8 Pro: Ensure that you have your Pixel device at hand.
A Flash Drive: This is where your photos are stored. Make sure it’s compatible with your Pixel device.
USB OTG (On-The-Go) Adapter: This is a small adapter that allows you to connect your flash drive to your Pixel device. It should be type-C male.
Read: How To Enable/Disable Data Saver On Samsung Galaxy A24
Transfer Photos & Videos From Flash Drive To Google Pixel 8 / Pixel 8 Pro
Begin by connecting your flash drive to the USB OTG adapter. Connect your flash drive to your Pixel device, make sure to plug it into your Pixel’s type-C charging port.
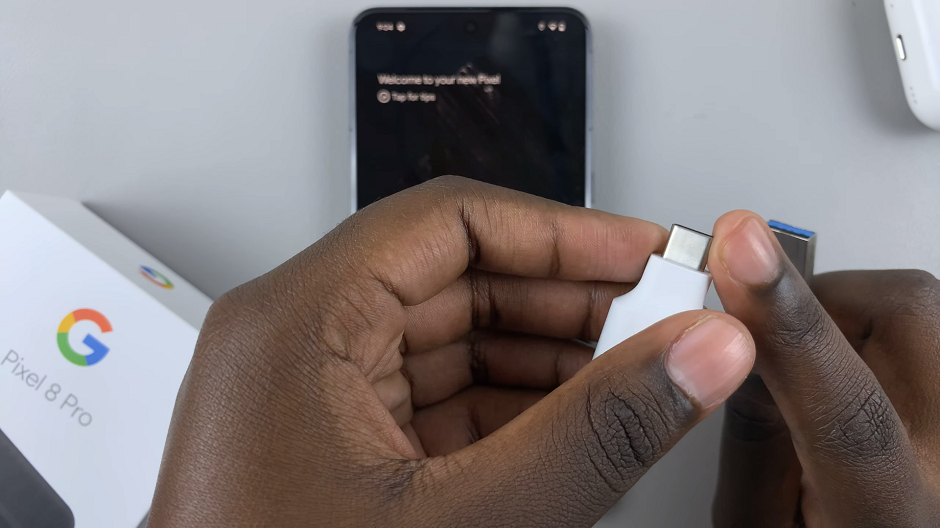
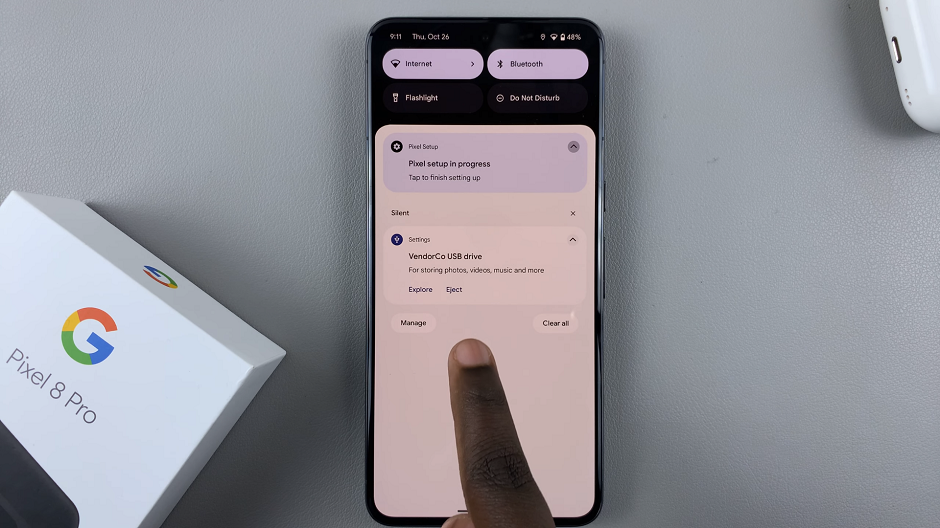
The Pixel should automatically detect the connected flash drive. Swipe down on the screen to reveal the notifications shade to confirm this.
On your Pixel 8 or Pixel 8 Pro, navigate to the Files app. This is where you’ll manage your files.
In the Files app, find the connected flash drive under the Storage Devices section. Tap on it to explore the contents.
Now, locate the photos and you want to transfer. You can do this by navigating through the folders on the flash drive. Once you’ve found the desired images & videos, select them.
Tap and hold on one and select the rest using the radial buttons. Then select the Copy to or Move to option from the menu. The Move to option will remove the file from the original location completely.
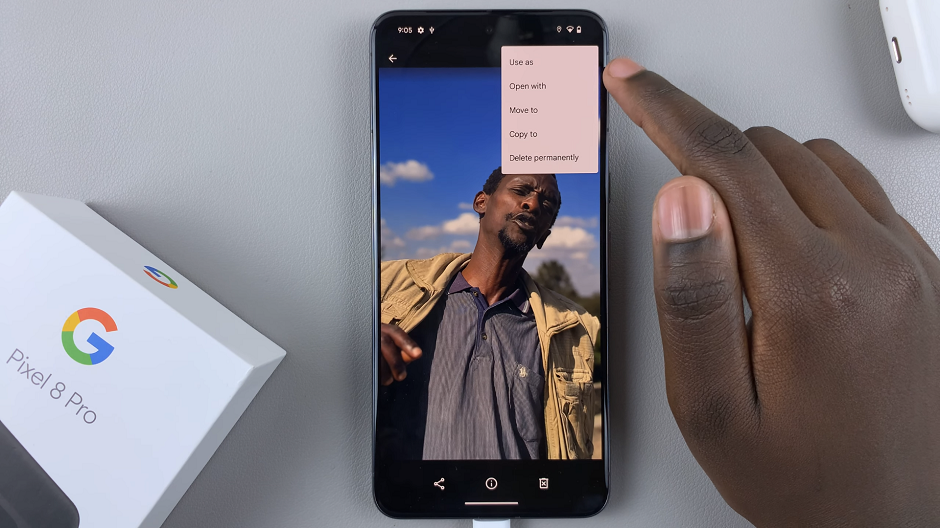
You can also open the file you want to transfer, tap on the three dots in the top-right and again, select Copy to or Move to.
Move Photos and Videos
A menu will appear from which you need to select Internal Storage. Select the folder in the internal storage where you want your photos and videos to be stored. You can also create a new folder.
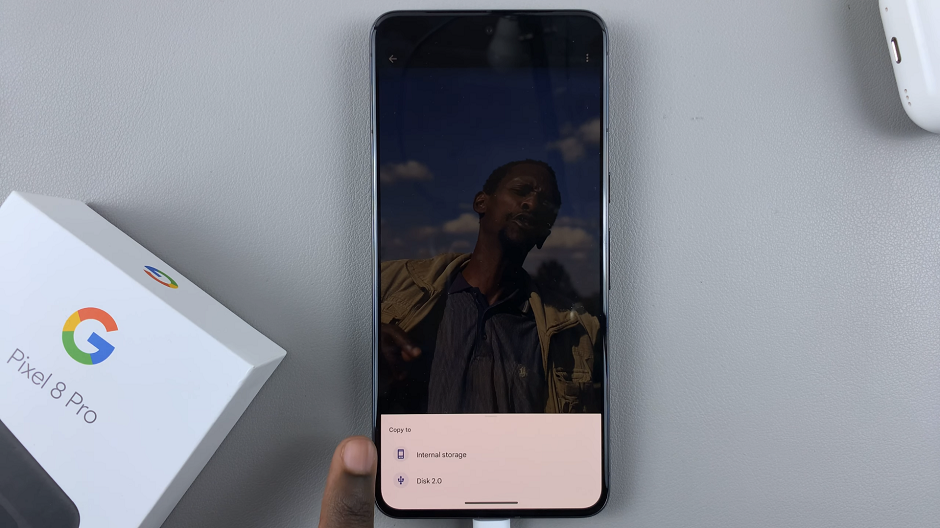
The data transfer process will commence, and the time taken will depend on the size and number of files being transferred. The photos and videos will now be stored on your Pixel 8 or Pixel 8 Pro.
After the transfer is complete, it is crucial to safely eject the flash drive from your Pixel device. This can be done by swiping down from the top of the screen to reveal the notifications shade and choosing the Eject option. This ensures that no data is lost or corrupted during the process.
Troubleshooting Tips
If you encounter any issues during the process, double-check that your connections are secure and that both your flash drive and Pixel device are functioning properly.
Ensure that the file formats of your photos are compatible with the Pixel’s native gallery app. The Pixel generally supports most common formats like JPEG and PNG.
Transferring photos from a flash drive to your Google Pixel 8 or Pixel 8 Pro is a straightforward process that allows you to easily access and manage your images. By following these steps, you can ensure that your precious memories are always at your fingertips.
Remember, practice makes perfect. Don’t hesitate to try the process a few times to become more comfortable with it. Soon enough, you’ll be effortlessly transferring photos to your Pixel device whenever you need to.
Watch: How To Take Screenshot Without Buttons On Google Pixel 8 / Pixel 8 Pro
