Call of Duty: Modern Warfare 3 offers players a dynamic and immersive gaming experience, and one way to enhance this experience is by customizing the colors of enemies and friendly players.
This not only adds a personal touch to the game but can also improve visibility and make it easier to differentiate between allies and foes during intense battles.
In this guide, we’ll walk you through the comprehensive step-by-step process on how to change enemy and friendly color in Call Of Duty Modern Warfare 3.
Also Read: How To Switch To Third Person In Call Of Duty Modern Warfare 3 Zombies
How To Change Enemy & Friendly Color In Call Of Duty Modern Warfare 3
Press the designated button to open the Options menu. Then, select the “Settings” option. Within the Settings menu, look for the “Interface” option. Click on it to reveal a range of settings related to the visual and display elements of the game.
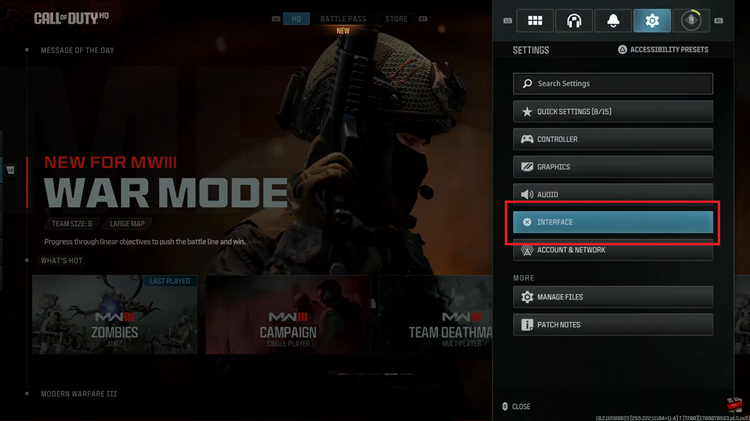
Once you are in the Interface section, navigate to the Readability settings. Look for an option named “Color Customization” within this section.
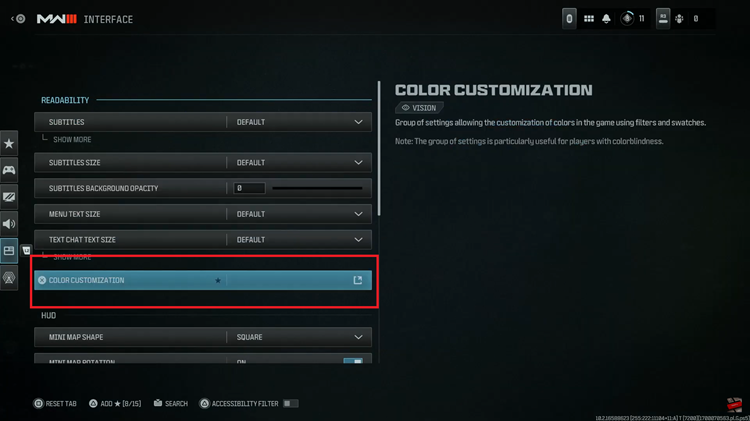
Upon selecting “Color Customization,” you’ll be presented with a list of colors associated with different in-game elements. Look for the specific options related to enemies and friendly players. These may be labeled as such or might be identified by other terms like “Enemy” or “Party.”
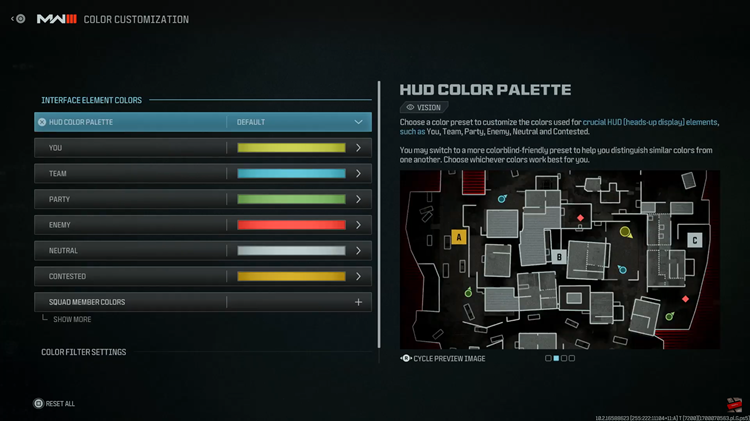
Click on the color associated with enemies or friendly players to open a color palette or a set of predefined colors. Choose the color that you find most distinguishable and suits your preferences. Some players prefer high-contrast colors for better visibility, while others may opt for colors that match their overall gaming aesthetic.
Watch: How To Change Display Name & Activision ID in Call Of Duty Modern Warfare 3
