If you’re eager to explore the convenience to set up & activate an eSIM on your iPhone, this comprehensive guide will walk you through the process step by step. In today’s digital landscape, the iPhone has become an integral part of our daily lives, offering a multitude of features and functionalities.
One of the lesser-known yet incredibly powerful capabilities of modern iPhones is the eSIM (embedded Subscriber Identity Module). This innovative technology allows users to enjoy the flexibility of having multiple cellular plans on a single device without the need for a physical SIM card.
Before diving into the setup process, let’s grasp the concept of eSIM. Unlike traditional SIM cards that are physical, eSIM is embedded directly into the device, enabling users to activate cellular plans digitally. This groundbreaking technology provides greater flexibility, allowing you to switch between carriers and plans effortlessly without swapping SIM cards.
Watch: GoPro HERO 12: How To Change Screen Brightness
Set Up & Activate eSIM On iPhone
Firstly, ensure that your iPhone model supports eSIM functionality. The following iPhone models are compatible with eSIM: iPhone 13 series, iPhone 12 series, iPhone 11 series, iPhone XS, XS Max, and XR.
Begin by confirming if your carrier supports eSIM activation. Not all carriers offer this service, so it’s essential to verify compatibility with your carrier of choice. Next, have them send you the eSIM activation details, either in hard copy or soft copy format.
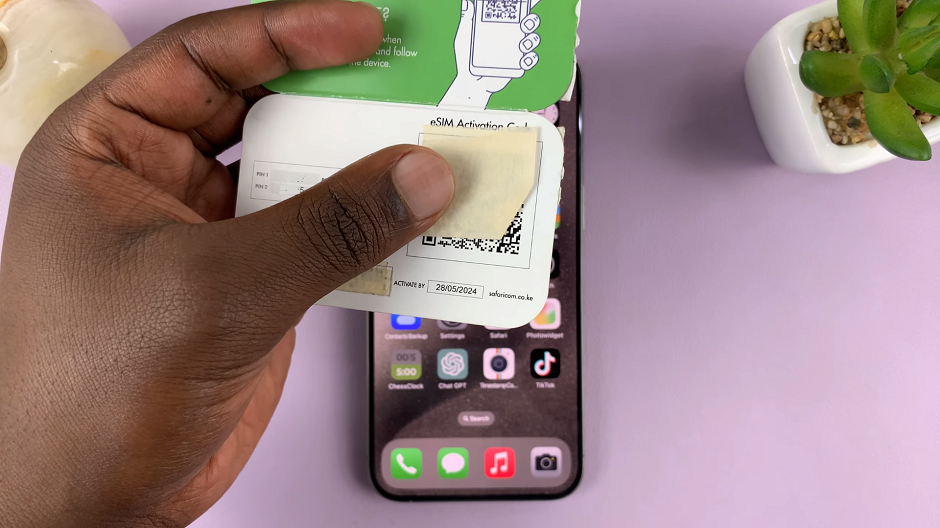
Also, ensure you have internet connection on your iPhone, preferably Wi-Fi.
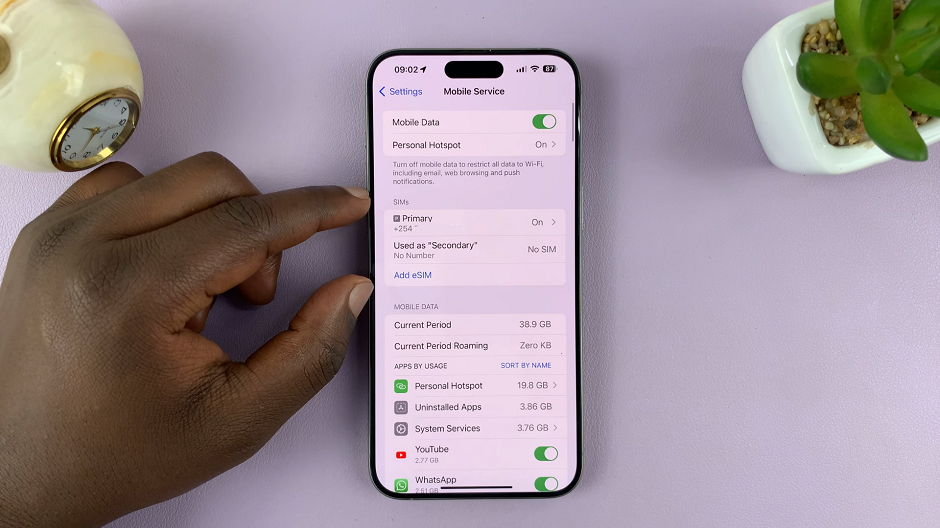
Navigate to Settings on your iPhone and select Mobile Service, Cellular or Mobile Data. This option should be just below Bluetooth.
Under the SIMs section, tap on Add eSIM.
To set up mobile service, you can scan the QR code provided by your carrier, via Use QR Code. Alternatively, you can manually enter the activation details provided by your carrier, via the Transfer From Nearby iPhone.
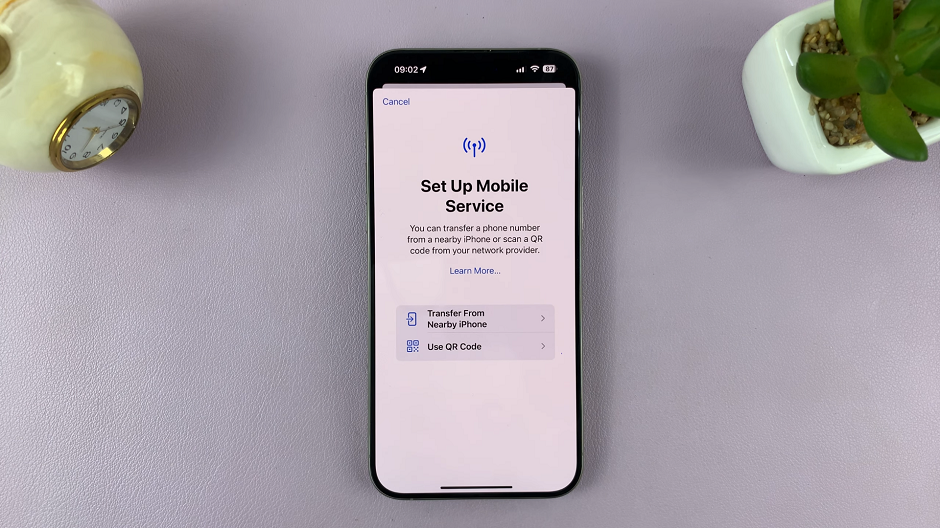
Most of the time, you’ll be provided with a QR Code. Tap on Use QR Code to scan the code.
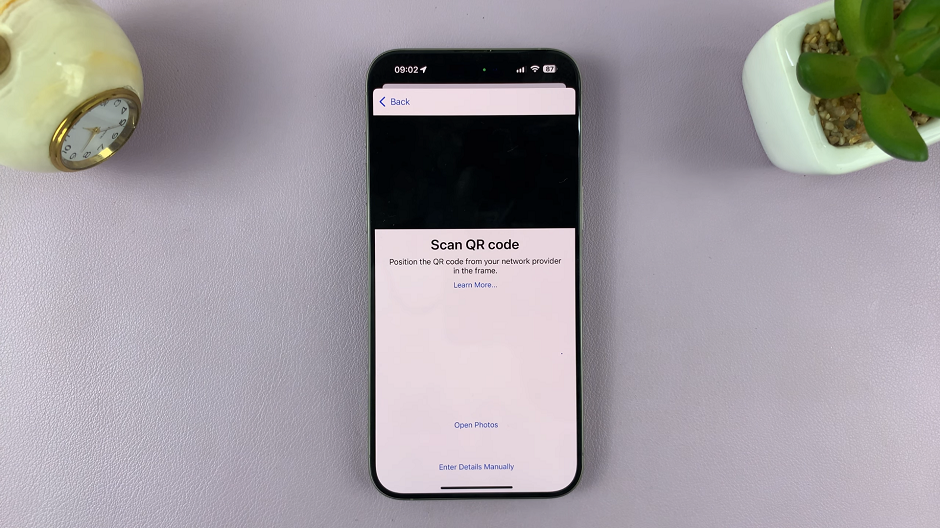
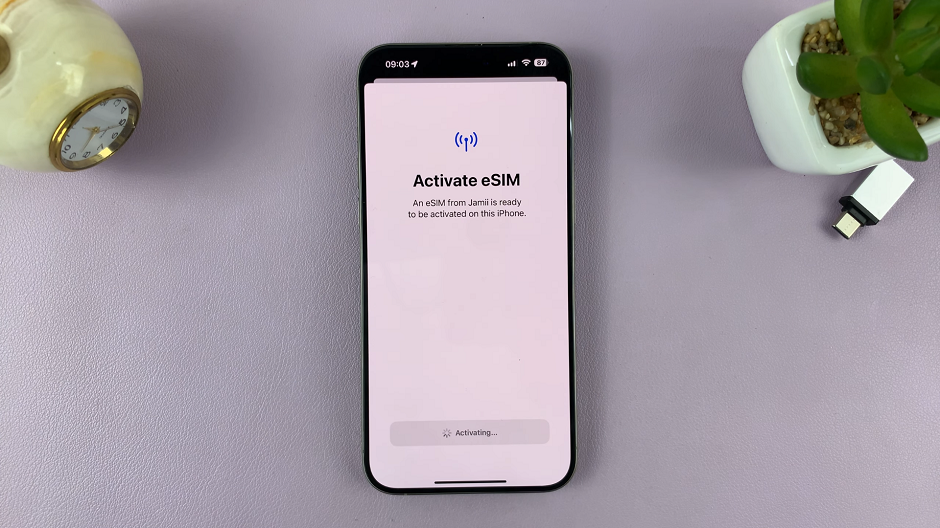
Once the QR code is scanned or the details are entered, proceed with the activation process. Under the Activate eSIM option, tap on Continue.
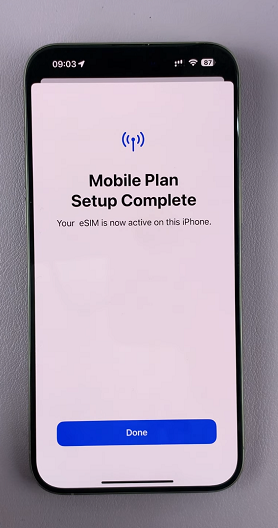
Once the activation is complete, you will receive a prompt saying, Mobile Plan Setup Complete. Tap on Done.
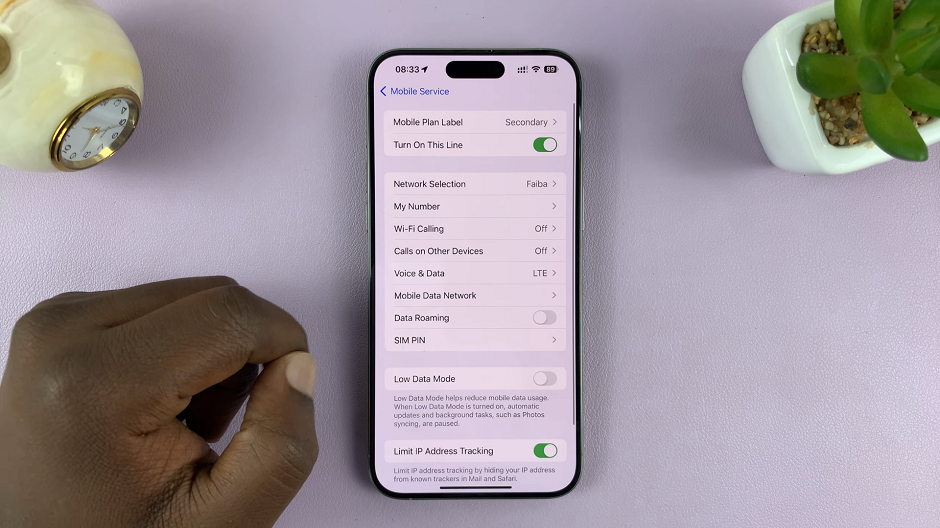
After successfully setting up your eSIM, it will be added in the SIMs section as a secondary SIM. You can manage the eSIM profile when you tap on it. Here, you’ll be able to do things like turn it on or off, as well as setup other settings regarding the eSIM.
Troubleshoot eSIM Activation
Encountering issues during eSIM setup is not uncommon. If you face challenges activating your eSIM, here are some troubleshooting tips:
Ensure a stable internet connection before attempting setup.
Restart your iPhone and retry the eSIM activation process.
Contact your carrier’s customer support for assistance and guidance.
Unlocking the Full Potential of Your iPhone with eSIM:
The versatility of eSIM technology empowers iPhone users to embrace a more flexible approach to managing their cellular plans. Whether it’s for travel, business, or personal convenience, activating eSIM on your iPhone provides a hassle-free way to access multiple networks without the need for physical SIM cards.
In conclusion, the process of setting up and activating eSIM on your iPhone opens doors to a new realm of convenience and adaptability. By following these simple steps and understanding the nuances of eSIM technology, you can harness the full potential of your iPhone’s capabilities.
Stay connected, stay versatile, and experience the freedom of eSIM technology on your iPhone today!
