If you’re looking for a comprehensive guide on how to remove an eSIM from your iPhone, you’re in the right place. The introduction of the eSIM (embedded SIM) technology has revolutionized the way we connect our devices to cellular networks.
Offering flexibility and convenience, eSIMs have become a prominent feature in modern smartphones like the iPhone. However, there are instances when users need to remove or delete the eSIM from their iPhone, whether for switching carriers, upgrading devices, or other reasons.
Before diving into the removal process, it’s essential to understand what an eSIM is and how it functions within the iPhone ecosystem. Unlike physical SIM cards, eSIMs are embedded in the device and can be activated, switched, or removed digitally, eliminating the need for a physical SIM card slot.
Read: How To Enable/Disable Auto Power OFF On GoPro HERO12
Reasons for Removing an eSIM
There could be various reasons prompting the removal or deletion of an eSIM from an iPhone. Some of these include:
Changing Carriers: Users might want to switch carriers for better plans or coverage.
Upgrading Devices: Transferring an eSIM to a new iPhone requires removal from the current device.
Troubleshooting Network Issues: Removing and re-adding the eSIM might help resolve network-related problems.
Traveling Abroad: Some users prefer local SIMs while traveling instead of the eSIM.
Remove (Delete) eSIM On iPhone
Begin by unlocking your iPhone and launching the Settings app.
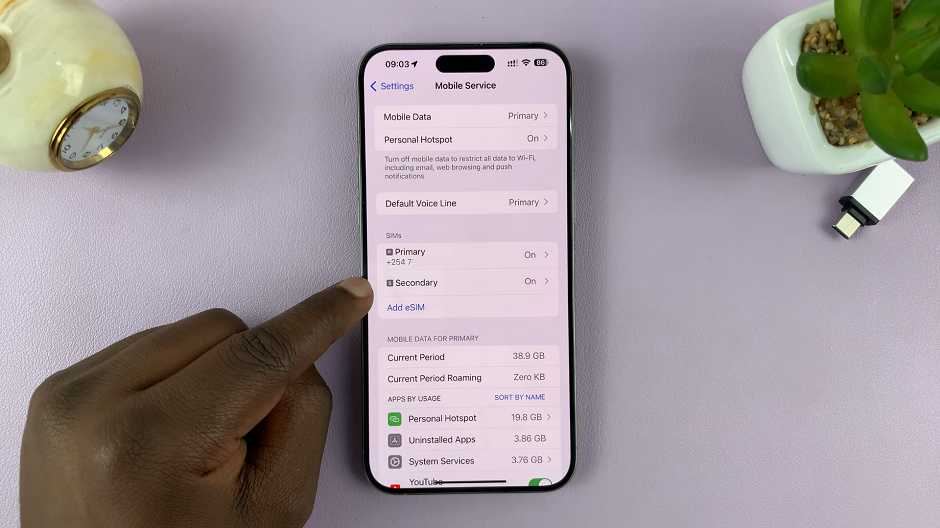
Within Settings, locate and tap on Mobile Service, Cellular or Mobile Data. This option should be just below Bluetooth. This will lead you to the menu where your eSIM is stored.
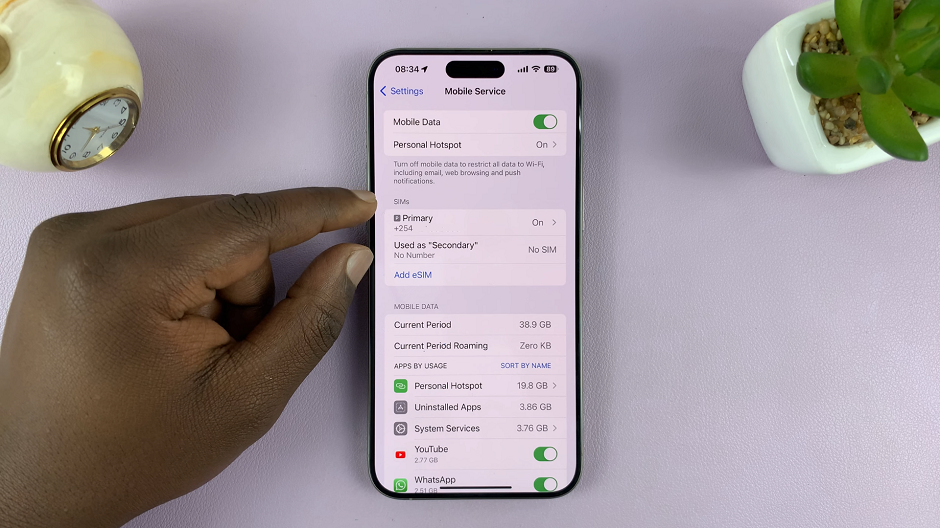
Under the SIMs section, tap on your eSIM. It may be under Primary or Secondary, depending on how it was set up.
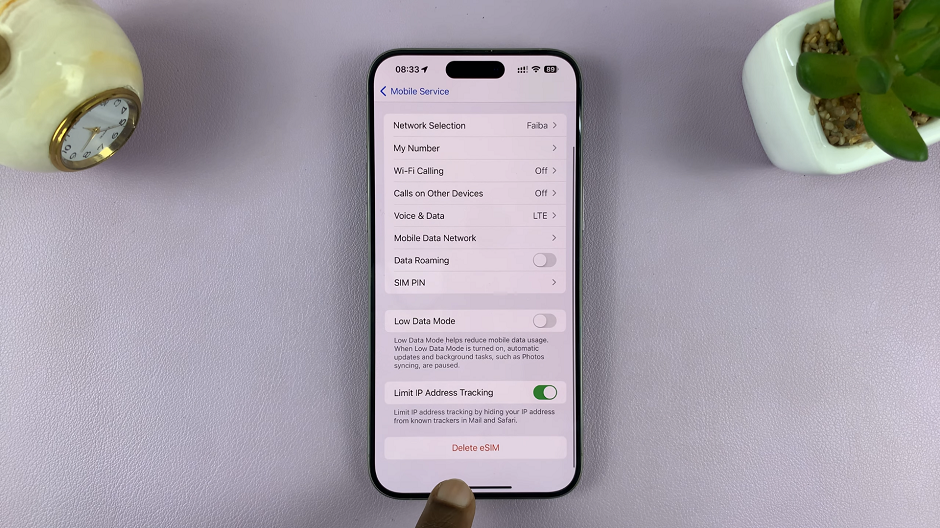
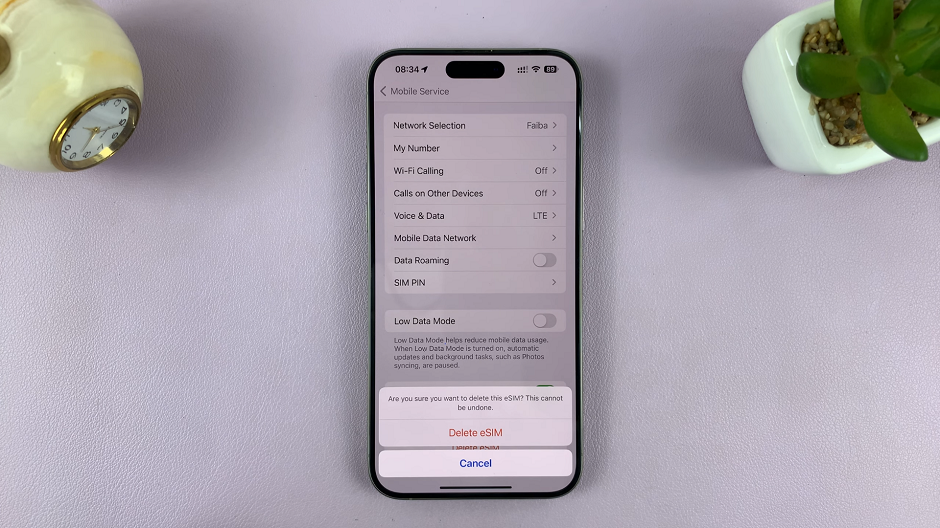
In the eSIM settings menu, scroll all the way down and find the Delete eSIM option. Tap on Delete eSIM to initiate the removal process.
A confirmation prompt will appear. Confirm the action by selecting Delete eSIM again.
Once again, you’ll be asked whether you’re sure about what you want to do. Tap on Delete eSIM a third time to proceed.
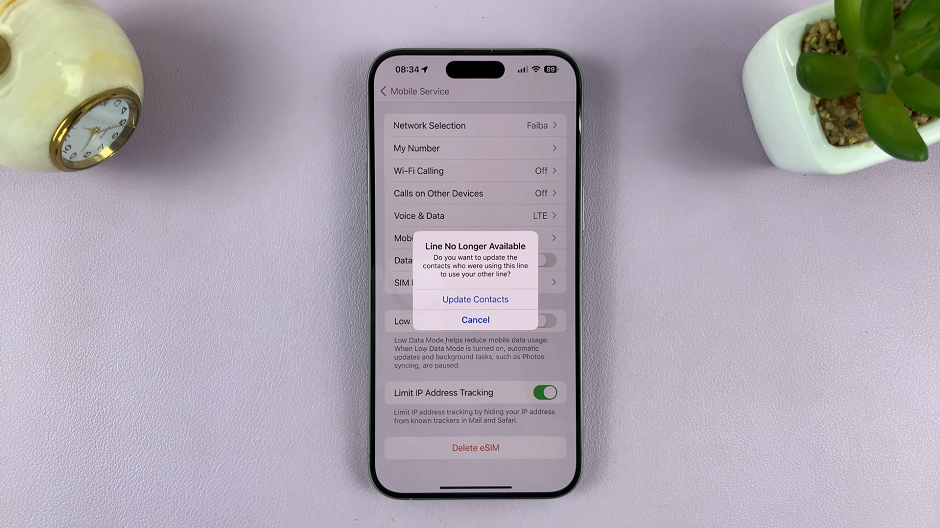
You will receive a notification that the line is no longer available. Under the ‘SIMs’ section, the eSIM will also be absent from the list.
Important Notes
Backup Data: Before removing the eSIM, ensure important data associated with the eSIM, such as contacts or messages, is backed up.
Carrier Guidelines: Some carriers might require additional steps or verification before removing an eSIM. Check with your carrier for specific instructions.
Network Disruption: Removing an active eSIM will disrupt cellular service until a new SIM is activated or re-added.
Removing or deleting an eSIM on an iPhone is a straightforward process, offering users the flexibility to manage their network connections efficiently. Whether it’s for switching carriers or upgrading devices, following these step-by-step instructions will help ensure a smooth eSIM removal experience.
Always remember to back up essential data and follow any additional instructions provided by your carrier to avoid any potential issues.
