In an era marked by technological advancements, the traditional SIM card has evolved into a more versatile and convenient form – the eSIM (embedded SIM). With its inception, eSIMs have revolutionized the way we connect and use mobile devices. They offer a seamless alternative to physical SIM cards, enabling users to switch carriers and manage multiple numbers without the need for physical swapping.
If you’re an Android user eager to harness the power of eSIM technology, this comprehensive guide will walk you through the step-by-step process of setting up and activating eSIM on your Android smartphone.
eSIM, short for embedded SIM, is a small chip embedded within your device that functions similarly to a traditional SIM card but without the physical form. It allows you to store multiple carrier profiles simultaneously, granting you the flexibility to switch between networks effortlessly. This innovation has gained traction due to its convenience, especially for those who travel frequently or require separate business and personal lines on a single device.
Watch: GoPro HERO 12: How To Change Camera Mode
Set Up eSIM
Before diving into the setup process, ensure that your Android device supports eSIM technology. Most modern Android smartphones released in recent years come equipped with eSIM capabilities, but it’s wise to double-check in your device settings or consult the manufacturer’s specifications.
Confirm if your carrier supports eSIM activation. Not all carriers offer this service, so it’s essential to verify compatibility with your carrier of choice. Next, have them send you the eSIM activation details, either in hard copy or soft copy format.
Also, ensure you have internet connection on your iPhone, preferably Wi-Fi or, if you have a dual SIM, you can use the mobile data from the other SIM Card.
Open the Settings app on your Android device. Select Network & Internet and then tap on SIMs.
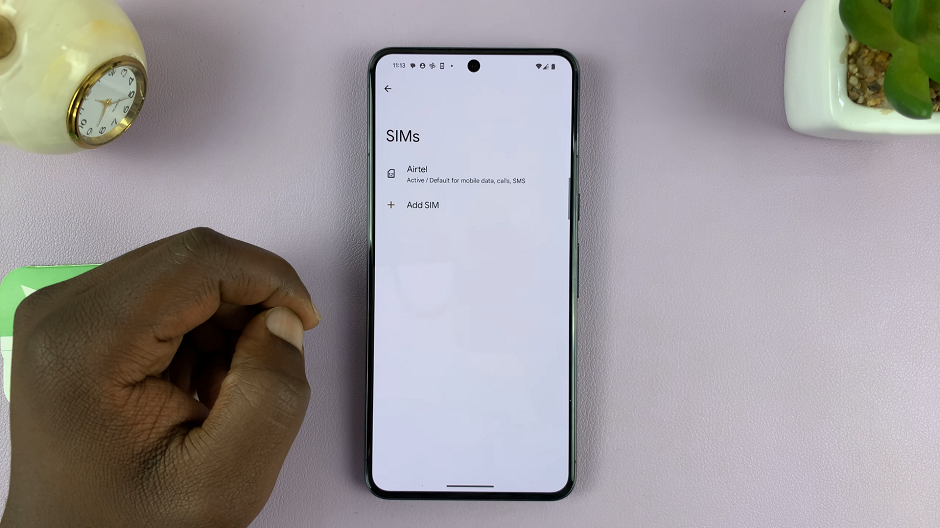
In the SIMs settings, you’ll find the option to Add SIM. Tap on it. You’ll be prompted to connect to a mobile network when you select the Download a New eSIM option.
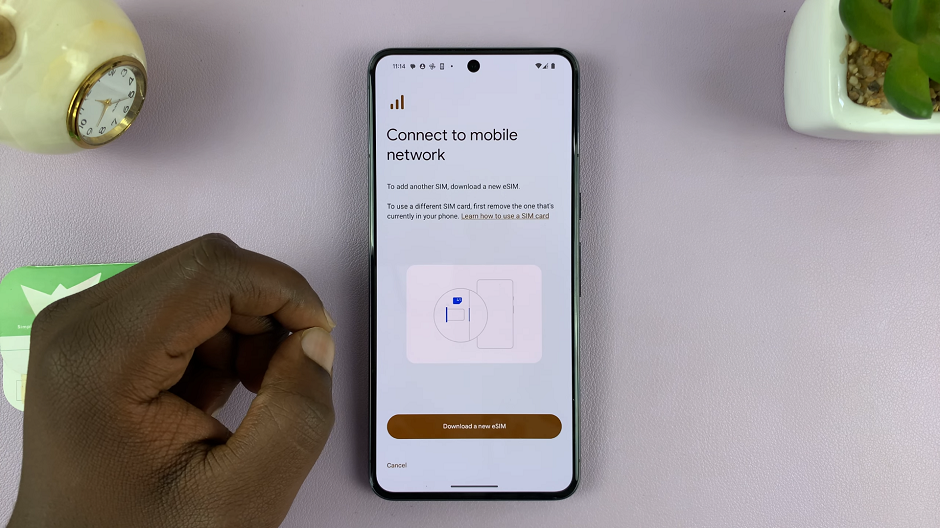
Different network carriers have different ways to add the eSIM profile. eSIMs in my region are added by scanning a QR Code provided by the carrier, on a card with my other network details. It may be different for you.
Once you tap on Download a New eSIM, you’ll be prompted to scan the QR code after various checks are complete.
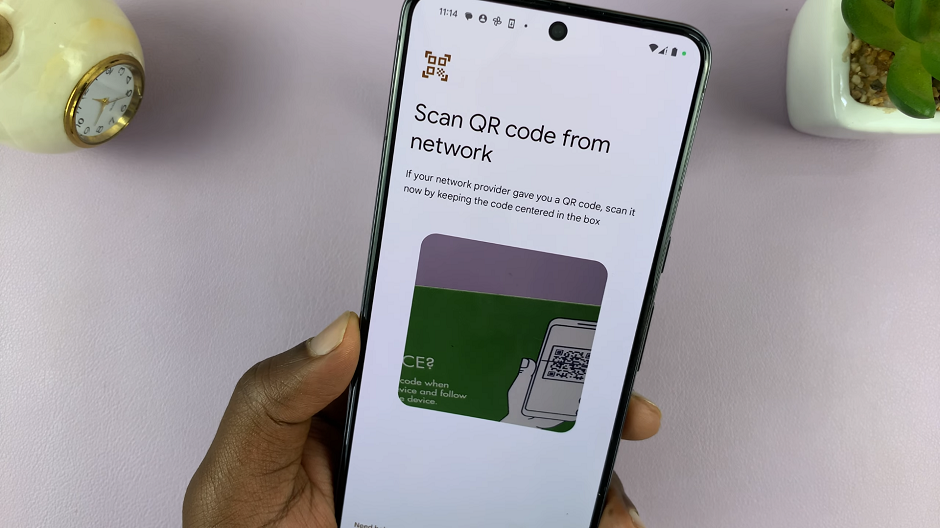
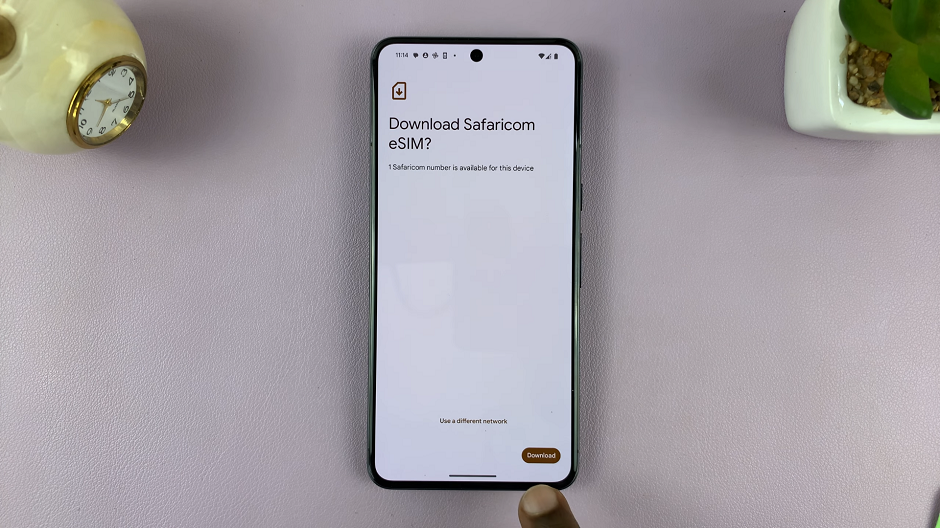
Once the QR Code is scanned successfully, you’ll need to tap on Download to download the available number from your network carrier.
Activate eSIM On Android
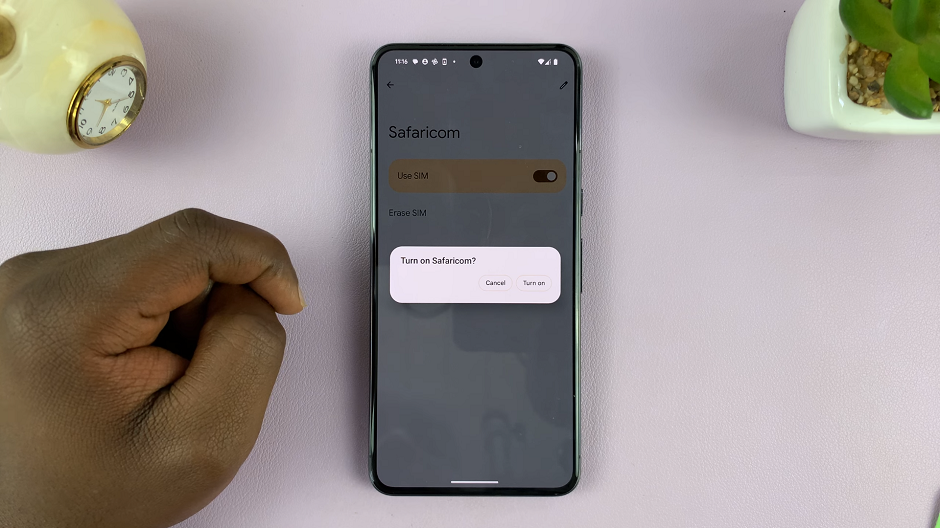
After the eSIM profile is downloaded, you’ll be notified by an eSIM Downloaded page. Now, go back to the SIMs settings to activate the eSIM on your Android device. This step finalizes the setup and enables your device to use the eSIM for calls, texts, and data.
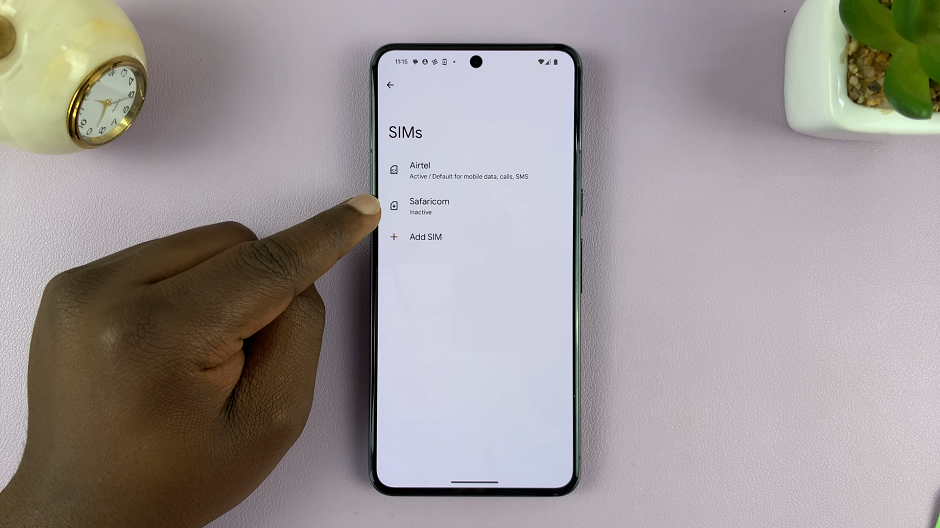
You should now be able to see the eSIM in the SIMs page under Settings. Repeat this process to add another eSIM if you would like.
Tips for a Smooth Activation Process
Ensure a stable internet connection throughout the setup process.
Double-check the details provided by your carrier for accuracy during manual entry.
If encountering issues, restart your device and attempt the activation process again.
Benefits of Using eSIM on Android
Simplified switching between carriers without physical SIM card changes.
Ideal for travelers, enabling easy access to local plans without swapping SIMs.
Allows for dual-SIM functionality on a single device, perfect for managing personal and work numbers simultaneously.
eSIM technology represents a leap forward in mobile connectivity, offering unparalleled convenience and flexibility for Android users. By following these steps, you can effortlessly set up and activate an eSIM on your Android device, opening doors to a more versatile and connected mobile experience.
As technology continues to evolve, embracing innovations like eSIMs ensures that you stay at the forefront of the mobile revolution, simplifying your connectivity needs in an ever-changing world.
Unlock the potential of your Android device with eSIM technology today!
