In the fast-paced digital age, the ability to capture and share what’s happening on your Android phone screen has become an essential feature.
Whether you want to create tutorials, showcase a gaming achievement, or simply share a funny moment with friends, knowing how to screen record on your Android device can be incredibly useful.
In this guide, we’ll walk you through the comprehensive step-by-step process on how to screen record on your Android phone.
Also Read: How To Restart Android Phone
How To Screen Record On Android Phone
Begin by navigating to the screen or app that you want to capture. Swipe down from the top of your screen to reveal the notification bar and access quick settings. Look for the “Screen record” icon. If it’s not immediately visible, locate the edit icon (usually represented by a pen) and tap on it. In the edit mode, find the screen record button and drag it to the quick settings panel.
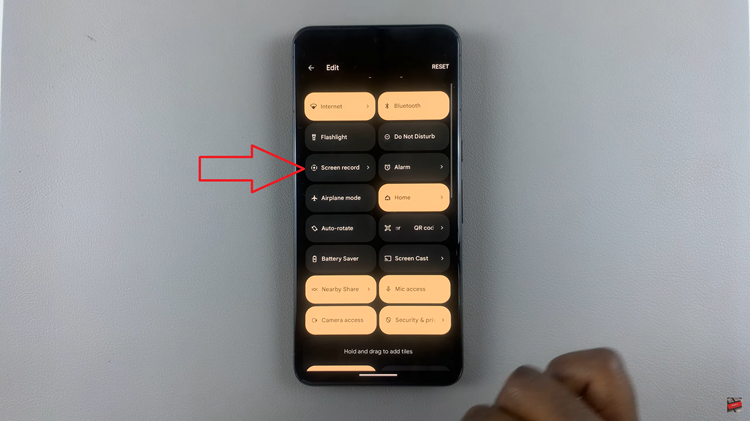
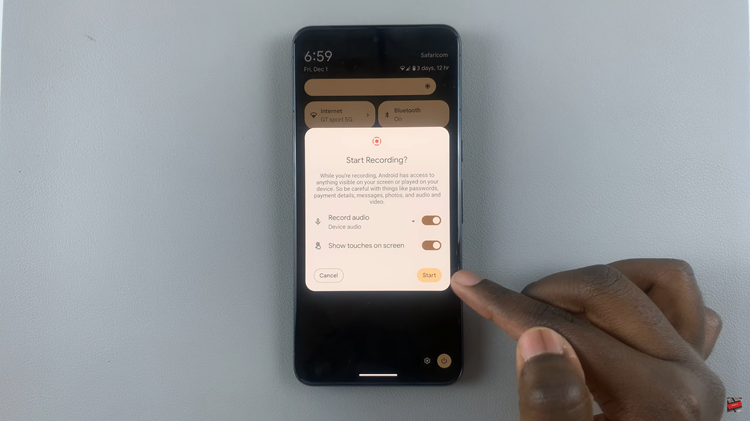
Tap on the “Screen record” icon in the quick settings. A dialog box will appear, allowing you to customize some settings. You can choose to enable or disable options such as “Record audio” and “Show touches on screen.” Once you’ve configured your preferences, tap on “Start” to initiate the recording.
Now that the recording has started, navigate through your device and perform the actions you want to capture. Whether it’s demonstrating a process, showcasing an app, or anything else, ensure you capture the desired content.
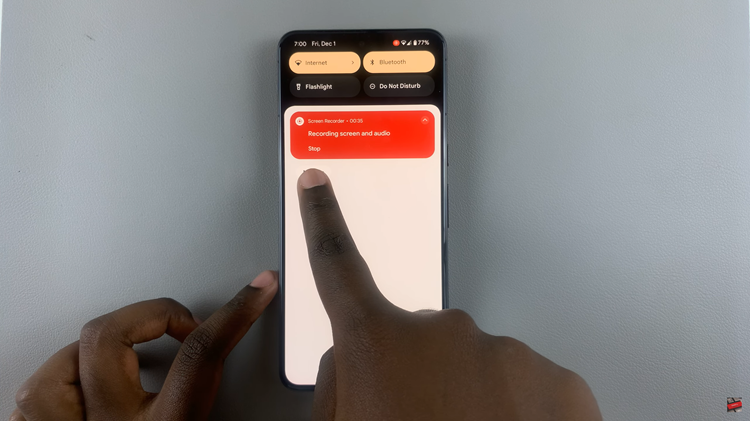
To stop the recording, slide down to reveal the notifications shade and tap on the “Stop” button from the recording menu. This will conclude the screen recording process.
After stopping the recording, open the Photos app on your Android device. Look for a folder labeled “Movies” to access your recordings. From the Photos app, you can edit your recordings or share them directly with others.
