In today’s fast-paced world, staying connected is crucial, and having control over your Android phone’s network settings is essential for a seamless communication experience.
If you’re looking to optimize your network connectivity or troubleshoot connection issues, knowing how to change the network mode on your Android device is a valuable skill.
In this guide, we’ll walk you through the comprehensive step-by-step process on how to change the network mode on your Android phone.
Also Read: How To Screen Record On Android Phone
How To Change Network Mode On Android Phone
The first step is to access the Settings app on your Android phone. Within the Settings menu, go to your Network & Internet settings. Then, look for the option labeled “Mobile Networks.” This is where you’ll find various settings related to your device’s cellular connections. Tap on “Mobile Networks” to proceed.
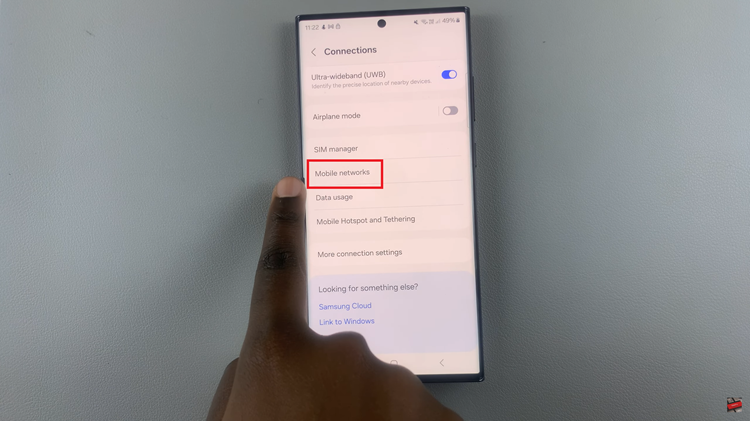
Inside the Mobile Networks section, you’ll find an option called “Network Mode.” Selecting this option will allow you to customize your phone’s network preferences. If your device has dual SIM capabilities, you may have the option to change the network mode for each SIM card individually.
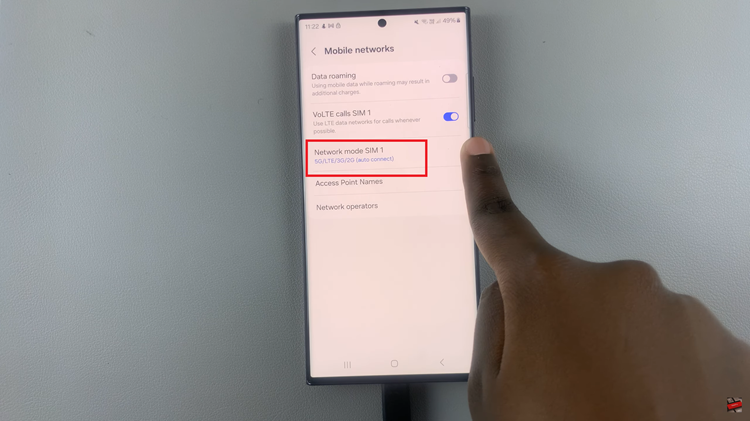
Upon tapping “Network Mode,” a dropdown menu will appear, presenting you with different network mode options. The available modes may include:
- 2G (GSM)
- 3G (WCDMA)
- 4G (LTE)
- 5G (if your device supports it)
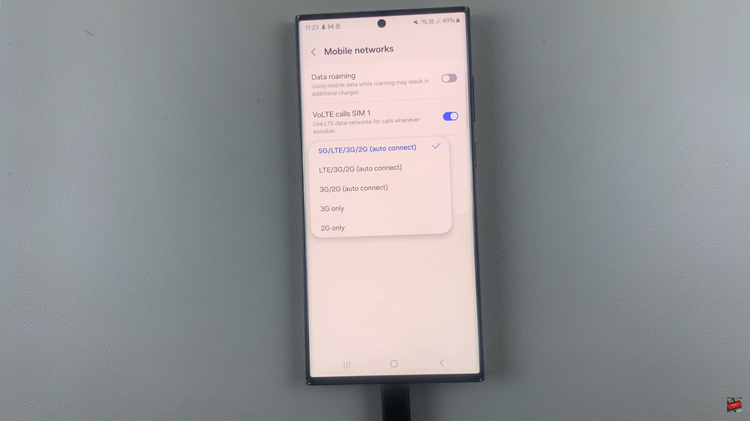
After selecting your preferred network mode, confirm your choice and save the changes. Your Android phone will now operate on the chosen network mode, providing you with the desired balance of speed, coverage, and battery efficiency.
