In the era of technological innovation, the quality and clarity of visuals displayed on our devices hold paramount importance. Android devices, renowned for their versatility, offer users the ability to customize various settings to suit individual preferences.
One such customizable aspect is the screen resolution – a fundamental feature influencing the visual display quality and overall user experience. Understanding how to manipulate the screen resolution on an Android device empowers users to optimize their viewing experience, whether it’s to enhance clarity, improve performance, or ensure compatibility with specific apps or games.
This guide aims to provide you with step-by-step instructions on how to change the screen resolution on your Android device with ease.
Watch: How To Enable Picture in Picture On Android
To Change Screen Resolution On Android
Firstly, locate and open the “Settings” app on your Android device. This app is usually represented by a gear icon and can be found in the app drawer or on the home screen.
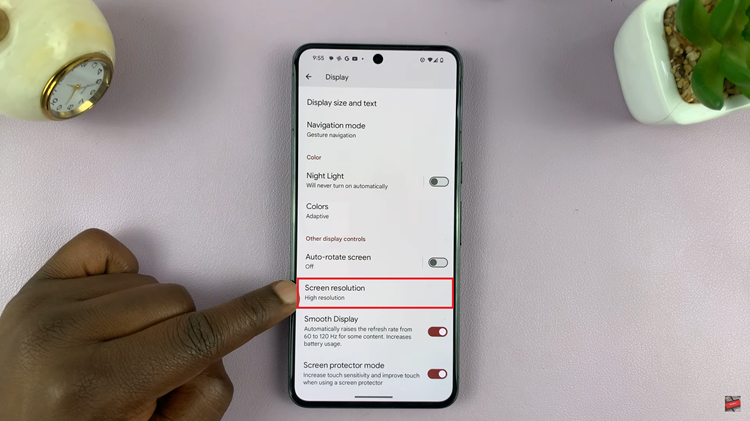
Following, scroll down and find the “Display” option. Tap on it to enter the display settings menu. At this point, look for an option named “Screen Resolution.” Tap on it to access the resolution settings.

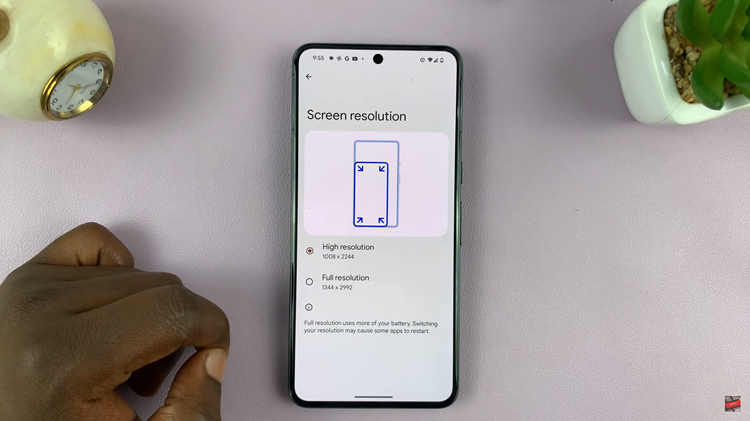
Depending on your device, you may be presented with a list of available resolution options. Choose the resolution that suits your preference or the one recommended for your device.

Afterward, exit the settings to save the changes. Some devices might require a restart to apply the new resolution settings. If prompted, restart your device.
In conclusion, changing the screen resolution on Android devices can offer flexibility in tailoring the visual experience to suit individual preferences. However, it’s crucial to consider compatibility and usability when making these adjustments. If in doubt, it’s advisable to stick to the default resolution recommended by the device manufacturer.
Read: How To Change Lock Screen Notification Settings On Android

