The Samsung Galaxy S24 stands out as a powerhouse of features and capabilities. As users, we continually seek ways to tailor our devices to our preferences, and one such customization lies in adjusting the screen timeout period.
If you find yourself wanting to extend or shorten the duration before your Galaxy S24 screen dims, this guide is here to walk you through the straightforward process.
In this guide, we’ll walk you through the comprehensive step-by-step process on how to change the screen timeout period on Samsung galaxy S24s.
Also Read: How To Enter Safe Mode On Samsung Galaxy S24s
How To Change Screen Timeout Period On Samsung Galaxy S24s
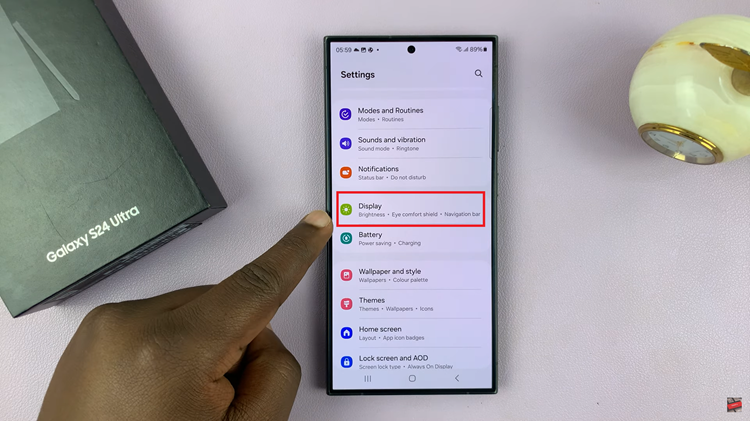
The first step is to access the Settings app. You can find the app icon on your home screen or in the app drawer. Within the Settings app, scroll down until you come across the ‘Display‘ option. This section houses various settings related to your device’s screen and visual display. Tap on ‘Display‘ to proceed.

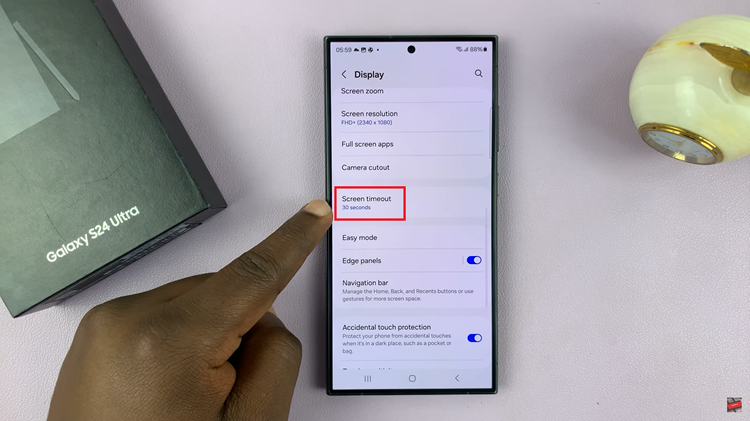
Now that you’re in the Display settings, scroll through the options until you find ‘Screen Timeout.’ This particular setting determines how long your device’s screen remains active when not in use.

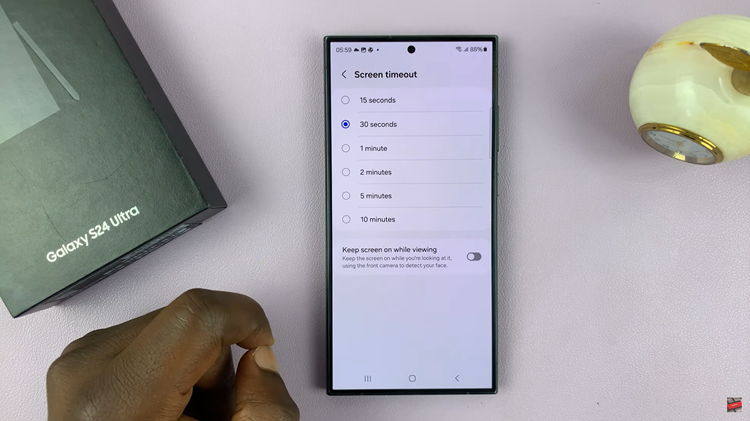
Tap on ‘Screen Timeout,’ and a list of timeout options will appear on your screen. The available durations may include options such as 15 seconds, 30 seconds, 1 minute, and so on. Choose the duration that best suits your preferences by tapping on the desired option.

Once you’ve selected the desired screen timeout duration, the changes will be applied automatically. There’s no need to save or confirm the changes separately. Your Samsung Galaxy S24 will now adhere to the new screen timeout setting, providing you with an optimized balance between screen activity and power conservation.
