In today’s digitally connected world, smart TVs have become an integral part of our entertainment setup. With features like streaming services, apps, and internet browsing, they offer a wide range of entertainment options.
However, to access these features, a stable Wi-Fi connection is essential. If you’ve recently changed your Wi-Fi network or moved to a new location, it’s crucial to know how to update the Wi-Fi connection on your Samsung Smart TV.
Fear not, as we’ve prepared a comprehensive guide to walk you through the process step by step.
Watch: How To Change Back To Default Font On Samsung Galaxy A15
Change Wi-Fi Connection On Samsung Smart TV
First, go to the home screen of your Samsung Smart TV. If you’re not on the home page, press the home button on the remote control.
Next, using your remote control, scroll left once to the TV menu. From the TV menu, scroll down to get to Settings. Press OK on the remote to access the Settings menu, then scroll until you get to All Settings.
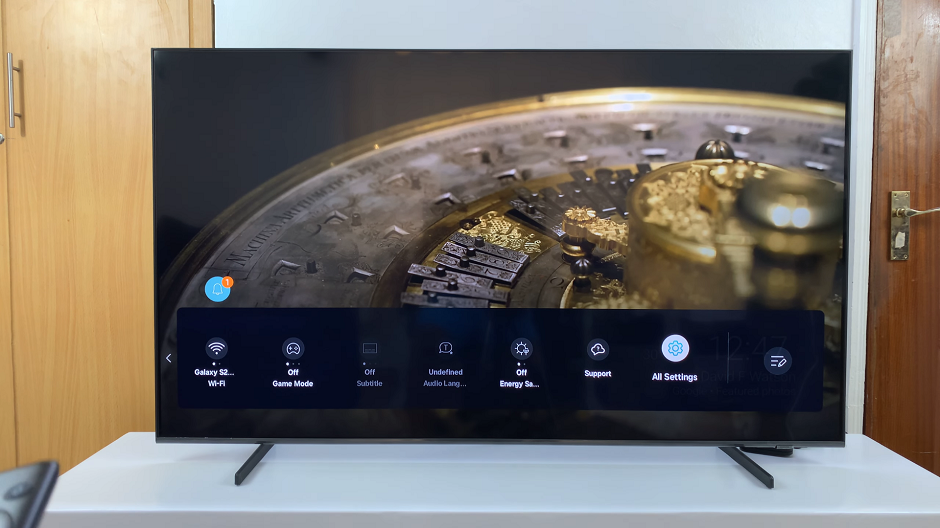
Select the Connection option, press OK and select Network by pressing OK once again.
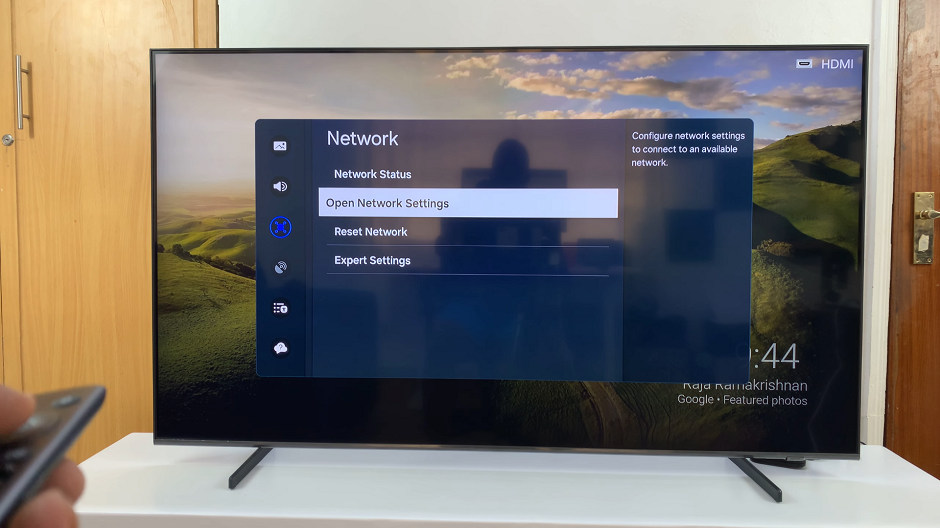
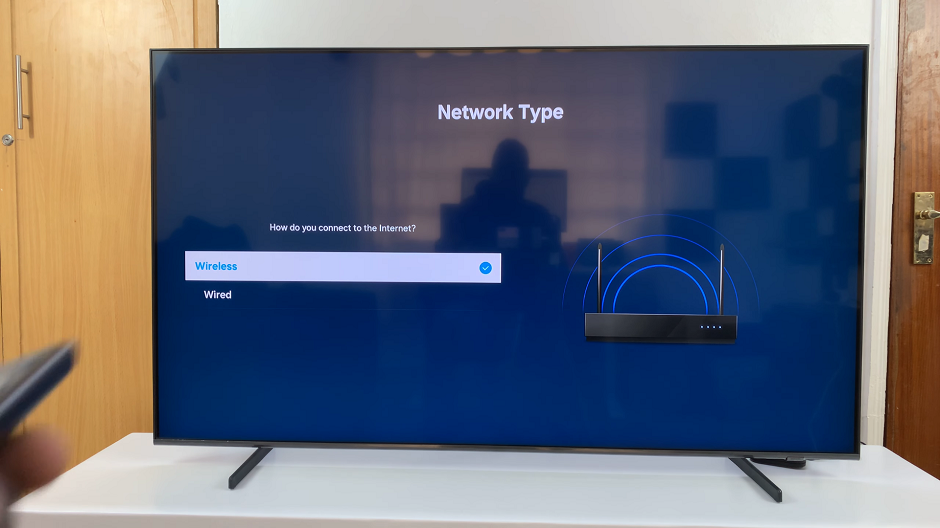
Under Network, select Open Network Settings. Here, choose Wireless in the Network Type page.
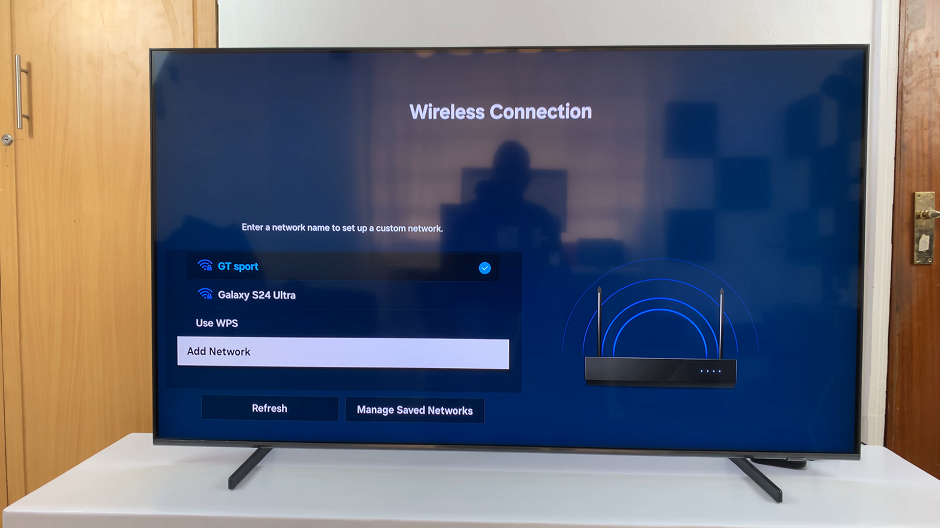
Your TV will start to scan for available networks. You will see the network you’re connected to in the list of networks available, as well as others you can connect to.
Highlight the Wi-Fi network you want to change to and press OK. If your network is hidden, you may need to manually enter the SSID (network name) via the Add Network option.
If the selected Wi-Fi network is password-protected, you’ll be prompted to enter the network’s password. Use the on-screen keyboard to input the password carefully, ensuring accuracy to avoid any connection issues.
After entering the password, select the Connect or OK option to initiate the connection process. Your Samsung Smart TV will attempt to establish a connection to the selected Wi-Fi network.
Once connected, your TV will display a confirmation message or icon indicating a successful connection to the new Wi-Fi network.
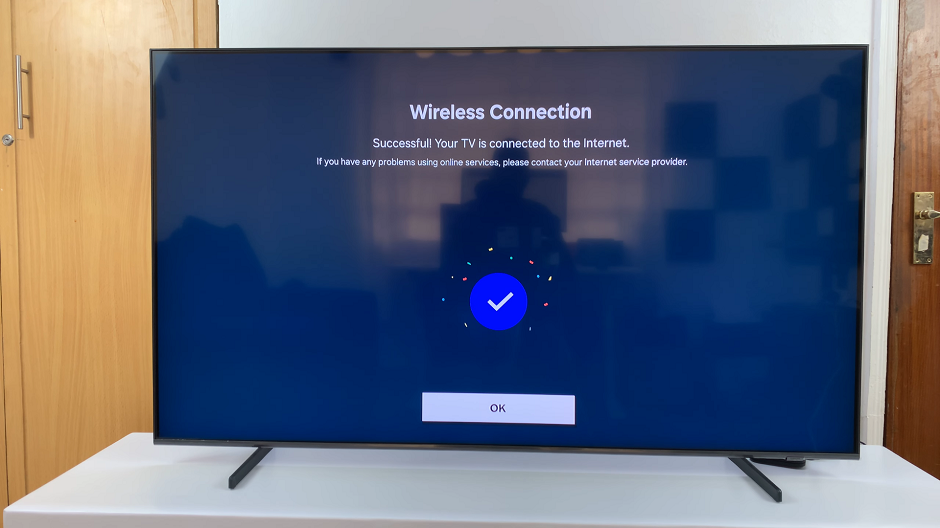
To ensure everything is functioning correctly, try accessing various online features on your smart TV, such as streaming apps or web browsing. If everything is working as expected, you’ve successfully changed the Wi-Fi connection on your Samsung Smart TV.
In case you encounter any issues during the process, double-check the entered Wi-Fi password, ensure the selected network is within range, and verify that your router is functioning correctly.
By following these simple steps, you can seamlessly update the Wi-Fi connection on your Samsung Smart TV, ensuring uninterrupted access to all your favorite online content. Remember, a stable Wi-Fi connection is essential for optimal performance, so it’s essential to keep your network settings up to date.
Whether you’re upgrading your home network or relocating to a new place, knowing how to change the Wi-Fi connection on your smart TV is a valuable skill that will keep you connected to endless entertainment possibilities.
