In the bustling world of social media, taking charge of your Instagram presence begins with proactive scheduling. Leveraging the power of strategic timing and efficient planning can catapult your content strategy to new heights.
From engaging your audience to optimizing reach, the ability to schedule posts on Instagram empowers you to maintain a consistent and impactful online presence. In this guide, we’ll dive into the steps required to schedule a post on Instagram, equipping you with the tools and techniques needed to conquer the digital landscape with confidence and finesse.
Join us as we unveil the secrets to optimizing your Instagram strategy, one scheduled post at a time.
Watch: How To Unrestrict Someone On Instagram
Schedule a Post On Instagram
Begin by launching the Instagram app on your mobile device. Make sure you’re logged in to your account. Then, tap on the “+” icon at the bottom center of the screen to create a new post. This will open the post-creation interface.
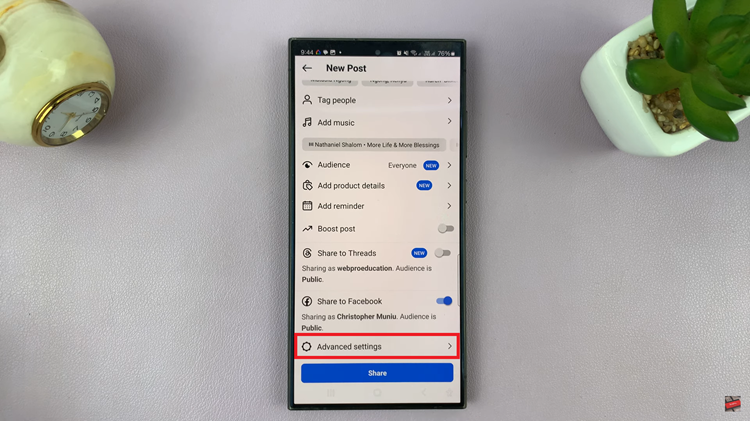
At this point, choose the image or video you want to post from your device’s photo gallery or camera roll. Tap on the image to select it. At this point, make any additional changes you’d like i.e. adding location, adding people, adding a music track, and much more. Once done, scroll down on the post and find the “Advanced Settings” option.

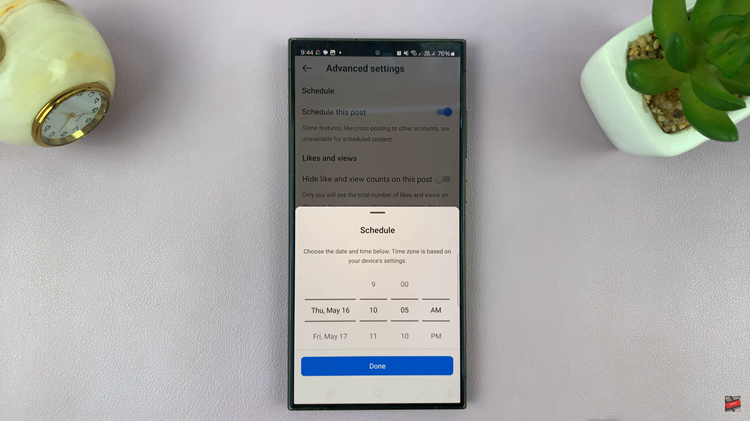
Following this, tap on the advanced settings and find the “Schedule Post” option. Then, toggle the switch to the ON position, choose the date and time you’d like, and tap on “Done” to confirm the changes. Finally, head back to the post creation section and when you’re ready to publish your post, tap on the “Share” button. Your post will be scheduled for the chosen date.

By following these steps, you can effectively schedule a post on Instagram, saving time and ensuring a consistent presence on the platform.

