Face ID has revolutionized the way we interact with our iPads, offering a seamless and secure method to unlock our devices and authenticate purchases with just a glance. This advanced facial recognition technology adapts to changes in your appearance over time, providing both convenience and enhanced security. However, there may be occasions when you need to reset your Face ID.
This could be due to persistent recognition issues, a desire to reconfigure the feature for better performance, or if you’re preparing to hand over your device to someone else. Understanding how to properly reset Face ID ensures that your iPad continues to operate smoothly and securely.
This comprehensive guide will walk you through the step-by-step process of resetting Face ID on your iPad, ensuring you can manage your device’s security features with ease and confidence.
Watch: How To Mute & Unmute iPad
Reset Face ID On iPad
If Face ID is currently set up, the first step is to unlock your iPad. You can do this by swiping up from the bottom of the screen or entering your passcode. Once your iPad is unlocked, locate the Settings app icon, which resembles a gear cog, and tap on it to open the Settings menu.
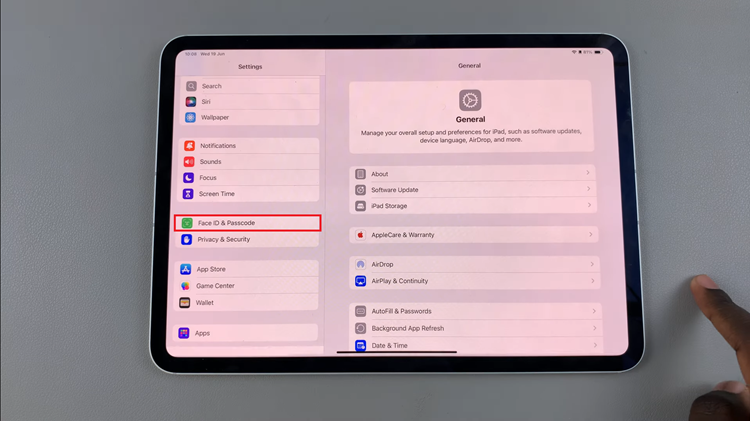
Next, in the Settings menu, scroll down until you find the “Face ID & Passcode” option and tap on it. To proceed, you will need to enter your passcode. This step ensures that only authorized users can make changes to the Face ID settings.

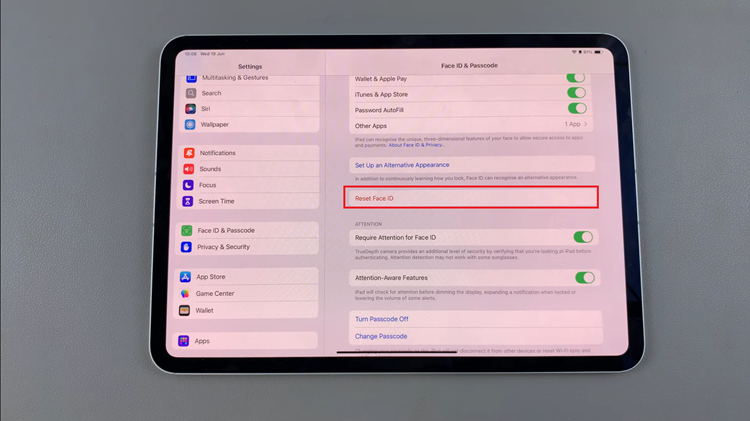
Once you are in the Face ID & Passcode settings, look for the “Reset Face ID” option. Tap on “Reset Face ID” to remove the current facial recognition data from your device. After resetting Face ID, you have the option to set it up again immediately. To do this, tap on the “Set Up Face ID” button. Follow the on-screen instructions to scan your face again.

By following these detailed steps, you can easily reset and reconfigure Face ID on your iPad, ensuring that your device remains secure and personalized to your needs.
Read: How To Enable Picture In Picture Mode (PIP) On M4 iPad Pro

