Staying connected with friends and family is easier than ever with Facebook Messenger, a versatile messaging platform that allows instant communication across various devices. Enabling notifications on your iPad ensures that you are promptly alerted to messages and updates.
Enabling Messenger notifications involves navigating through your iPad’s settings to configure specific options that dictate how and when you receive alerts. This guide will walk you through the detailed steps to enable Facebook Messenger notifications on your iPad, ensuring you never miss a message or important update.
By the end of this article, you will know to seamlessly integrate Messenger notifications into your iPad experience, enhancing your ability to stay informed and connected in real time.
Watch: How To Enable Guided Access On iPad
Enable Facebook Messenger Notifications On iPad
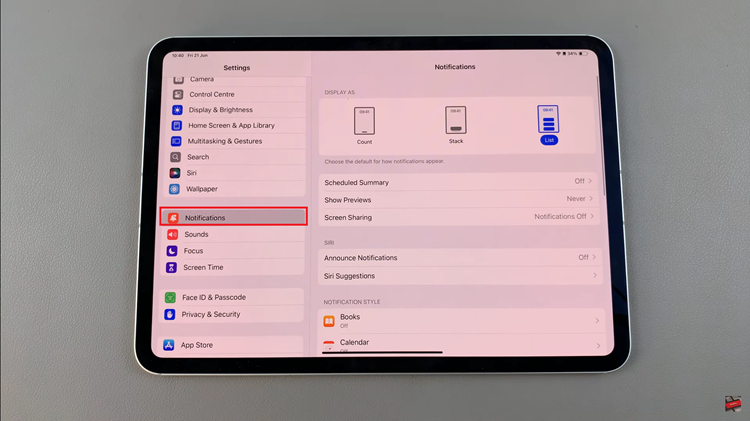
Begin by navigating to your iPad’s home screen and tap on the “Settings” app, represented by a gray gear icon. From there, scroll down until you find the “Notifications” option and tap on it to proceed.

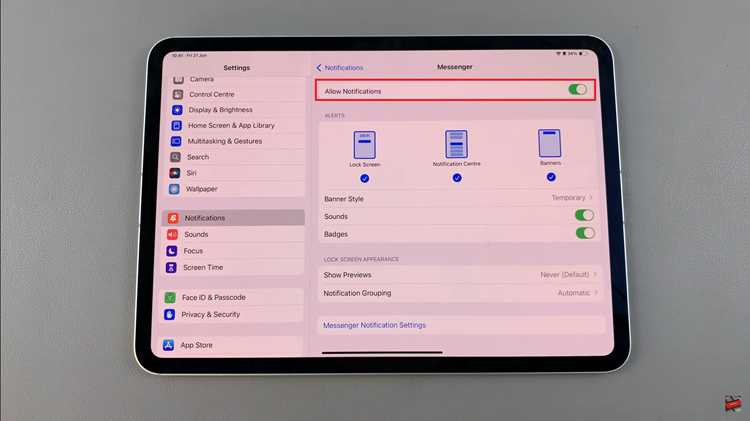
Within the Notifications settings, continue scrolling until you locate “Messenger” in the list of apps. Tap on Messenger to access its specific notification settings. You will find a toggle switch next to “Allow Notifications.” Toggle this switch to the right (green) to enable Messenger to display notifications on your iPad.

Once you have enabled notifications for Messenger, you can exit the Settings page by pressing the Home button or swiping up from the bottom of the screen (depending on your iPad model) to apply the changes. These steps ensure that you receive timely alerts for messages and updates through Facebook Messenger on your iPad.
By following these steps, you can ensure that you never miss a message on Facebook Messenger while using your iPad. Stay connected and enjoy seamless communication with your friends and family through Messenger notifications on your iPad!

