In today’s digital age, our devices often automatically update apps to ensure they’re running smoothly and securely. While this feature offers convenience by keeping apps up-to-date with the latest features and security patches, it might not always align with your preferences.
For instance, you may prefer to manually manage updates to review changes or ensure compatibility with other software. Additionally, disabling automatic updates can be beneficial if you have limited data plans and want to control when data-intensive updates occur.
If you own an iPad and want more control over when apps are updated, disabling automatic updates is a straightforward process. This guide will walk you through the steps to disable automatic app updates, allowing you to tailor your device’s settings to better suit your needs and preferences.
Watch: How To Disable Notification Center On iPad
Disable Automatic App Updates On iPad
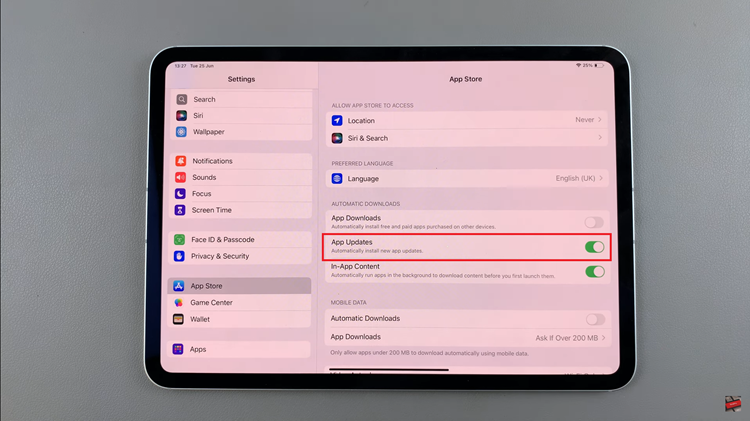
To disable automatic app updates on your iPad, begin by unlocking your device and navigating to the “Settings” app, identifiable by its gear icon on the home screen. Once inside the Settings menu, scroll down until you locate and tap on “App Store.” This will direct you to the specific settings related to app updates and downloads.
Within the “App Store” settings section, you’ll find various options, including one labeled “App Updates.” Here, toggle the switch next to “App Updates” to the OFF position. This action effectively disables automatic updates for all apps installed on your iPad. Once you’ve made this adjustment, ensure to exit the Settings app to save the changes.

By following these simple steps, you can adjust your iPad’s settings to suit your preferences regarding app updates, ensuring a smoother and more controlled experience tailored to your needs.

