In today’s fast-paced digital world, staying connected and informed is more important than ever. With the iPad being a central hub for communication, entertainment, and productivity, ensuring you never miss a critical message is essential.
Whether it’s an urgent text from a family member, an important iMessage from a colleague, or just a friendly note from a friend, having message notifications enabled on your iPad can significantly enhance your connectivity and responsiveness. This guide will walk you through the simple yet crucial steps to enable message notifications on your iPad, ensuring you are always in the loop and can respond promptly to any incoming messages.
By following these detailed instructions, you can customize your notification settings to suit your preferences and needs, making your iPad an even more efficient tool in your daily life.
Watch: How To Change Your Passcode On iPad
Enable Message Notifications On iPad
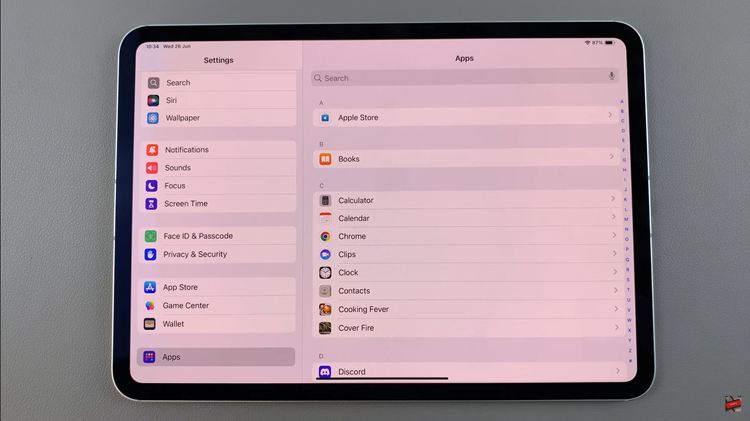
To begin configuring message notifications on your iPad, start by locating and tapping the Settings app icon on your device’s home screen. Once inside Settings, scroll down until you find the “Apps” option in the left-hand menu, then tap on it. This will open a list displaying all applications currently installed on your iPad.

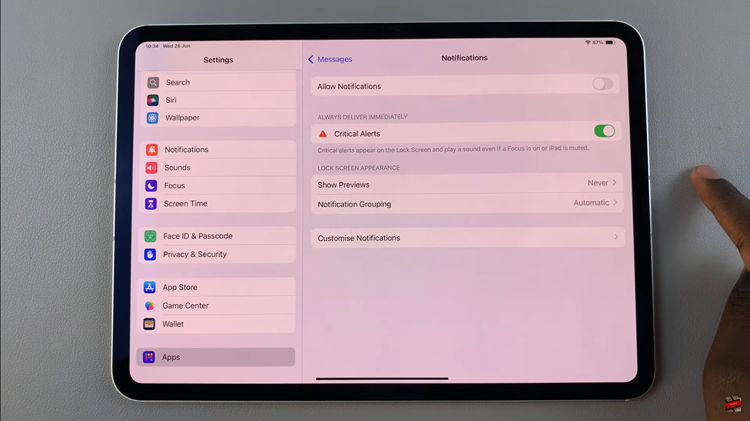
Then, continue scrolling through the list of apps until you find the “Messages” app. Tap on “Messages” to access its specific settings. Inside the Messages settings, tap on “Notifications,” then proceed to select the option labeled “Allow Notifications.” At this point, toggle the switch next to it to the ON position. Enabling this option ensures that your iPad will display notifications whenever you receive new messages.

By following these steps, you can easily enable message notifications on your iPad, ensuring you never miss important communications. Keeping notifications enabled helps you stay connected and informed wherever you go.

