In today’s digital age, our devices are extensions of ourselves, and having the right tools can significantly enhance our productivity and overall user experience. One such tool is Gboard, the Google Keyboard, which has become a favorite among users due to its impressive features and seamless integration with Google services.
Unlike the default iOS keyboard, Gboard offers a range of functionalities, including glide typing, integrated Google search, GIFs, emojis, and support for multiple languages. For iPad users, adding Gboard can transform the way you interact with your device. Whether you’re composing emails, chatting with friends, or performing web searches, Gboard’s capabilities can streamline these activities, making them quicker and more enjoyable.
This guide will walk you through the steps to add and use Google keyboard on your iPad, from downloading the app to customizing its settings to fit your needs. So, let’s dive in and enhance your iPad typing experience with Gboard.
Watch: How To Add Timestamps To Photos On iPad
Add & Use Google Keyboard On iPad
First, open the App Store on your iPad. Once there, search for “Gboard” in the search bar. After performing the search, you will see a list of results. Tap on the “Gboard – the Google Keyboard” app from these results. Following this, tap the “Get” button to initiate the download and installation process of the app.
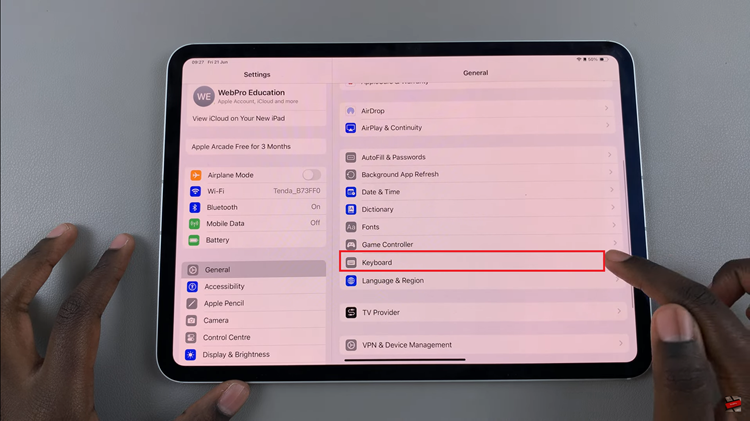
After the installation, launch the Gboard application to set it up for the first time. During this setup, you may be prompted to allow certain permissions to ensure the application functions correctly. If you wish to allow full access, you must open the Settings app, select “General”, and locate the “Keyboards” option. Proceed by tapping on this option to move forward.
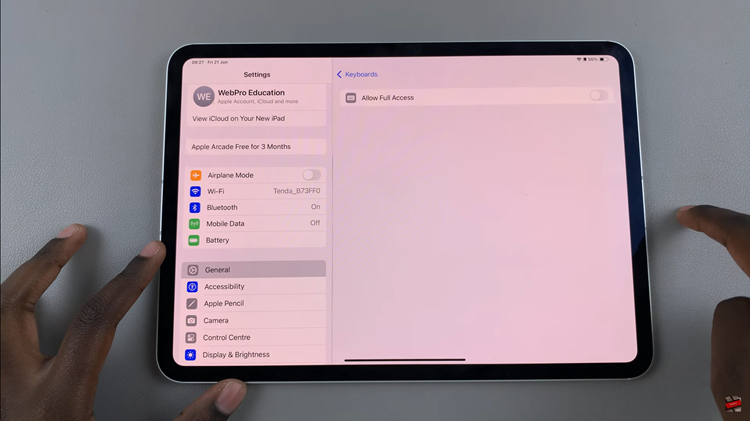
Within the keyboard settings, tap on “Keyboards” and then find and tap on “Gboard.” Here, you will see an option “Allow Full Access”. Toggle ON the switch next to it to enable this feature. Once you have allowed full access, head back to the Gboard application to customize the keyboard according to your preferences.
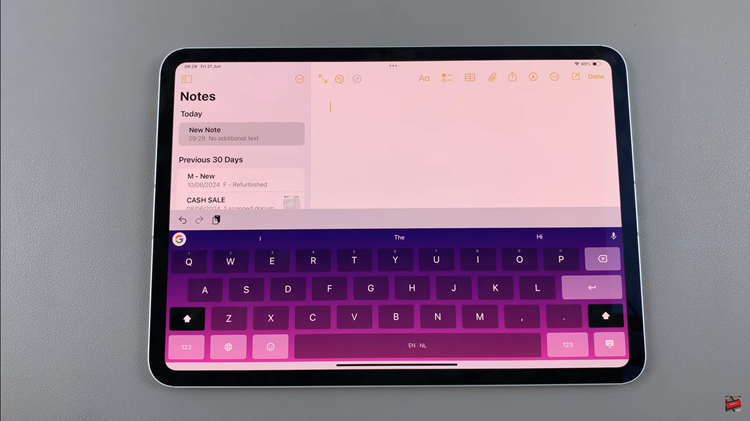
Finally, to start using Gboard, open any app that allows text input, such as Notes or Messages. Tap on the text field to bring up the keyboard. Press and hold the globe icon located at the bottom left side of the keyboard. From the options that appear, select “Gboard” from the list of available keyboards. Now, you can enjoy typing using the advanced features of Gboard.
In conclusion, adding and using Gboard on your iPad can significantly enhance your typing experience with its rich features and seamless integration. Follow the steps outlined above to install and start using Gboard today.
