Capturing moments through photography is a fantastic way to preserve memories, and the iPad, with its advanced camera technology, makes this task easy and enjoyable. However, simply taking photos isn’t always enough to keep track of when those moments happened. Adding a date and time stamp to your photos can significantly enhance your ability to organize and reference these memories.
Unfortunately, the native Photos app on the iPad doesn’t offer a built-in function to add date and time stamps to photos. However, don’t let this limitation deter you. There are several third-party apps available that can seamlessly integrate this functionality into your photo management routine.
In this guide, we will walk you through the steps to add timestamps to your photos on an iPad using these third-party applications. By the end of this article, you’ll be equipped with the knowledge to enhance your photo organization, making it easier to revisit your cherished memories with clear context.
Watch: How To Customize Assistive Touch Button Menu On iPad
Add Timestamps To Photos On iPad
Begin by opening the App Store on your iPad. Once the App Store is open, proceed to the search bar, which is typically located at the bottom of the screen. Then, search for “Date Stamper.” After locating the app in the search results, download and install it by tapping the “Get” button. Depending on your internet connection speed, this process might take a few moments.
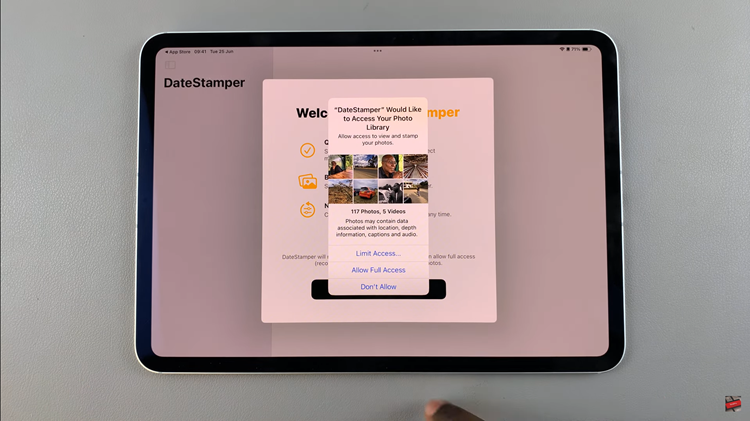
Once the installation is complete, open the Date Stamper app by tapping its icon. Upon launching the app for the first time, you will be prompted to allow the application to access your photo library. This permission is necessary for the app to retrieve and modify your photos. Approve this request to proceed further.
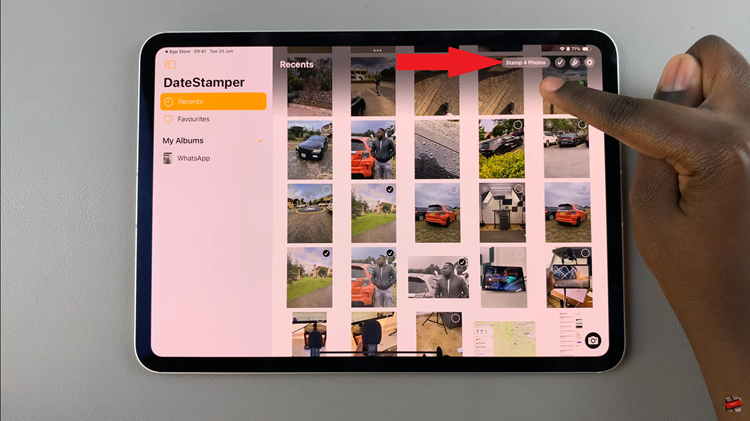
At this point, the app will display all the photos stored on your iPad. Browse through your collection to select the images you wish to add timestamps to. You can choose multiple photos by tapping on them individually. After selecting the desired photos, look towards the top right corner of the screen and tap on the “Stamp Photos” button. This action will initiate the process of adding date and time stamps to the selected images.
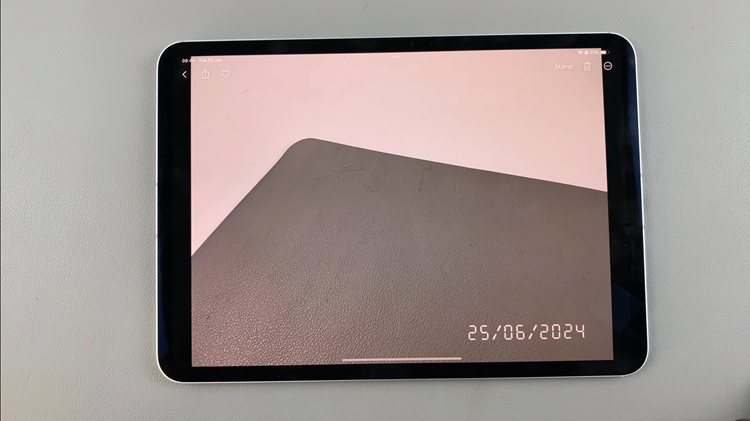
Once the stamping process is complete, open any photos you selected. You will now see the photos’ date and time stamps, clearly indicating when they were taken. This feature is handy for organizing your photo library and recalling memories with precise timestamps.
By following the steps above, you can easily add date and time stamps to your photos on your iPad, helping you keep your memories organized and easily accessible.
