The iPad is renowned for its intuitive design and ease of use, but Apple’s commitment to accessibility ensures that all users, regardless of their physical abilities, can enjoy its full potential. One of the standout accessibility features on the iPad is Assistive Touch. This versatile tool provides an on-screen menu that can replicate physical button functions and perform complex gestures, making it an invaluable aid for users who find it challenging to interact with the touch screen or physical buttons.
Assistive Touch goes beyond merely replicating existing functions; it can be customized to fit your unique needs and preferences. Customizing the Assistive Touch menu is not only beneficial for users with accessibility needs but also for anyone looking to streamline their device usage and increase efficiency.
In this guide, we will walk you through the steps to enable and customize the Assistive Touch button menu on your iPad.
Watch: How To Type Requests To Siri On iPad
Customize Assistive Touch Button Menu On iPad
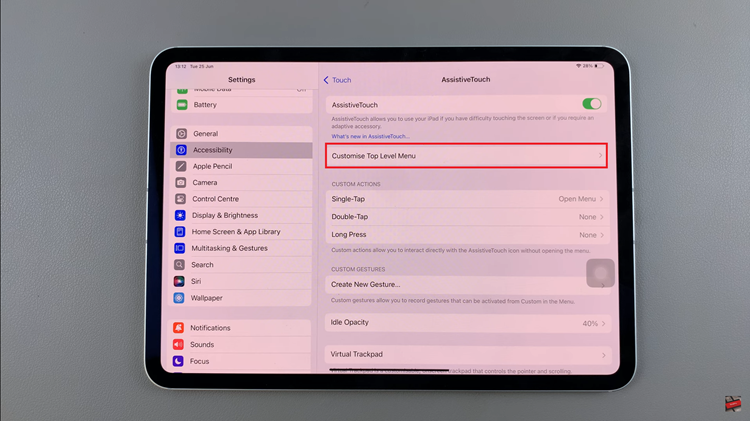
To begin customizing the Assistive Touch menu on your iPad, you must first enable the feature. Start by opening Settings > Accessibility > Touch > Assistive Touch and toggle the switch to the ON position.
Following this, you can proceed to customize its menu. To do this, scroll down within the AssistiveTouch settings and tap on Customize Top Level Menu. This option allows you to tailor the on-screen menu to better fit your needs and preferences.

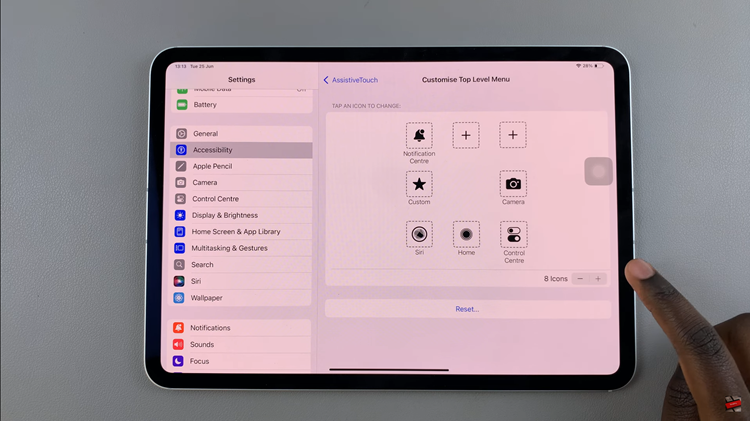
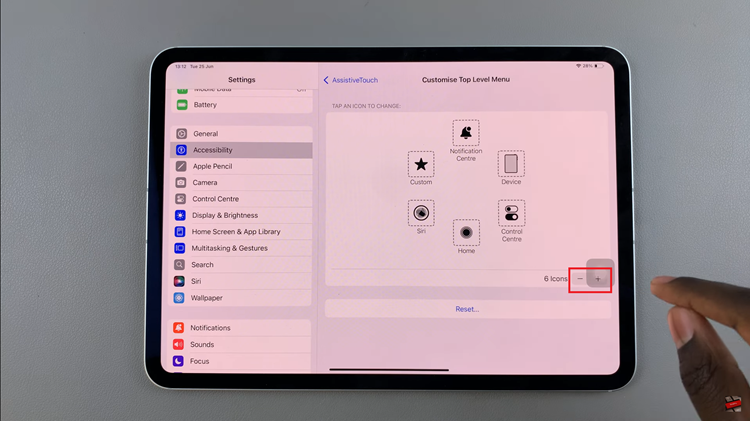
At this point, you can begin adjusting the menu items. You can add new icons by tapping the + button, allowing you to select additional actions or shortcuts that you frequently use. If you wish to replace existing icons, simply tap on an icon to choose a different action from the list.

Conversely, to remove icons, tap the – button, which will reduce the number of items in the menu. This flexibility lets you create a streamlined and efficient menu that includes only the most useful functions for you. Afterwards, you can exit the settings page.

In conclusion, customizing the Assistive Touch menu on your iPad can make your device much easier to use, especially if you need quick access to certain functions. By following these steps, you can tailor the menu to your specific needs and preferences, ensuring a more efficient and enjoyable user experience.

