Understanding the warranty status of your iPad is essential for knowing your device’s coverage and potential repair options. Whether you’ve recently purchased a new iPad or are considering buying a used one, knowing how to verify its warranty status can save you from unexpected repair costs down the line.
This guide walks you through the steps to check the warranty status on your iPad, ensuring you can make informed decisions about your device’s maintenance and protection. From using the Settings app to accessing Apple’s support services, here’s everything you need to know to keep your iPad covered.
By following these steps, you can confidently manage and protect your iPad investment.
Watch: How To Turn ON Live Photos On iPad
Check the Warranty Status On iPad
To check the warranty status of your iPad, start by launching the Settings app, identifiable by a gear icon usually located on your home screen. Once opened, navigate by scrolling down and tapping on “General” from the list of options provided.
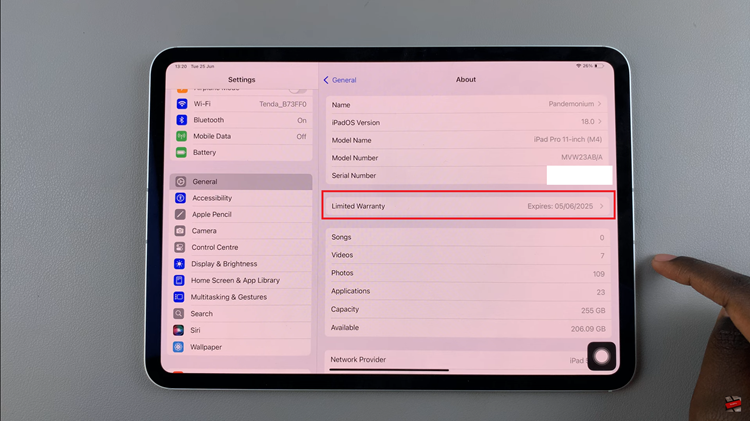
Then, within the General menu, locate and tap on “About” to access essential information about your device. At this point, you can find details such as device model, capacity, and importantly, warranty status. Look specifically for “Limited Warranty” to see if your device is covered and view the start and end dates of the warranty period.

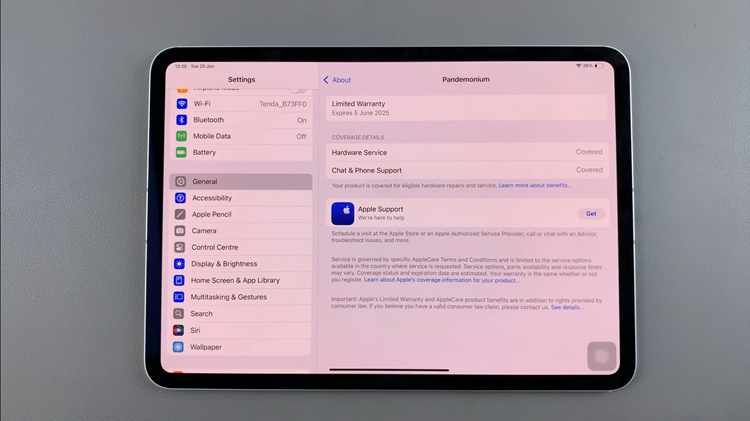
For more comprehensive details about the warranty coverage, you can tap on “Limited Warranty” to delve deeper into the specifics. This section will provide additional information and may include options for extending coverage or details about AppleCare+ if applicable.

By following the steps above, you can easily determine the warranty status of your iPad, ensuring you’re aware of its coverage and any potential repair options available to you. This information is essential whether you’re buying, selling, or simply managing your device.

