Keeping your iPad’s operating system up-to-date is crucial for maintaining the device’s performance, security, and access to the latest features. Automatic iOS updates ensure that your iPad installs the newest updates without requiring manual intervention, which can be particularly convenient for users who prefer a hands-off approach.
However, there are instances where you might want to control when and how your device updates. For instance, you might prefer to wait for feedback on new updates before installing them, or you might want to ensure updates occur at a specific time to avoid disruptions.
This guide will walk you through the steps to enable and disable automatic iOS updates on your iPad, giving you the flexibility to manage your device’s updates as you see fit.
Watch: How To Turn OFF Facebook Notifications On iPad
Enable & Disable Automatic Updates On iPad
Start by tapping the Settings icon on your iPad’s home screen. This icon resembles a gear and is the gateway to all system settings. Once you’ve accessed the Settings menu, you’ll need to navigate to the next step.
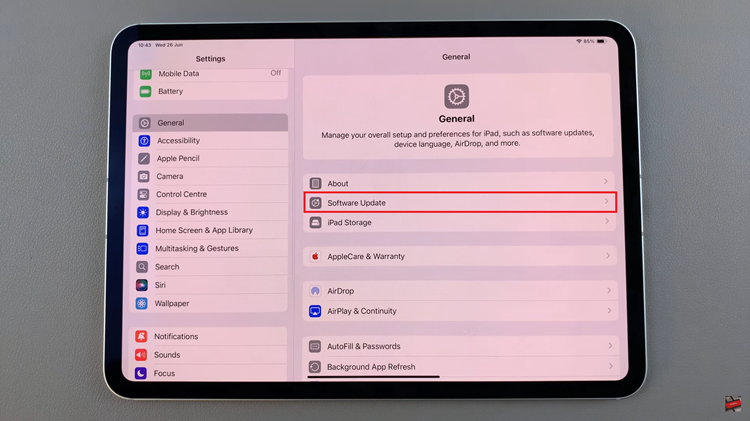
At this point, scroll down the left-hand menu until you find the General option. Tap on General to reveal more specific settings. Following this, tap on Software Update, which is typically the first option listed under the General settings. This section is dedicated to managing updates for your iPad’s operating system.

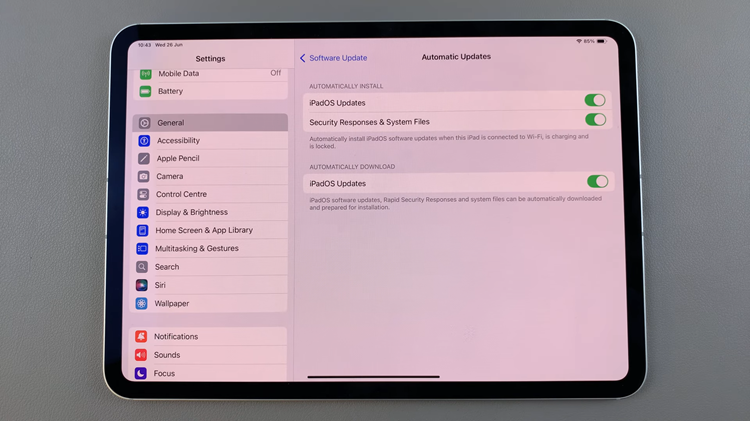
At this point, tap on Automatic Updates and then locate the iPadOS Updates option. Here, you’ll see a toggle switch next to it. From here, you can toggle the switch to either the ON or OFF position, depending on whether you want to enable or disable automatic updates. Finally, simply exit the settings page to apply the changes.

By following these steps, you can manage automatic iOS updates on your iPad according to your preferences, ensuring your device stays secure and up to date with the latest features from Apple.

