Mastering image adjustments in Canva opens a vast realm of creative possibilities. Every visual element can be enhanced with precision and flair. Whether you’re an experienced designer or new to digital creativity, understanding Canva’s tools is crucial.
From basics like brightness to advanced techniques such as color correction, each feature refines designs. Our guide explores Canva’s editing nuances, empowering you to transform raw images into polished masterpieces.
Join us as we uncover effective adjustment secrets, crafting resonant, stunning visuals.
Watch:How To Create a 3D Effect In Canva
Adjusting an Image In Canva
Here’s how:
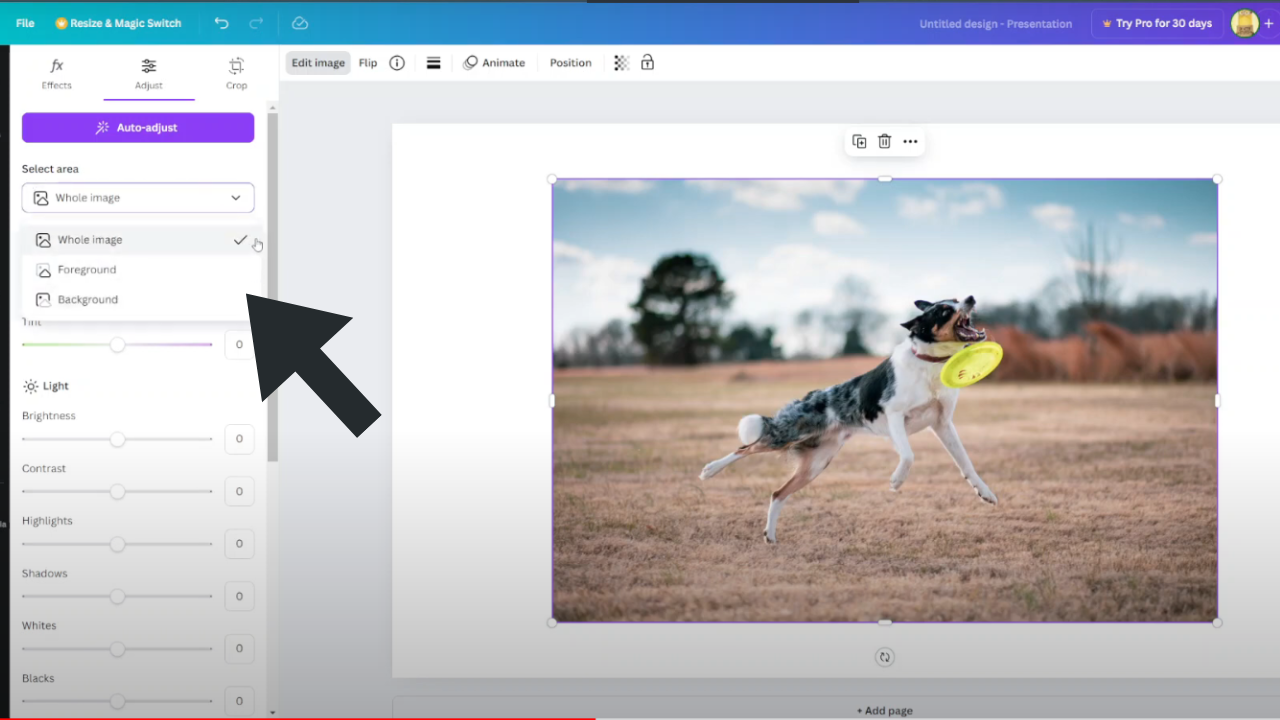
Step 1:Begin by selecting the image you wish to edit. Click on ‘Edit Image’ located at the top menu to initiate the editing process

Step 2:Once in the editing interface, navigate to the ‘Adjust’ option. Here, you’ll find a range of tools to refine your image

Step 3:Select the option adjust and from here you can click auto adjust and you picture will be adjusted in the best possible way automatically or you can adjust the brightness,contrast,highlights and temperature automatically.

Canva provides flexibility in selecting the part of the image you want to adjust. Whether you opt to modify the entire image, foreground, or background, Canva’s intuitive tools ensure precise and effective editing tailored to your creative needs.

These steps empower you to transform your images with ease, leveraging Canva’s versatile editing capabilities to create visually stunning designs.
