This article explores the step-by-step process of flipping text in Canva, guiding you through each stage with clear instructions and transitional words that smoothly transition from one step to the next.
In the realm of digital design, understanding how to manipulate elements like text can make a substantial difference in the final aesthetic and effectiveness of your visuals. Transitioning seamlessly from traditional horizontal text to flipped variations can evoke different moods, emphasize key messages, or simply add a playful twist to your designs.
Whether you’re looking to create eye-catching social media posts, professional presentations, or personalized invitations, the ability to flip text in Canva empowers you to achieve these goals with ease.
This guide will walk you through the fundamental steps, using transitional words to ensure a cohesive flow of instructions that anyone can follow, regardless of their level of design expertise.
Watch:How To Make Instagram Stories In Canva
Flipping Text In Canva
Here’s how you do it;
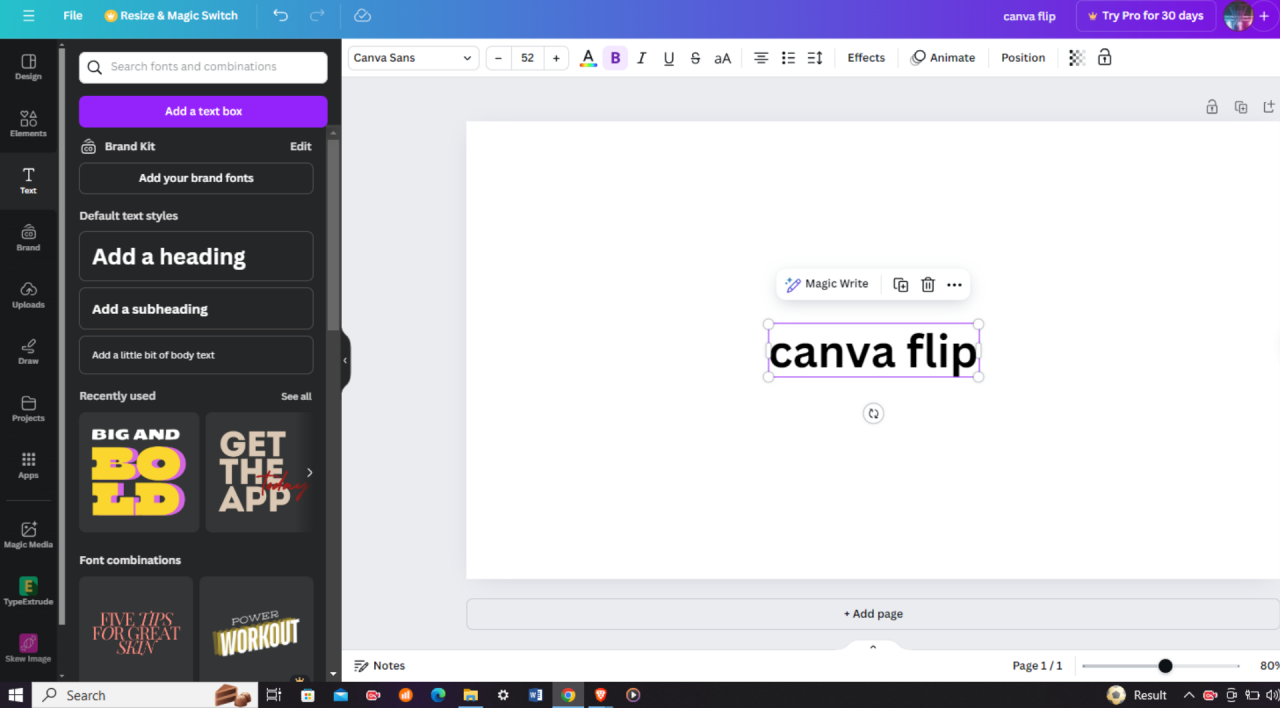
Step 1: Add Text Start by clicking on the “Text” tool in the left-hand toolbar of Canva. This action allows you to add a text box directly onto your canvas. Input your desired text and customize its appearance using Canva’s formatting options such as font style, size, color, and alignment.
Step 2: Share and Download Once your design is complete, navigate to the top right corner of the Canva interface and click the “Share” button. From the dropdown menu, select either PNG or JPEG format to download your project. Save the file to your computer for sharing or printing.
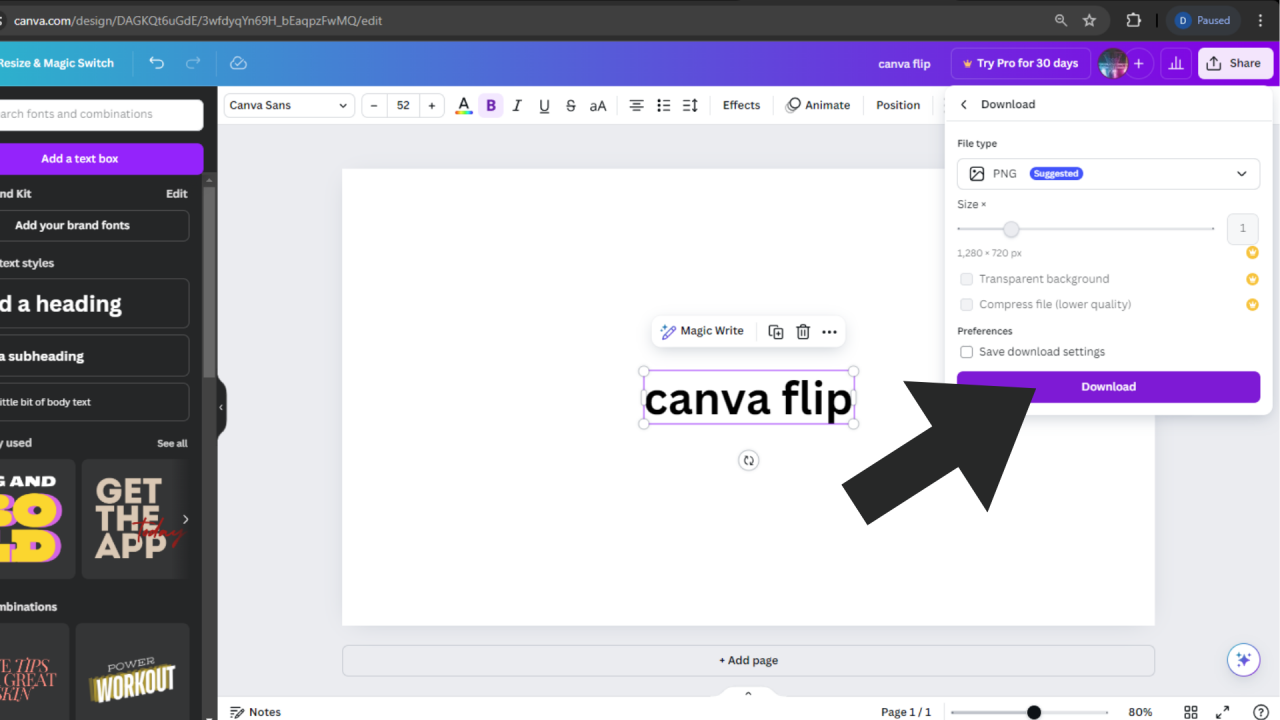
Step 3: Upload and Integrate If you want to incorporate your design into other projects or make further adjustments, use Canva’s upload feature. Click on the “Upload” button in the left-hand toolbar, and select your saved project file from your computer or cloud storage. Canva will seamlessly integrate your design onto the canvas, allowing you to adjust its position and layer it with other elements.
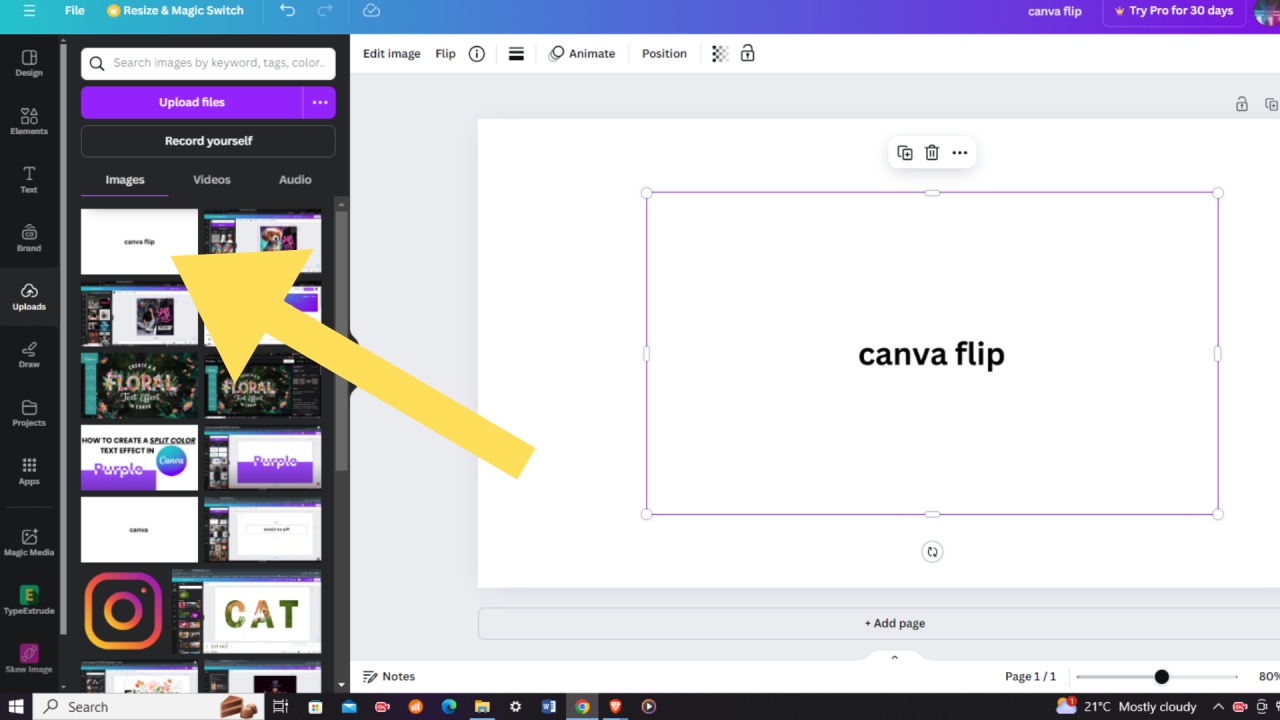
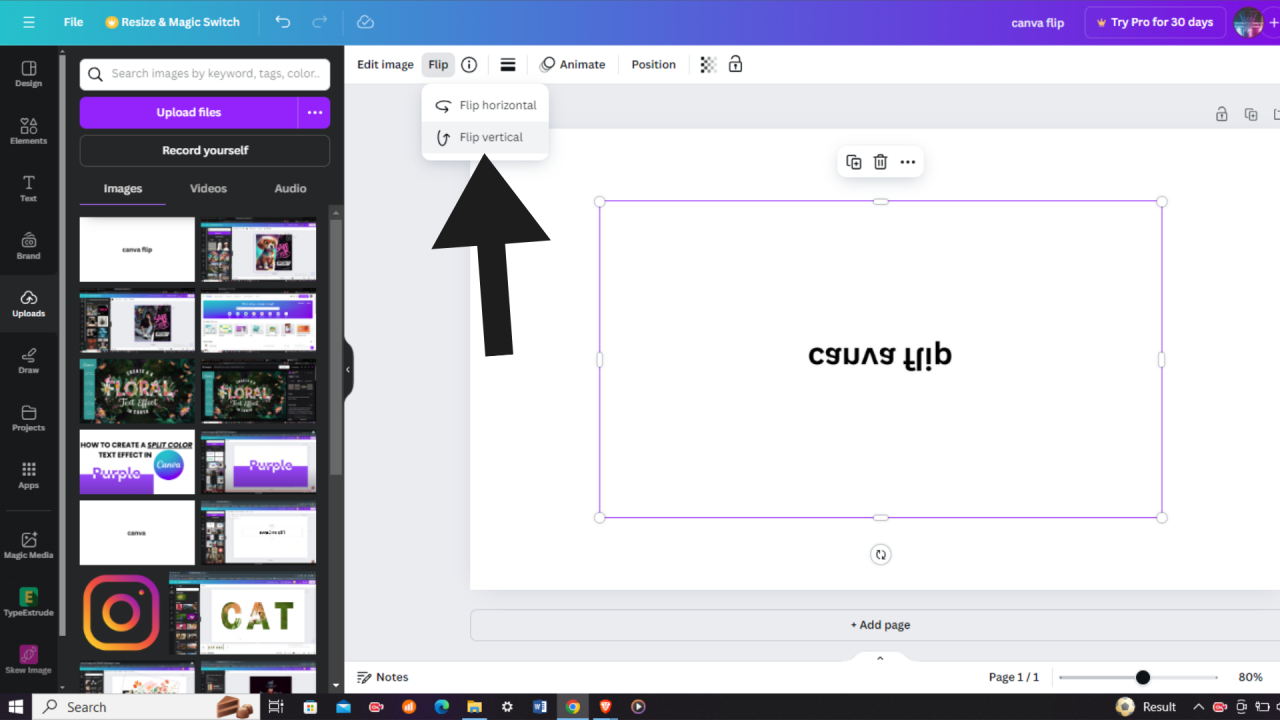
Step 4: Flip Your Design For additional creative possibilities, explore Canva’s “Flip” feature located at the top of the page. Click on the “Flip” option and choose to flip your design horizontally or vertically. This feature allows you to experiment with different visual orientations and enhance the overall look of your project.
