In a world that revolves around tools like Outlook or Mail, managing your inbox quickly is of the utmost importance to keep yourself organized and productive. Reading Pane is a feature by Gmail, one of the most popular mail platforms should be enabled for effective email management.
Having the Reading Pane lets you streamline your day to only needing to open those emails that require it, saving a lot of time and so much work throughout your process. It’s an easy process to enable the Reading Pane in Gmail and can probably save you a moderate amount of time when using your inbox.
This guide walks you through the steps to enable Reading Pane in Gmail, so that you can personalize your email experience and work more productively.
Watch: How To Create Google Account On Windows PC
Enable Reading Pane On Gmail
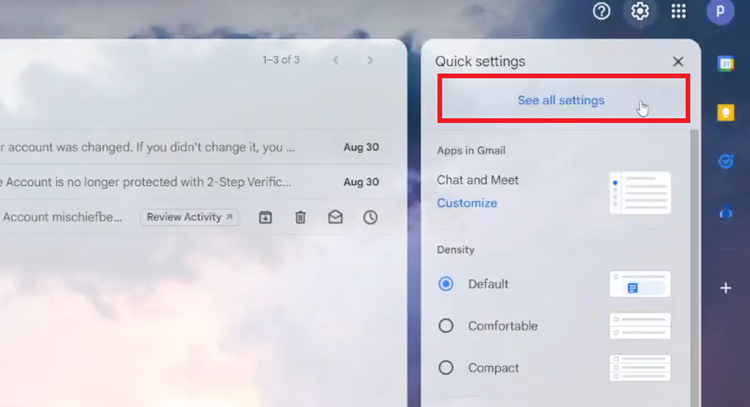
To begin, launch your favorite browser. From here, access your Gmail account, then log in to your Google account when prompted. Then, tap on the “Settings” icon at the upper right corner of the screen and select “See All Settings.”
Following this, select the “Inbox” tab and scroll down until the “Reading Pane” option. From here, click on the checkbox next to “Enable Reading Pane” to enable this feature.
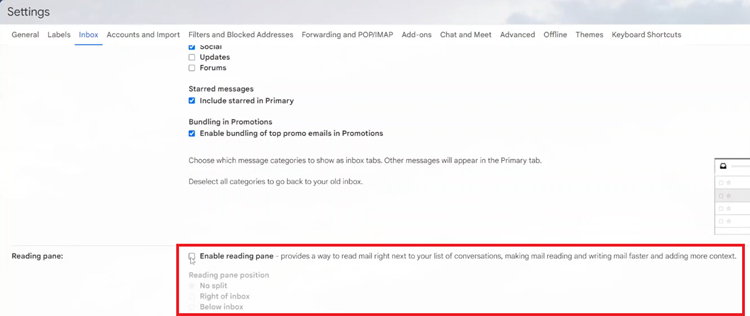
Subsequently, you’ll be prompted to choose the location you’d like the reading pane to appear. Once done, scroll down and click on “Save Changes.” Whenever you open your email, the reading panel will appear at the designated location.
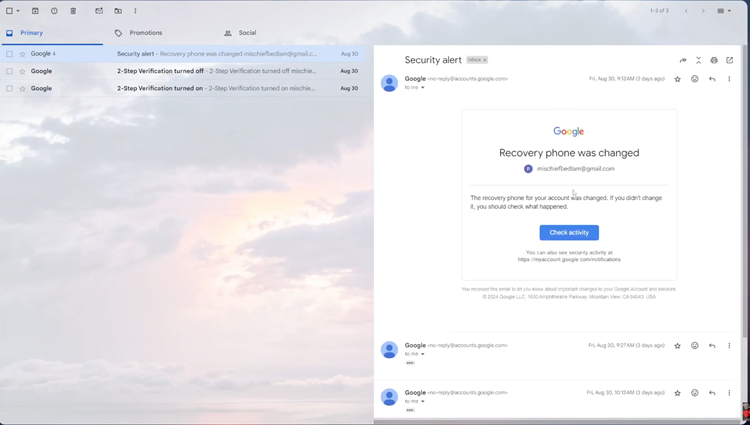
In conclusion, enabling the Reading Pane in Gmail is a simple yet powerful way to streamline your email workflow. By following the steps outlined above, you can preview and manage your emails more efficiently without opening each one fully.
