Adding location data to your iPhone photos not only helps you remember where your memories were made but also makes organizing and searching your photo library easier.
Sometimes, however, the location might be missing, or you might want to manually add or adjust it. In this article, we’ll walk you through how to add (edit) location information on your iPhone photos.
The iPhone camera, when enabled, automatically tags photos with location data using GPS. This is particularly useful for organizing photos by sorting and filtering images based on location in the Photos app.
Viewing where a photo was taken can spark memories or help recall specific trips or events. This can make it easier for sharing on certain apps and platforms. Apps like Instagram and Twitter display the location where your picture was captured, if you have set them to.
Watch: Remove Location From Photos On iPhone
Enable Location Services
Before adding or editing location data, it’s important to ensure that location services are enabled on your iPhone. This allows the iPhone to automatically add GPS data to your photos when you take them.
To do this, open the Settings app on your iPhone. Inside the Settings menu, scroll down and select Privacy & Security.
Under Privacy & Security, tap on Location Services. Make sure the toggle next to Location Services is enabled before you proceed.
Scroll down to find the Camera option and select it. This will open the page where you can control whether your location is used to tag where photos and videos are taken. When enabled, it can improve photos search and memories.
You will receive three options.
Never: This option will not allow location access, therefore, no location will be saved on your photos or videos.
Ask Next Time or When I Share: A confirmation prompt will always appear to ask you whether you want to allow location access. This will happen whenever you’re sharing the photo after taking it via the Camera app.
While Using the App: Location access will only be granted to the camera app while you’re using it.
Make sure you select While Using the App. This ensures your camera is allowed to use your location when you take a picture.
Add Location On iPhone Photos
If a photo doesn’t have location data, or you want to edit the existing location, you can manually add or adjust it using the Photos app.
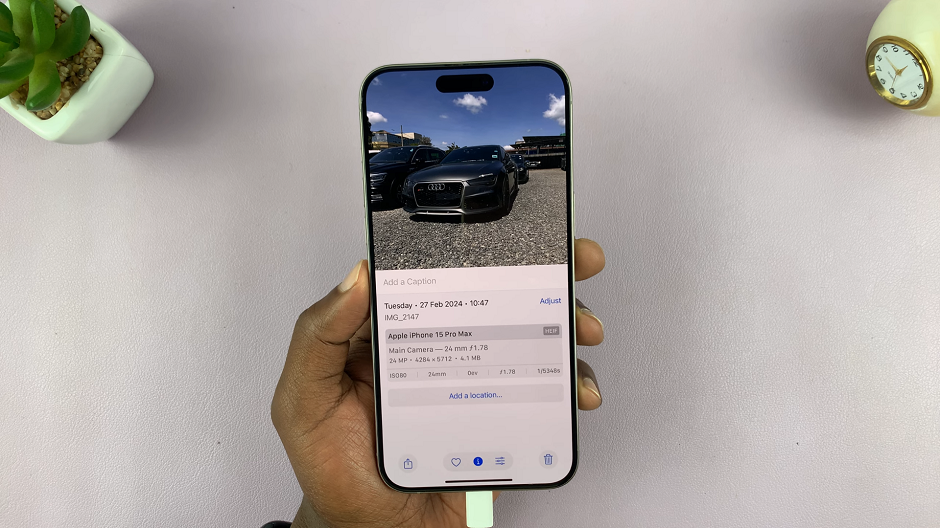
Simply launch the Photos app on your iPhone and find the photo whose location you want to add a location to. Swipe up on the photo or tap the info (ℹ️) icon at the bottom of the screen to view more data including the location option.
Tap on the Add a Location option. This will bring up a text box where you can manually type in and select a location from the resulting options.
Use the keyboard to key in the location you want to assign to the photo. You will receive a list of location tags based on the location you typed.
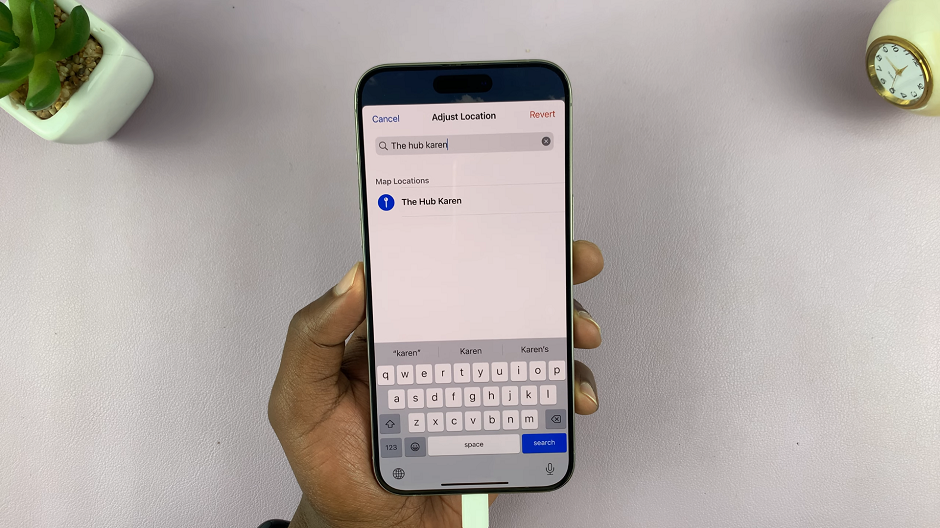
Select the correct location from the map options, and your iPhone will update the geotagged location for that photo instantly.
The location will now be saved to the photo’s metadata, and you’ll be able to view it in the Places section of the Photos app.
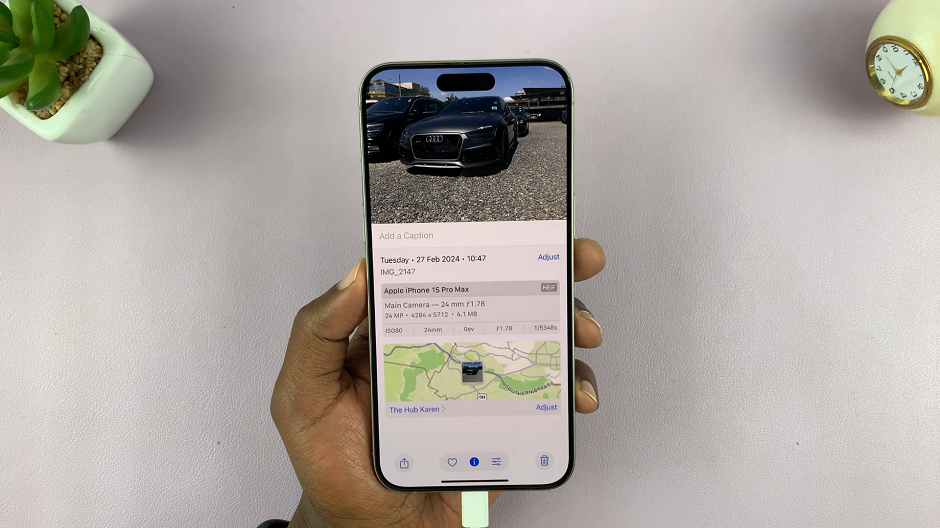
Edit the Location of an iPhone Photo
If a photo has incorrect location data or you simply want to change it, open the Photos app and select the photo whose location you want to change.
Swipe up or tap on the info (ℹ️) icon to open the photo details. Tap on Adjust next to the location currently listed under the photo and start typing the new location in the search bar.
Choose the correct location from the suggestions and your photo will now display the new location data.
Adding Location to Multiple Photos at Once
If you want to add or change the location for multiple photos at once, you can. This is especially useful if you forgot to add the location before. It can come in handy for photos you want to group from the same trip or event.
To do this, once again on the Photos app, tap on Select in the upper-right corner. Then, choose the photos you want to edit.
Once selected, tap the Share icon at the bottom of the screen. In the sharing menu, scroll down and tap Adjust Location.
Enter the location in the search bar and select it from the suggestions. This will apply the new location to all the selected photos.
Organizing Your Photos by Location
Once your photos have location data attached, you can easily browse and organize them by location in the Photos app. Simply tap on the Albums tab at the bottom of the screen.
Then, scroll down and find the Places option. This album shows a map with pins indicating where all your photos were taken. Tap on any pin to view the photos taken in that specific location.

