With the introduction of the M4 iPad Pro, Apple continues to innovate by providing more versatile connectivity options, including the ability to use an eSIM.
An eSIM (embedded SIM) is a digital SIM that allows you to activate a cellular plan from your carrier without having to use a physical nano-SIM.
This feature is particularly useful for travelers, dual SIM users, or anyone who wants the convenience of managing multiple carrier plans on one device. Here’s a comprehensive guide to help you set up an eSIM on your M4 iPad Pro.
Read: How To Force Quit Unresponsive Apps On M4 iPad Pro
Add eSIM On M4 iPad Pro
First, you will need the eSIM details provided by your carrier, which could come in the form of a QR code, activation code, or manual setup information. Contact your carrier if you haven’t received this information.
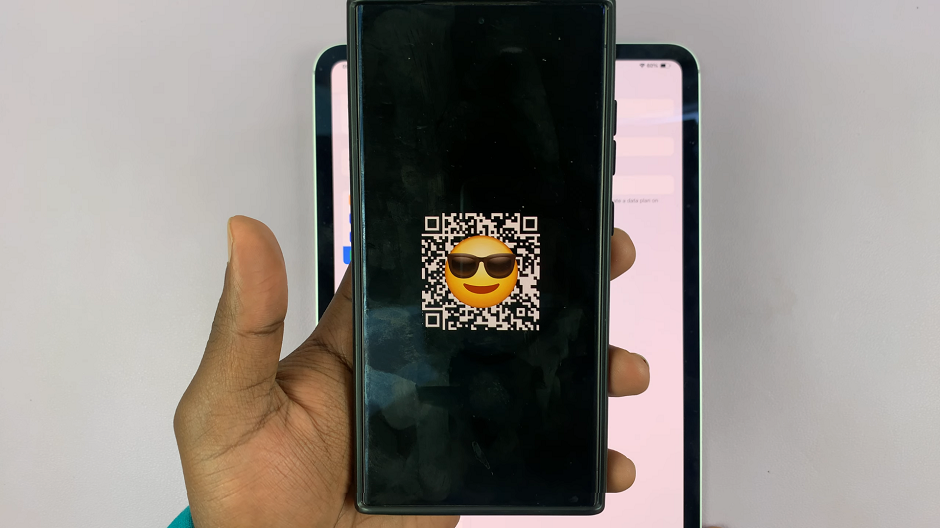
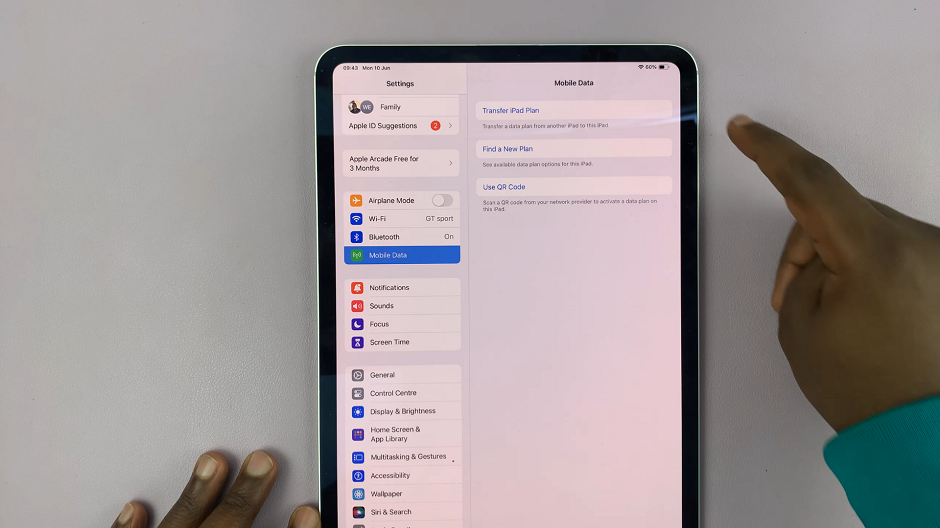
If your carrier provided a QR code, which most carriers do, open the Settings app on your iPad. Tap on Mobile Data in the left-hand side panel. Here, select the Use QR Code option.
Select Transfer iPad Plan or Find a New Plan, then follow the on-screen instructions, if you did not receive a QR Code.
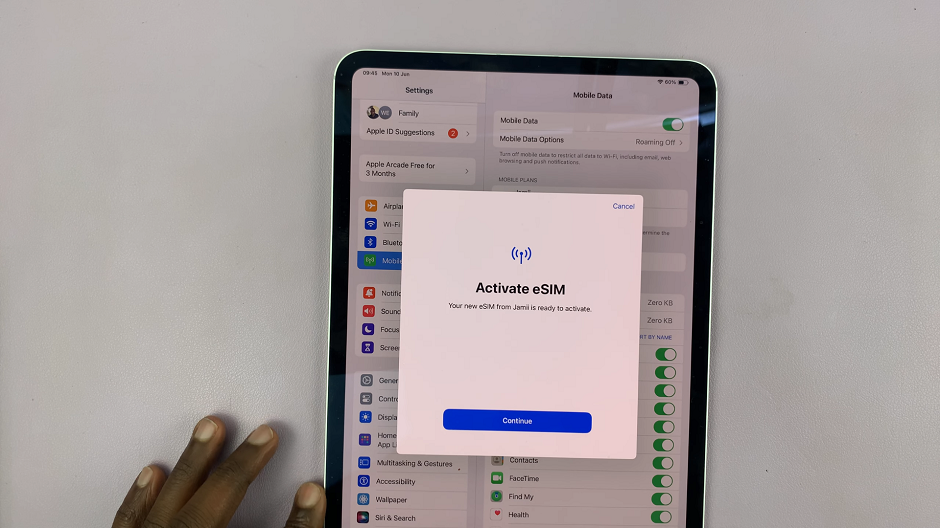
Use your iPad’s camera to scan the QR code provided by your carrier. Tap on Continue when the Activate eSIM window pops up. Wait for the activation to complete, so that you can be connected to the network. this may take a while.
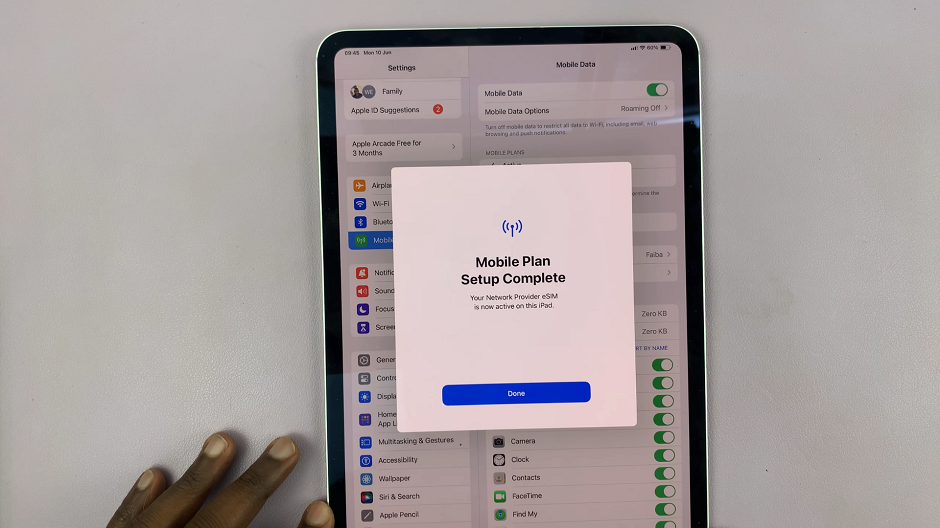
Once the connection is complete, you should be met by a window labelled Mobile Plan Setup Complete. Tap on Done.
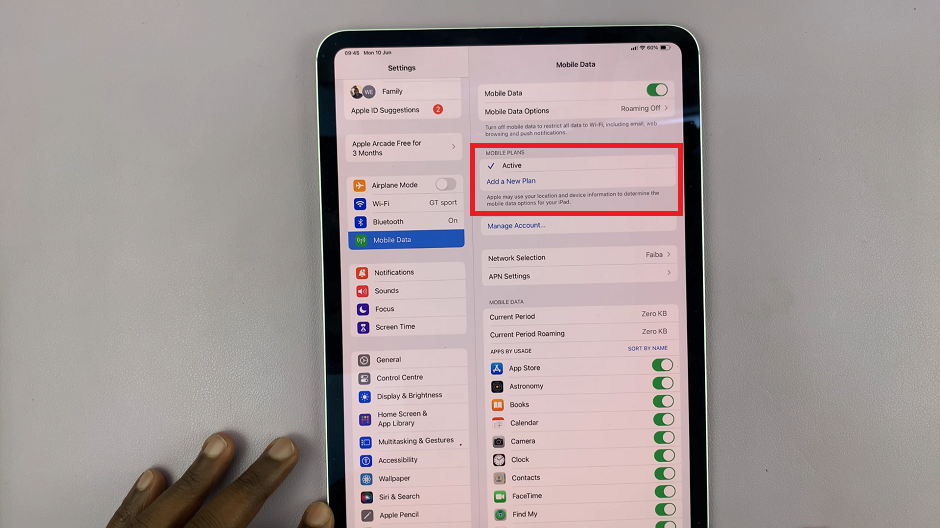
Under the Mobile Plans section, you should now see Active.
Tap on Add a New Plan if you wish to add another eSIM. One of the advantages of eSIM is the ability to have multiple profiles. Once you’ve added more than one, you will see a list of your cellular plans. Tap on the plan you want to use.
Toggle between different plans as needed. You can label each plan to make it easier to manage.
Troubleshooting Common Issues
If you encounter issues during the eSIM setup process, try the following troubleshooting steps:
Restart Your iPad: Sometimes a simple restart can resolve setup issues.
Check for Software Updates: Ensure your iPad is running the latest version of iPadOS.
Reset Network Settings: Go to Settings –> General –> Reset –> Reset Network Settings. Note that this will also reset Wi-Fi networks and passwords.
Contact Your Carrier: If problems persist, your carrier may be able to provide specific guidance or reset the eSIM details on their end.
Adding an eSIM to your M4 iPad Pro is a straightforward process that provides great flexibility for managing your cellular connectivity. Whether you’re setting up for travel, business, or personal use, following these steps will ensure a smooth setup. Enjoy the convenience and versatility that eSIM technology brings to your iPad Pro experience.
