In today’s interconnected world, multilingual capabilities on our smartphones have become increasingly important.
Whether you’re learning a new language or need to communicate with friends and colleagues in different regions, adding languages to your Android phone, such as the Samsung Galaxy, is a simple yet essential customization.
In this guide, we’ll walk you through the comprehensive step-by-step process on how to add a language on your Android phone (Samsung Galaxy).
Also Read: How To Turn ON Mobile Hotspot On Android 14 (Samsung Galaxy)
How To Add Language On Android Phone (Samsung Galaxy)
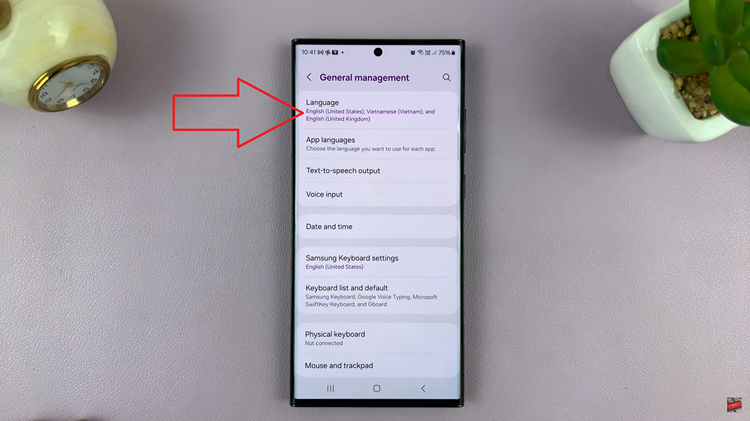
The first step is to open the Settings app. Once in the Settings, locate and tap on the “General Management” option. Within the General Management menu, you’ll find the “Language” option. Tap on it to access the language settings for your device.

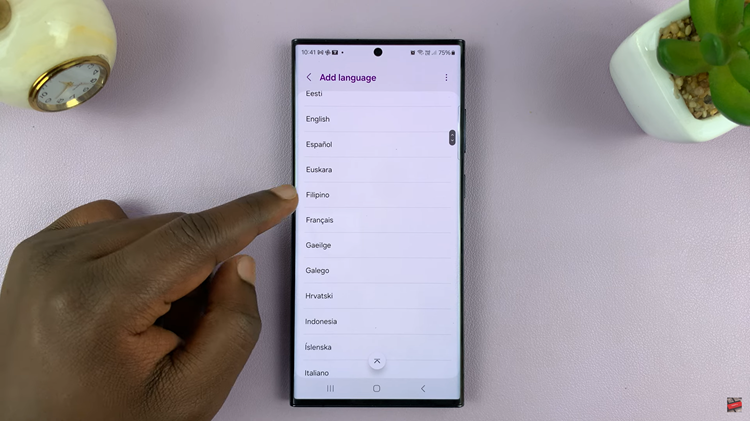
In the Language menu, tap on a button labeled “Add Language.” You’ll be presented with a list of available languages. Scroll through the list and choose the language you want to add. For instance, if you’re adding French, you’ll then have the option to select the specific region, such as Canadian French or French from France.

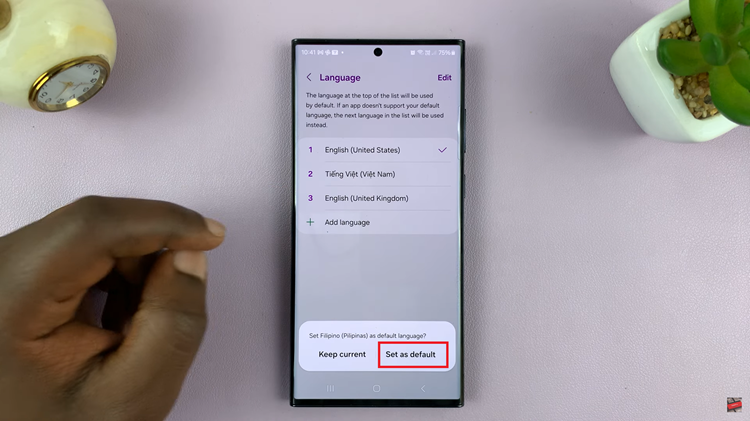
After selecting the language and region, you can choose to set it as your default system language. Setting a default language means that your phone’s system interface, menus, and default apps will be displayed in the chosen language.

Customizing the language settings on your Android phone is a straightforward process. Whether you’re a polyglot or simply need to communicate in multiple languages. These steps ensure that your smartphone is a versatile tool that meets your linguistic needs.
Watch: How To Change Screen Timeout Period On Android (Samsung Galaxy)

