In the dynamic world of mobile video editing, CapCut has established itself as a go-to application for creators seeking professional-level editing tools at their fingertips.
With its intuitive interface and a plethora of features, CapCut empowers users to transform their video footage into captivating visual stories. One of the standout features that CapCut offers is the ability to add a slow-motion effect, allowing you to infuse your videos with a touch of drama and intensity.
In this article, we’ll take you through the step-by-step process on how to add a slow motion effect in CapCut.
Also Read: How To Install iCloud On Windows 11 PC
How To Add Slow Motion Effect In CapCut
Begin by opening the app, and tap on “New Project“. Then browse and select a video from your photo library to create a new project.
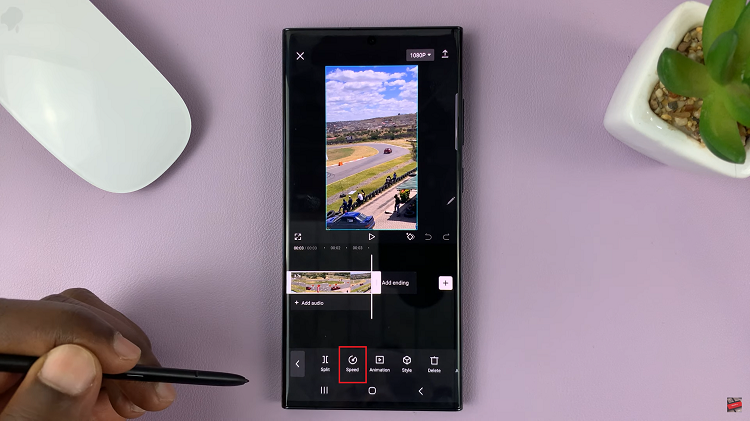
Next, locate the video clip timeline and tap on it. This action will reveal a set of editing options, among which you’ll find the trimming tool. On the editing menu select, “Edit” and choose “Speed” from the options you are given.

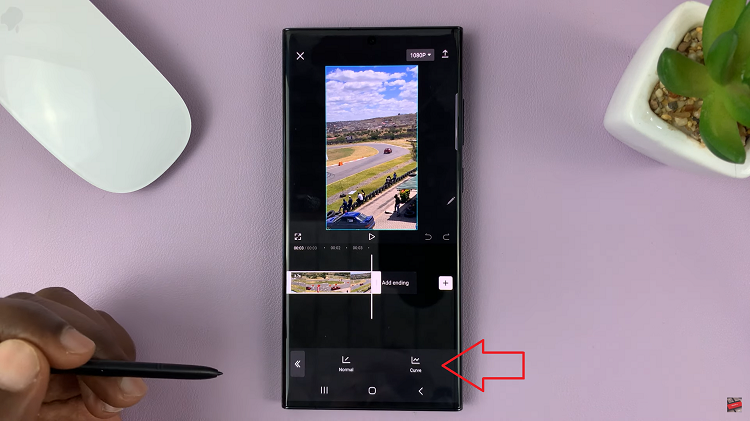
As you unlock the speed controls, CapCut presents you with an array of speed options. They are each tailored to craft your desired effect.
- Normal Speed Up: This function allows you to speed the entire video clip. CapCut permits speed increases of up to 2x and higher.
- Curve Speed Up: On the other hand, you can opt for this mode to accelerate specific portions of the video clip.

Once you’ve done with the slow-motion sequence, tap on the playback button to see if you are happy with it. When you’re satisfied with the result, tap on the checkmark or done button on your screen to save your work.

