Photographs have the magical ability to freeze moments in time, and timestamps take this experience a step further by providing a tangible connection to the temporal context of each image. Whether you’re capturing a spontaneous adventure, a family gathering, or a breathtaking sunset, timestamps serve as digital signposts, allowing you to relive those moments with accuracy.
The Samsung Galaxy S24 and S24 Ultra recognize the importance of this feature, and fortunately, integrating timestamps into your photos is a straightforward process.
This guide aims to walk you through the steps to add timestamps to photos on your Samsung Galaxy S24.
Watch: How To Turn ON Live Photos On Samsung Galaxy S24
To Add Timestamps To Photos On Samsung Galaxy S24
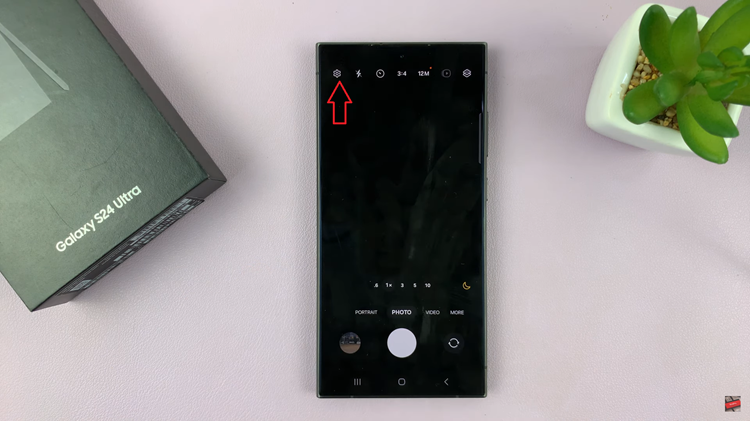
To get started, unlock your Samsung Galaxy S24 or S24 Ultra and open the Camera app. You can do this by tapping the camera icon on your home screen or accessing it from the apps menu.
Following this, look for the settings icon located at the top left corner of the screen. Tap on it to access the camera settings.

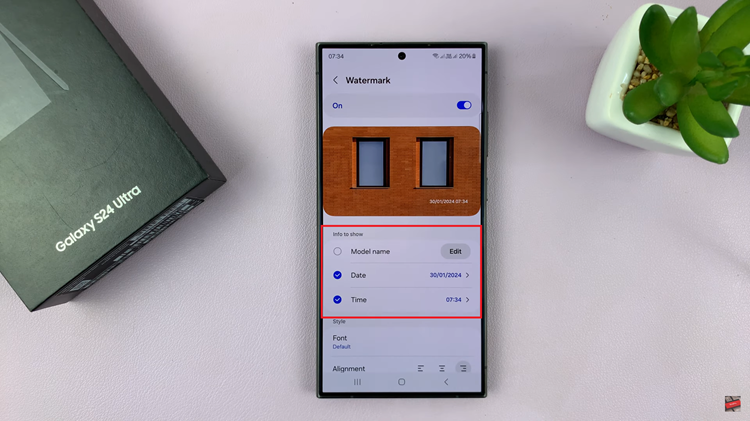
Within the camera settings, scroll down and select the “Watermark” option. At this point, toggle ‘ON’ the switch to turn it on. Once timestamps are enabled, choose to display the date and time from the settings that appear. Once activated, every photo that you capture will now have a timestamp displayed on the image.

In conclusion, adding timestamps on the Samsung Galaxy S24 and S24 Ultra is a simple yet effective way to enhance the significance of your captured moments.
Read: How To Enter & Exit Recovery Mode On Samsung Galaxy S24

