The iPhone’s user-friendly camera makes it possible for anyone to take great photos. You can make a few tweaks to your photo and make them look beautiful and stunning.
Exposure basically refers to the brightness of an image. A photo that is too bright is over-exposed while a too-dark photo is under-exposed. Getting the right exposure can result to a beautiful photo.
On your iPhone, you can either adjust the exposure by using the Photos app or using the camera as you take them. The guide below contains steps that will help you learn how to adjust exposure on iPhone.
Watch: How To Record Videos With Both Cameras On Samsung Galaxy S22 Ultra
Adjust Exposure on iPhone
There are two ways on adjusting exposure on the iPhone. You can use the Photos app or use the camera instead.
Using Photos App
You can adjust the exposure of a photo that you have already taken.
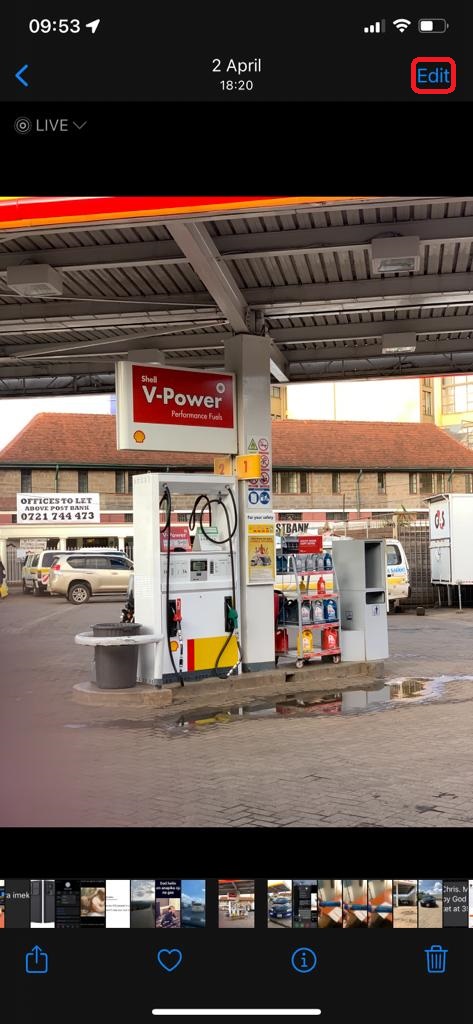
On the home screen, tap on Photos and select the photo you want.
Next, on the top left corner of the photo, click on Edit.
A menu will appear at the bottom of the photo. Click on the icon that has both the plus/minus icon (+/-). It’s the second icon on the menu.
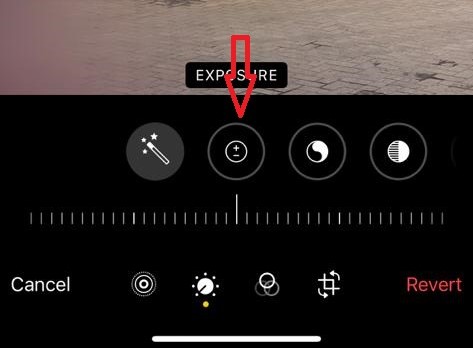
To adjust the exposure of the photo, use the exposure slider to slide left or right to darken the photo, or brighten the photo.
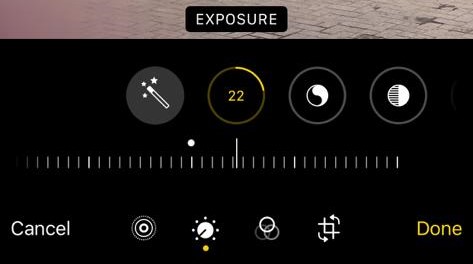
Once you get the sweet spot, tap on the exposure icon to lock it. Click on Done to save the changes.
Adjust Exposure on Camera
You can adjust the exposure of a photo as you take them.
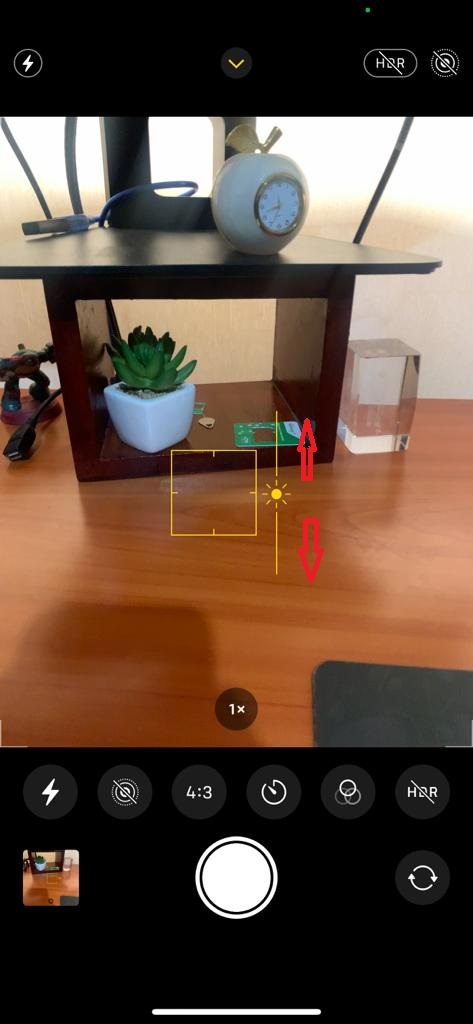
Launch the Camera app and tap on the screen. A box with a sun icon will appear on the screen.
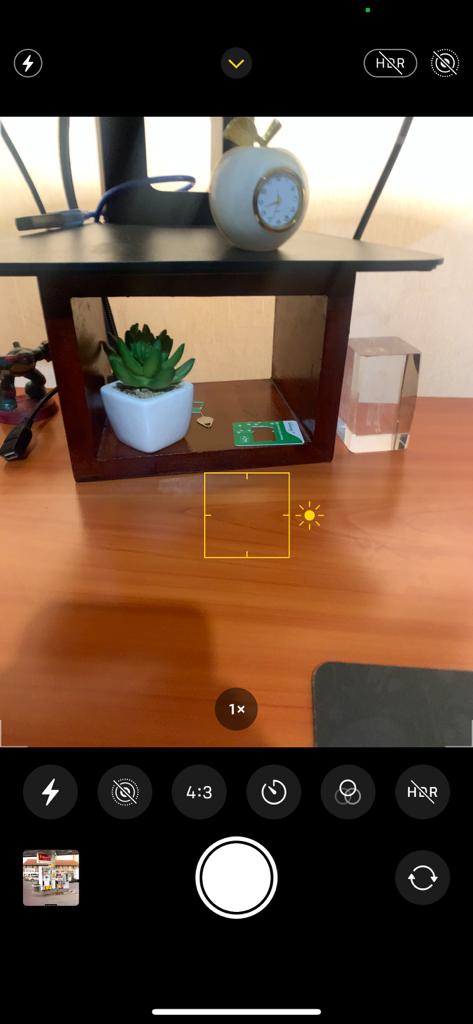
You can adjust the exposure by dragging the slider up or down to increase and decrease the brightness of the photo.
That’s how to go about it. Hope it helps. If you have any questions, let me know in the comment section below.
