Windows operating systems offer a plethora of customization options, allowing users to personalize their computing experience. One of the fundamental aspects of customization is altering the font size, which can significantly impact readability and user comfort.
Whether you seek to enlarge or reduce the font size for better visibility or aesthetics, Windows 10 and Windows 11 provide straightforward methods to adjust text sizes across the system.
This article will guide you through the process of how to change the font size on your Windows 10 or 11 computer.
Watch: How To Disable Read Receipts On WhatsApp
To Change Font Size In Windows 11 PC
Begin by opening the “Settings” menu. In Windows 10, click on the Start menu and select the gear-shaped icon. In Windows 11, you can click on the Start button and then the gear icon to access Settings.
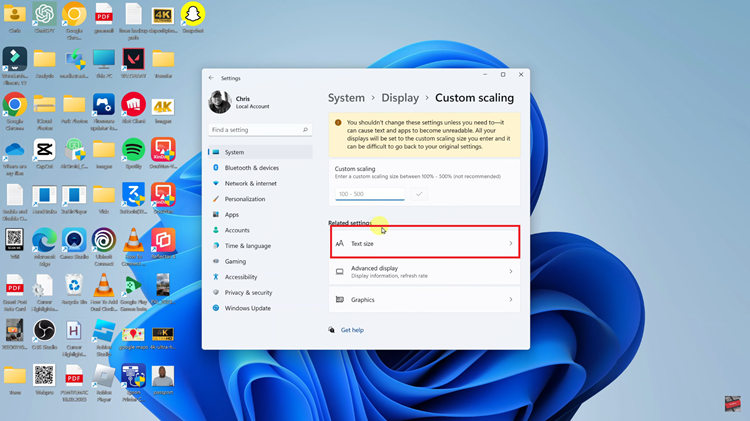
Within Settings, locate and select “System” (Windows 10) or “System > Display” (Windows 11). Under the display section, click on “Scale” then select “Text Size.”

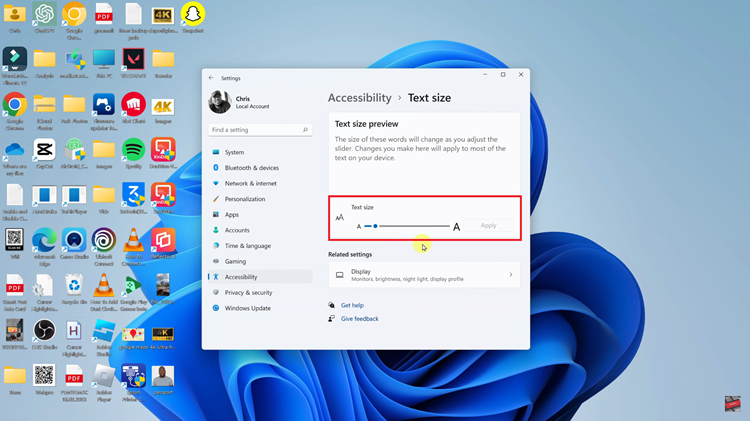
Here, you can modify the size of text, apps, and other items. Use the slider under “Text Size” to increase or decrease the font size. Move the slider to the left for smaller text and to the right for larger text. Once you’ve selected your desired size, click on “Apply” and Windows will save the changes.

In conclusion, customizing the font size in Windows 10 and 11 is a straightforward process that caters to individual preferences. Whether you require larger text for improved visibility or prefer a sleeker look with smaller fonts, these methods allow you to tailor your Windows experience accordingly.

