The iPhone 15 comes with a multitude of customization options, and one of the most frequently adjusted settings is the lock screen timeout period.
Whether you want to conserve battery life or simply keep your device secure, adjusting the auto-lock time is a straightforward process.
In this article, we’ll be giving you a step-by-step comprehensive guide on how to change the lock screen timeout period on your iPhone 15 and iPhone 15 Pro.
Also Read: How To Screenshot On iPhone 15 & iPhone 15 Pro
How To Change Lock Screen Timeout Period iPhone 15 & iPhone 15 Pro
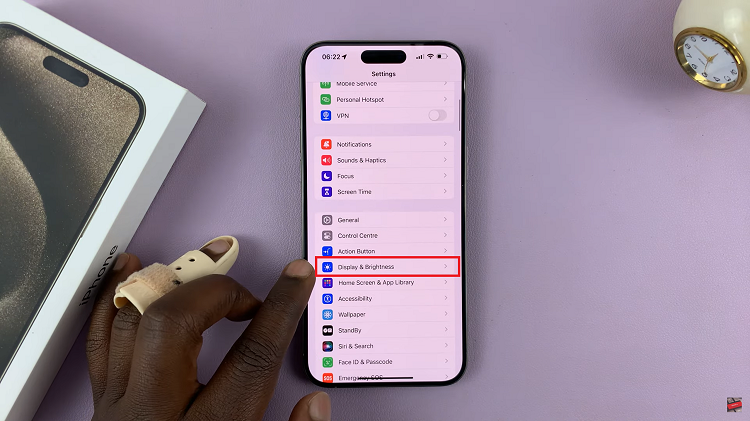
Begin by locating the “Settings” app on your home screen. It’s represented by a gearwheel icon. Inside the “Settings” app, scroll down and tap on “Display & Brightness.”

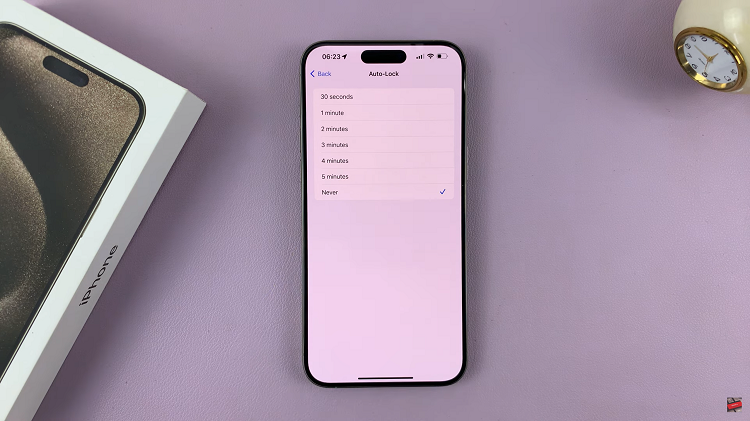
Under the “Display & Brightness” section, you will find an option called “Auto-Lock.” Tap on it to access the screen timeout settings. You will now see a list of different timeout options, ranging from 30 seconds to 5 minutes. Additionally, there is an option for “Never.” It means the screen timeout period will be turned of. Your iPhone 15 will remain active until you manually lock it.

Finally, tap on your preferred timeout period to select it. Your choice will have a blue tick, indicating that it’s now the active lock screen timeout period. Just follow the steps outlined in this article, and you’ll have your iPhone 15 set up with the lock screen timeout period that suits you best.

