In our daily lives, safeguarding our digital assets has become a top priority. The Rabbit R1, a versatile and innovative device, is no exception. With its array of features and functionalities, including the option to set passcodes, the Rabbit R1 ensures that your data remains secure and accessible only to authorized users.
However, as circumstances evolve and security standards evolve, there may come a time when you need to change the passcode on your Rabbit R1. Whether it’s for enhanced security or simply to update your settings, understanding how to navigate through the process is essential.
In this guide, we’ll walk you through the comprehensive step-by-step process on how to change the passcode on the Rabbit R1.
Also Read: How To Adjust Screen Brightness On Rabbit R1
How To Change Passcode On Rabbit R1
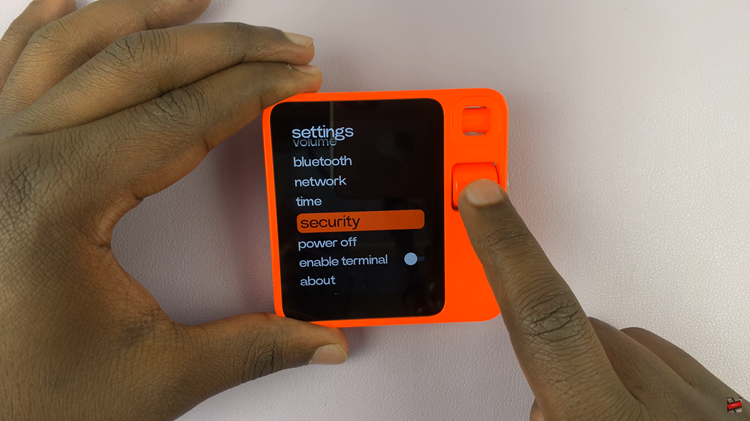
To begin, gently shaking the Rabbit R1. The motion sensor inside the Rabbit R1 will detect the movement and activate the Settings menu. Once the Settings menu is activated, scroll through the options. Look for the “Security” tab and select it.

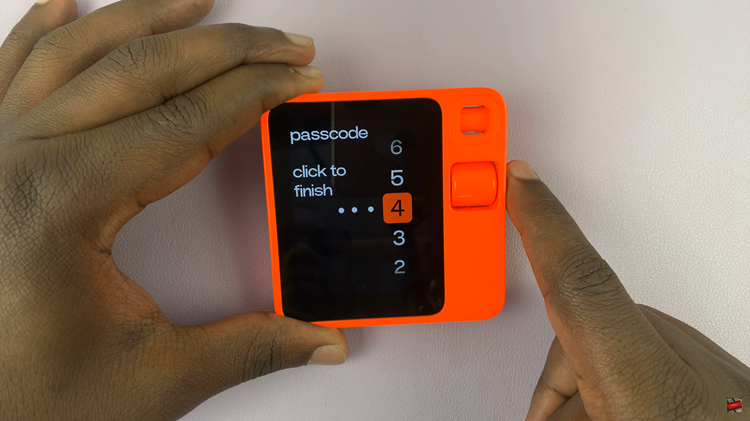
Within the Security submenu, locate the option labeled “Change Passcode” and select it. You will be prompted to enter your current passcode to confirm your identity. After successfully confirming your identity, you will be prompted to enter a new passcode. Use the scrolling wheel to navigate through the numbers and select the digits that will compose your new passcode.

In conclusion, changing the passcode on your Rabbit R1 is a straightforward process. By following the steps outlined in this guide, you can ensure that your device remains secure and protected against unauthorized access.

