In the age of stunning smartphone cameras capable of capturing high-resolution images, managing photo file sizes becomes essential. Google Pixel smartphones, celebrated for their exceptional camera capabilities, offer users a remarkable array of photography options.
However, the high-resolution images they produce might sometimes consume significant storage space on your device or pose challenges when sharing or uploading. In such cases, adjusting the photo resolution becomes crucial.
Whether you aim to conserve storage space, adapt to specific requirements, or simply want to manage your photo sizes effectively, knowing how to change photo resolution on your Google Pixel device can be immensely beneficial. Follow these steps to change the photo resolution on your Google Pixel device.
Watch: How To Install APK Files On Android
To Change Photo Resolution On Android (Google Pixel)
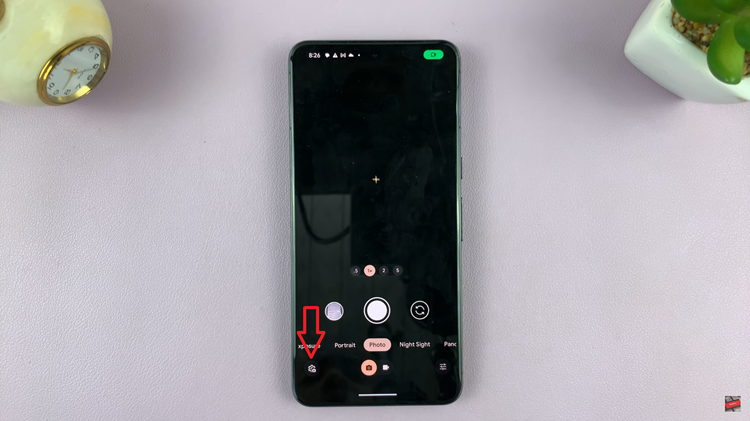
Firstly, Launch the Camera app on your Google Pixel device. You can find it in your app drawer or by tapping the camera icon on your home screen. Then, look for the settings icon, usually represented by a gear, and tap on it.

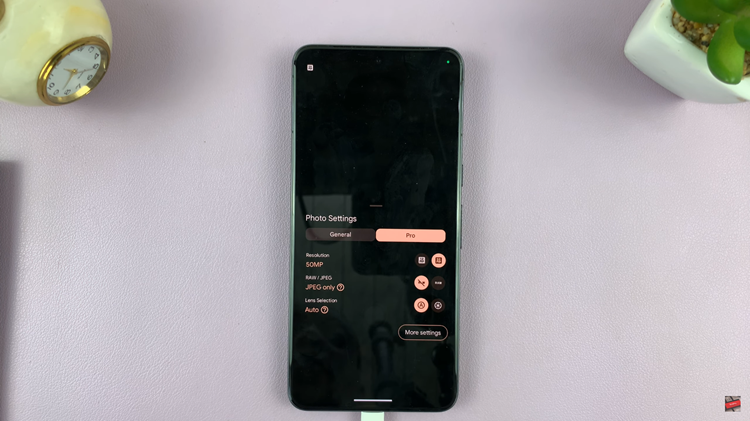
Within the camera settings, you’ll see two sections; ‘General’ & ‘Pro.’ At this point, tap on “Pro” and you’ll see the resolution option. Following that, choose your desired resolution, then exit the camera settings to save the changes.

By following these steps, you can easily adjust the photo resolution on your Google Pixel device. Remember, adjusting resolution can impact image quality, so find a balance between reducing file size and maintaining acceptable image clarity based on your needs.

