Android devices are a powerful tool for capturing life’s moments. However, to truly harness its photographic potential, it’s essential to understand and manipulate key settings, such as photo resolution.
Whether you’re aiming for crystal-clear details or seeking to conserve storage space, knowing how to change the photo resolution on your Samsung Galaxy is a skill every smartphone photographer should possess.
In this guide, we’ll walk you through the comprehensive step-by-step process on how to change the photo resolution on your Android phone (Samsung Galaxy).
Also Read: How To Reset App Preferences On Android (Samsung Galaxy)
How To Change Photo Resolution On Android (Samsung Galaxy)
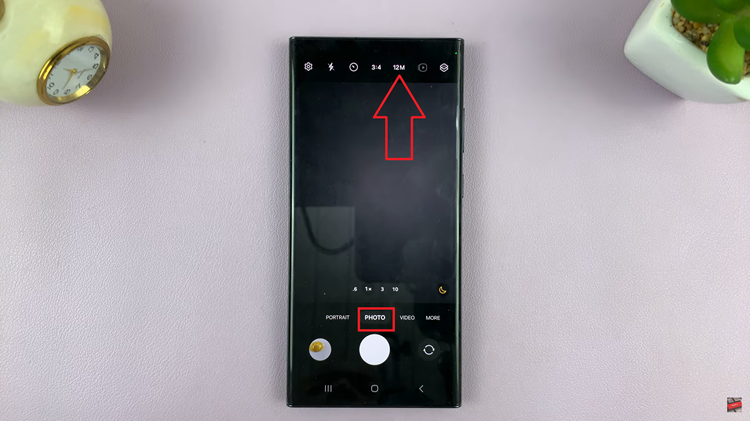
Begin by launching the Camera app. Ensure that you are in Photo mode, as the resolution settings may vary between different modes. Look for the resolution indicator at the top of the screen, usually displayed as 12M or something similar. This represents the current photo resolution setting. Tap on it.

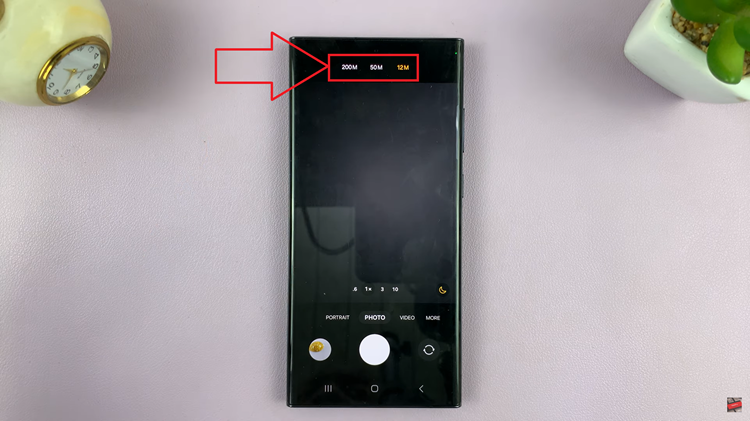
Once you’ve tapped on the resolution indicator, a menu with various resolution options will appear. Select the photo resolution you would like to use for your future pictures. Higher resolutions generally result in more detailed photos but may occupy more storage space.

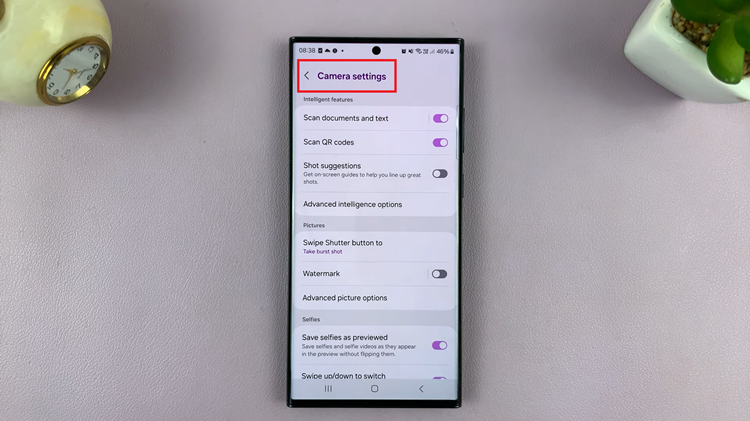
In some Samsung Galaxy models, the resolution setting may not be directly accessible from the main screen. If this is the case, navigate to the camera settings. You can usually find the settings icon represented by a gear or three dots. Look for the resolution option within the settings menu and choose the desired photo resolution.

Customizing your photo resolution on a Samsung Galaxy device is a simple yet effective way to enhance your photography experience. Whether you prioritize storage efficiency or crave the utmost detail in your photos, the ability to adjust resolution puts you in control.

