Changing the region or country setting on your iPad can open up a world of new possibilities, allowing you to access apps, content, and services tailored to a different geographic location. Whether you’ve relocated to a new country or simply want to explore region-specific features, adjusting your iPad’s region settings is straightforward but requires careful attention to ensure a smooth transition.
In this detailed guide, we will walk you through the step-by-step process of changing the region on your iPad using the settings menu. By following these instructions, you’ll be able to seamlessly switch to a new region while understanding the implications for your apps, media, and subscriptions.
Let’s dive into the process to empower you to make the most of your iPad’s capabilities in any location.
Watch: How To Enable Voice Typing On iPad
Change Region On iPad
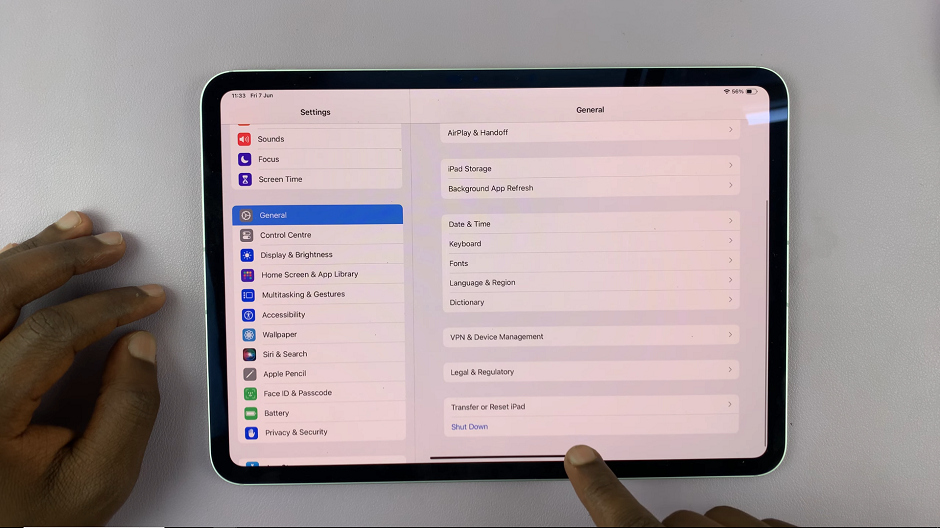
Begin by locating the Settings icon on the home screen or in the app library of your iPad. Once found, tap on it to open the settings menu. In the settings menu, scroll down until you see the General option and tap on it.
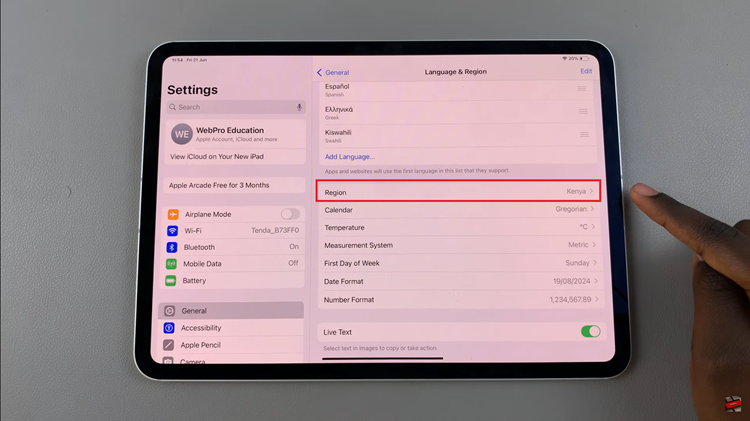
Within the General settings, continue scrolling down until you find the Language & Region option. Selecting this option will allow you to access the settings related to the region and language preferences of your iPad. At this point, locate the Region option within the Language & Region settings and select it.

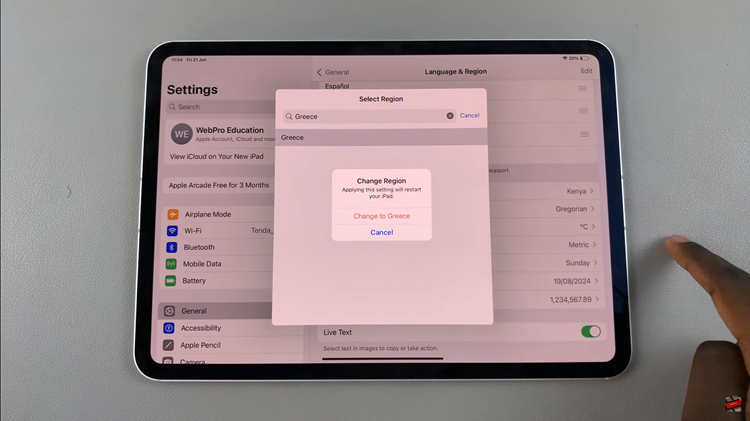
A comprehensive list of different regions will appear on your iPad screen. Scroll through this list to find the region you would like to switch to. Once you have identified the desired region, tap on it. After selecting the region, you will see an option to Change to [selected region]. Tap on this option to apply the changes.

Once the change is made, simply exit the settings page. Your iPad will automatically apply the new region settings, allowing you to access content and services specific to your newly selected region.

