GoPro cameras are renowned for their versatility and ability to capture stunning footage in various environments. To make the most of your GoPro HERO 12, it’s crucial to understand how to adjust settings like resolution and frames per second (FPS).
Whether you’re filming high-action sports or scenic landscapes, customizing these settings allows you to tailor your recording to specific preferences.
This guide will walk you through the steps to change the resolution and frame rate on your GoPro HERO 12.
Watch: How To Uninstall WinZip On Windows 11
To Change Resolution & Frame Rate On GoPro HERO 12
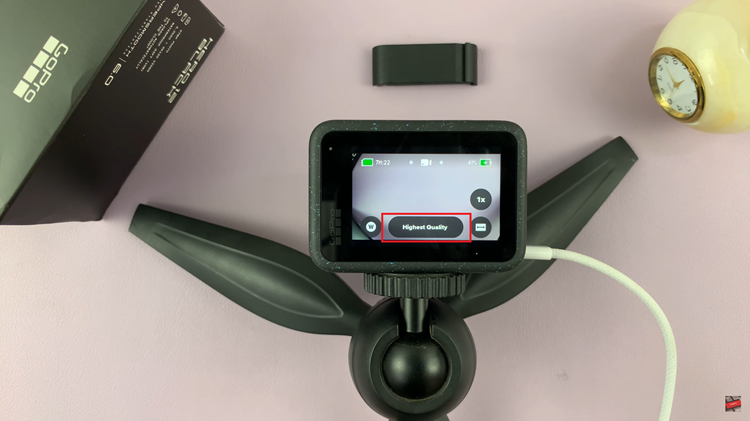
First, ensure your GoPro is powered on and ready for use. Next, on the home page, look for an option related to video settings or capture settings usually at the bottom of the screen. This is where you’ll find the resolution options. Tap on it.

Now, use the slider to adjust the resolution on your GoPro Hero 12. Alternatively, slide down from the top of the screen to access the control center. At this point, swipe to the left and find the “Controls” option. Tap on it and set it to “Pro.”
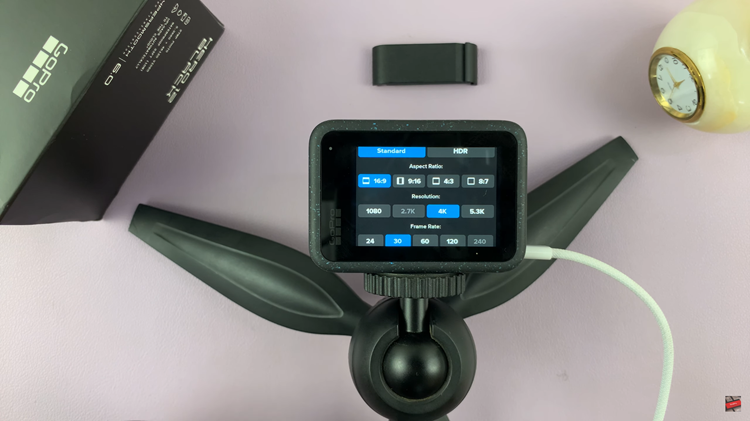
Thereafter, select the option related to video quality on your home page. Following this, you’ll see all the video settings including the resolution and frame rate. Choose your desired settings and exit the settings. Your changes will be saved.

In conclusion, customizing your GoPro’s resolution and FPS settings is key to capturing the perfect shot. Whether you’re shooting in 4K for crystal-clear detail or adjusting the frame rate for smooth slow-motion, these settings give you creative control over your footage.

